DisplaySwitcher

Switch your monitor’s video input and seamlessly transfer text and files! A Linux/macOS/Windows Desktop Application.
Installation Instructions
Download Installer
The installers automatically update themselves, so these are always the most current versions. The DisplaySwitcher application also automatically updates itself, so it too will always be at the most current version.
Linux
Mac (Apple Silicon only)
Windows
Linux
Requirements
While only officially tested on Ubuntu Linux, DisplaySwitcher should work on virtually any 64-bit Linux distribution from the past 5+ years that uses the x86_64 ("amd64") architecture, including:
- Ubuntu 18.04 and newer
- Debian 10 and newer
- Linux Mint
- Pop!_OS
- Fedora
- Arch Linux
- Manjaro
- Zorin OS
- Elementary OS
- openSUSE
- ...and others
Monitor with DDC/CI support [What is DDC/CI?]
- External monitors must support DDC/CI over the active connection (DisplayPort, HDMI, etc.)
- Most modern monitors support DDC/CI, but some may require it to be enabled in monitor settings
- USB-to-HDMI adapters or docking stations often block DDC/CI (YMMV).
User must have permission to access I²C devices DDC/CI communication is done via /dev/i2c-*. On many distros, this requires:
- Running as root or adding the user to the i2c group, then log off and back on. sudo adduser $USER i2c To make this permission permanent and avoid needing sudo after each reboot, add a udev rule and restart your system. Save this file as /etc/udev/rules.d/90-ddc-i2c.rules.
- X11 or Wayland Under Wayland, some display servers may block low-level hardware access. If DDC/CI doesn't work, try switching to an X11 session.
Uninstall
The installer automatically replaces previous installations, so you don't ever need to uninstall, unless you want to stop using DisplaySwitcher.
Read instructions below, or watch this demo video.
Open a terminal.
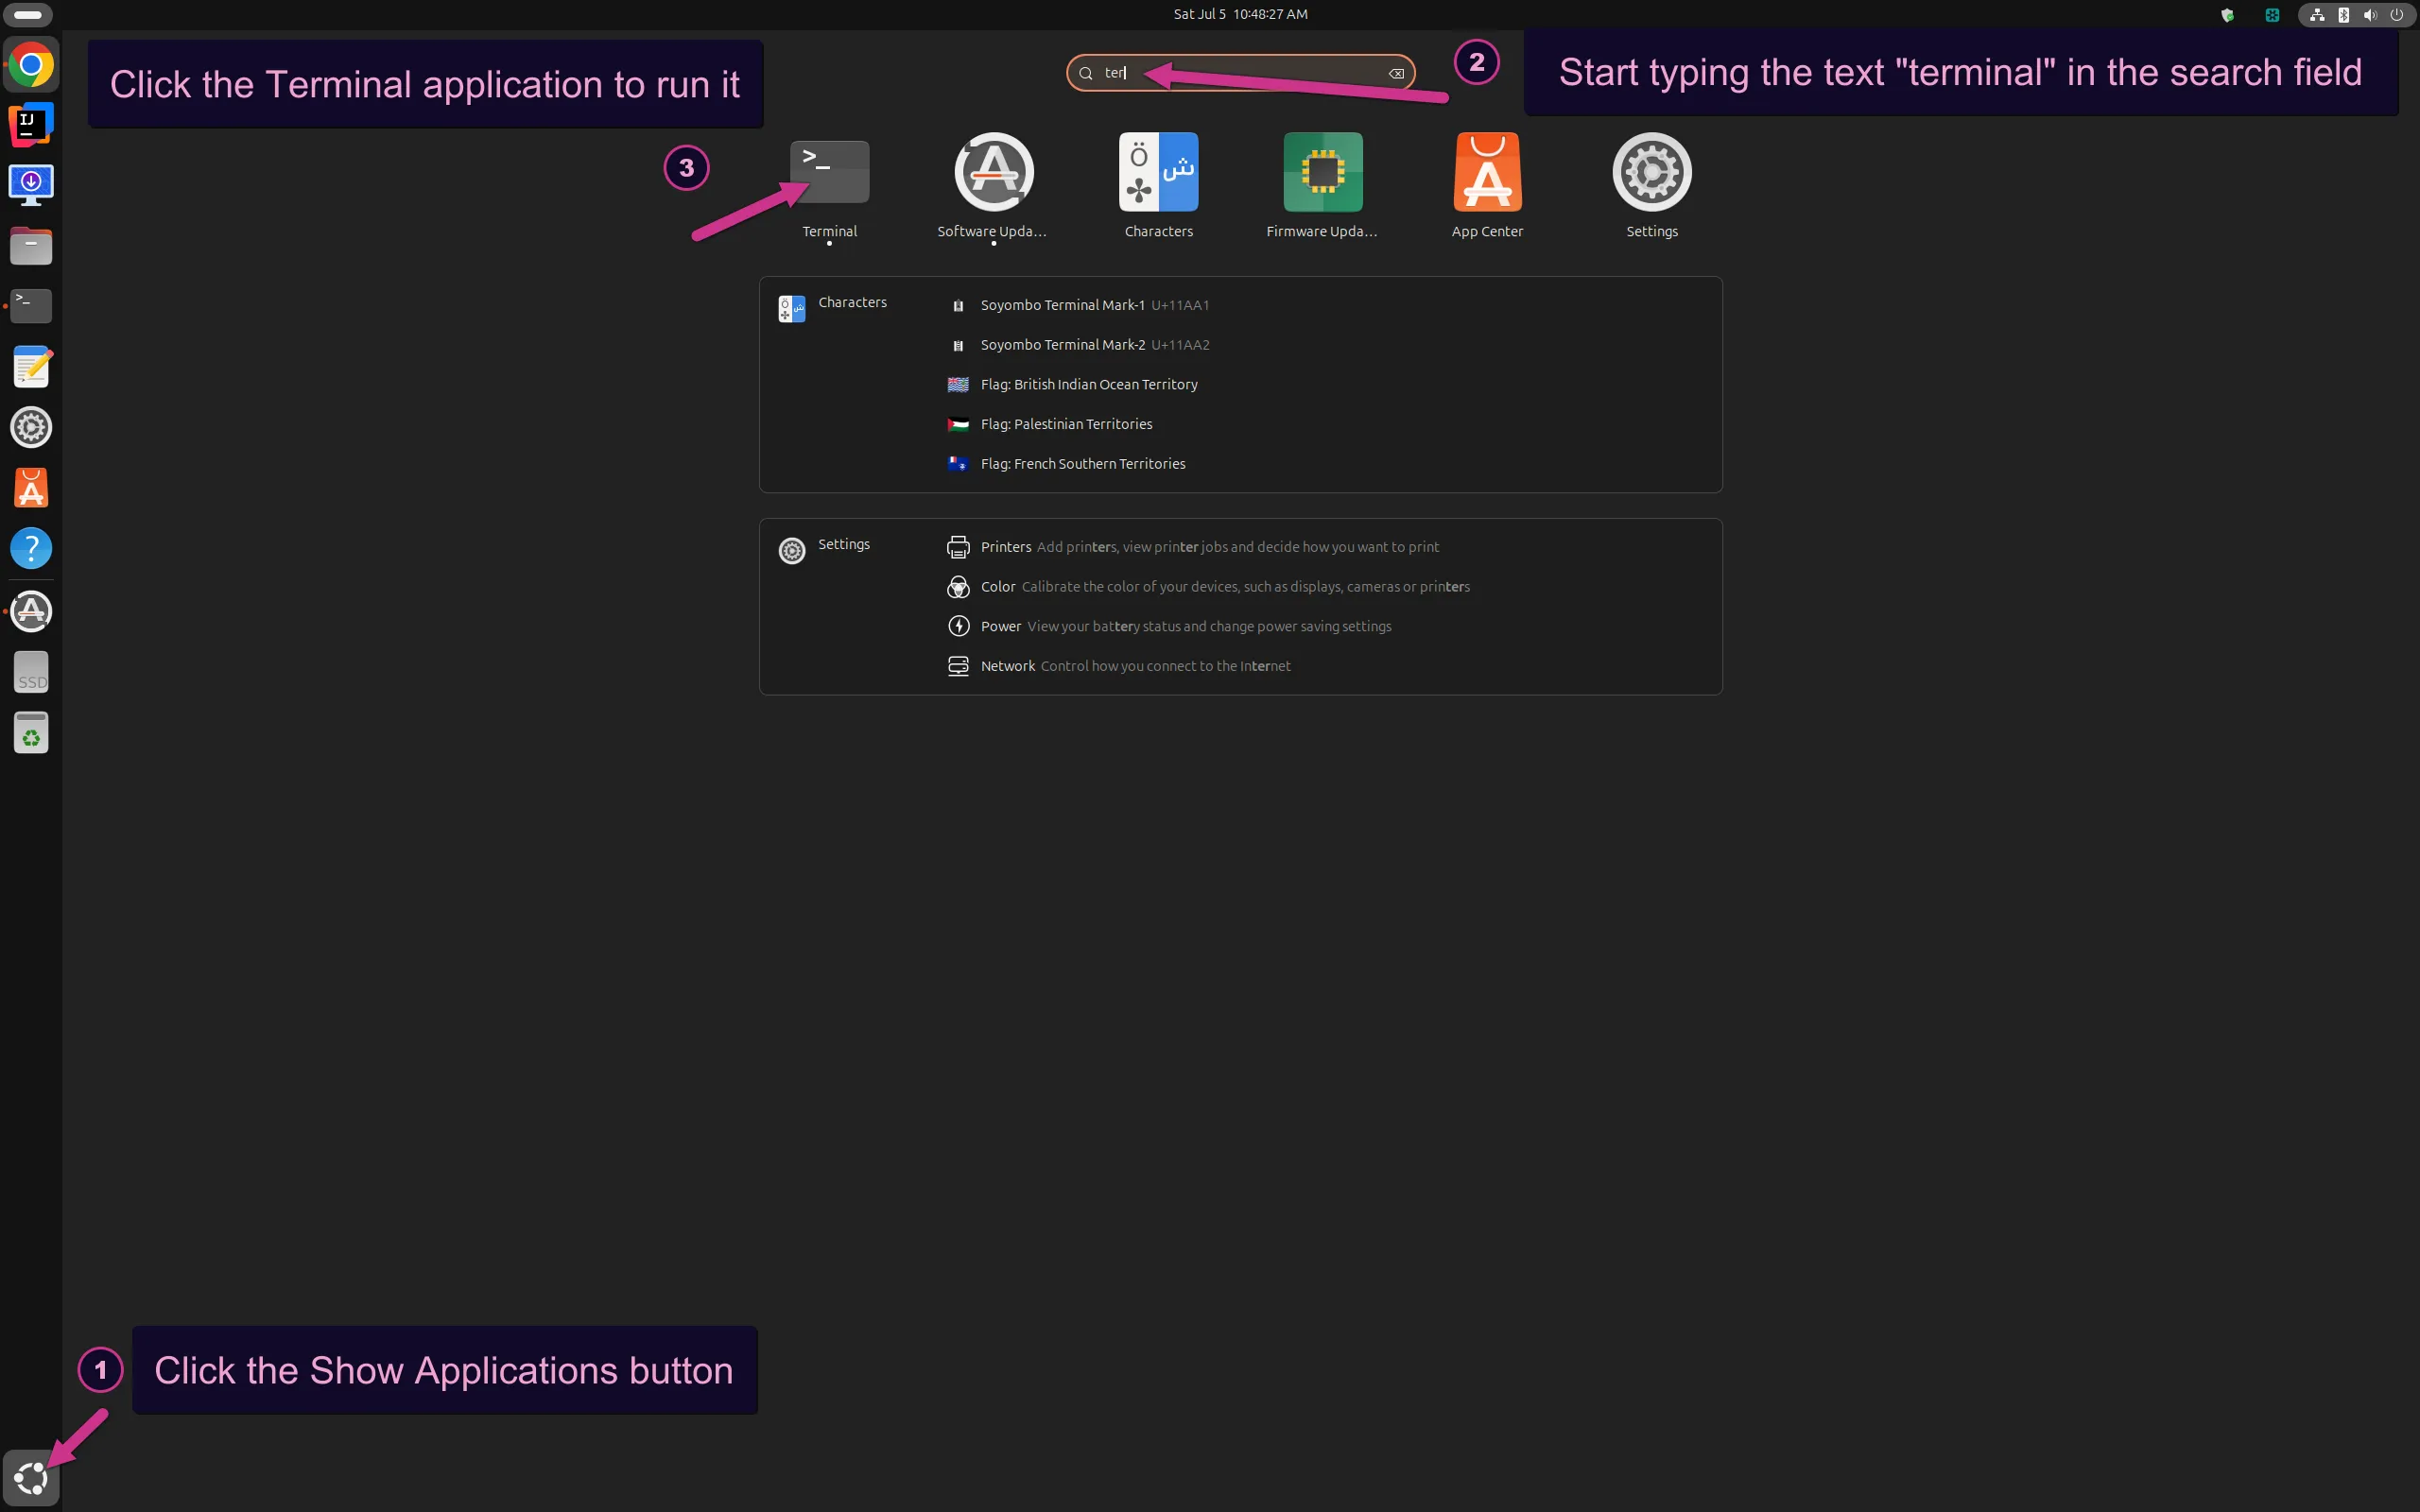
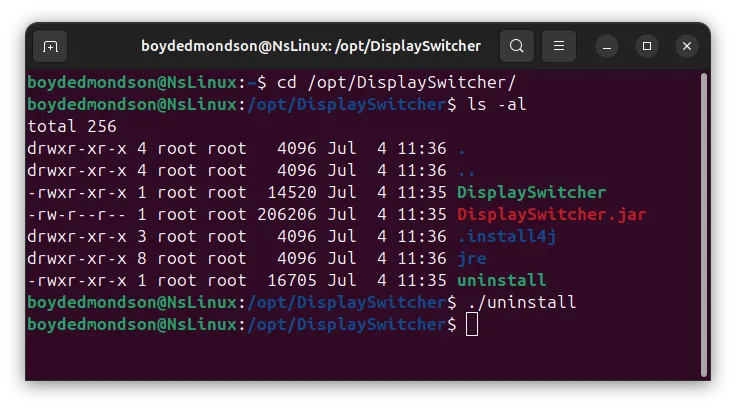
Go to the installation location.
Optionally list the files in the directory.
Run the uninstaller.
It will ask for your root (sudo) password.
Install
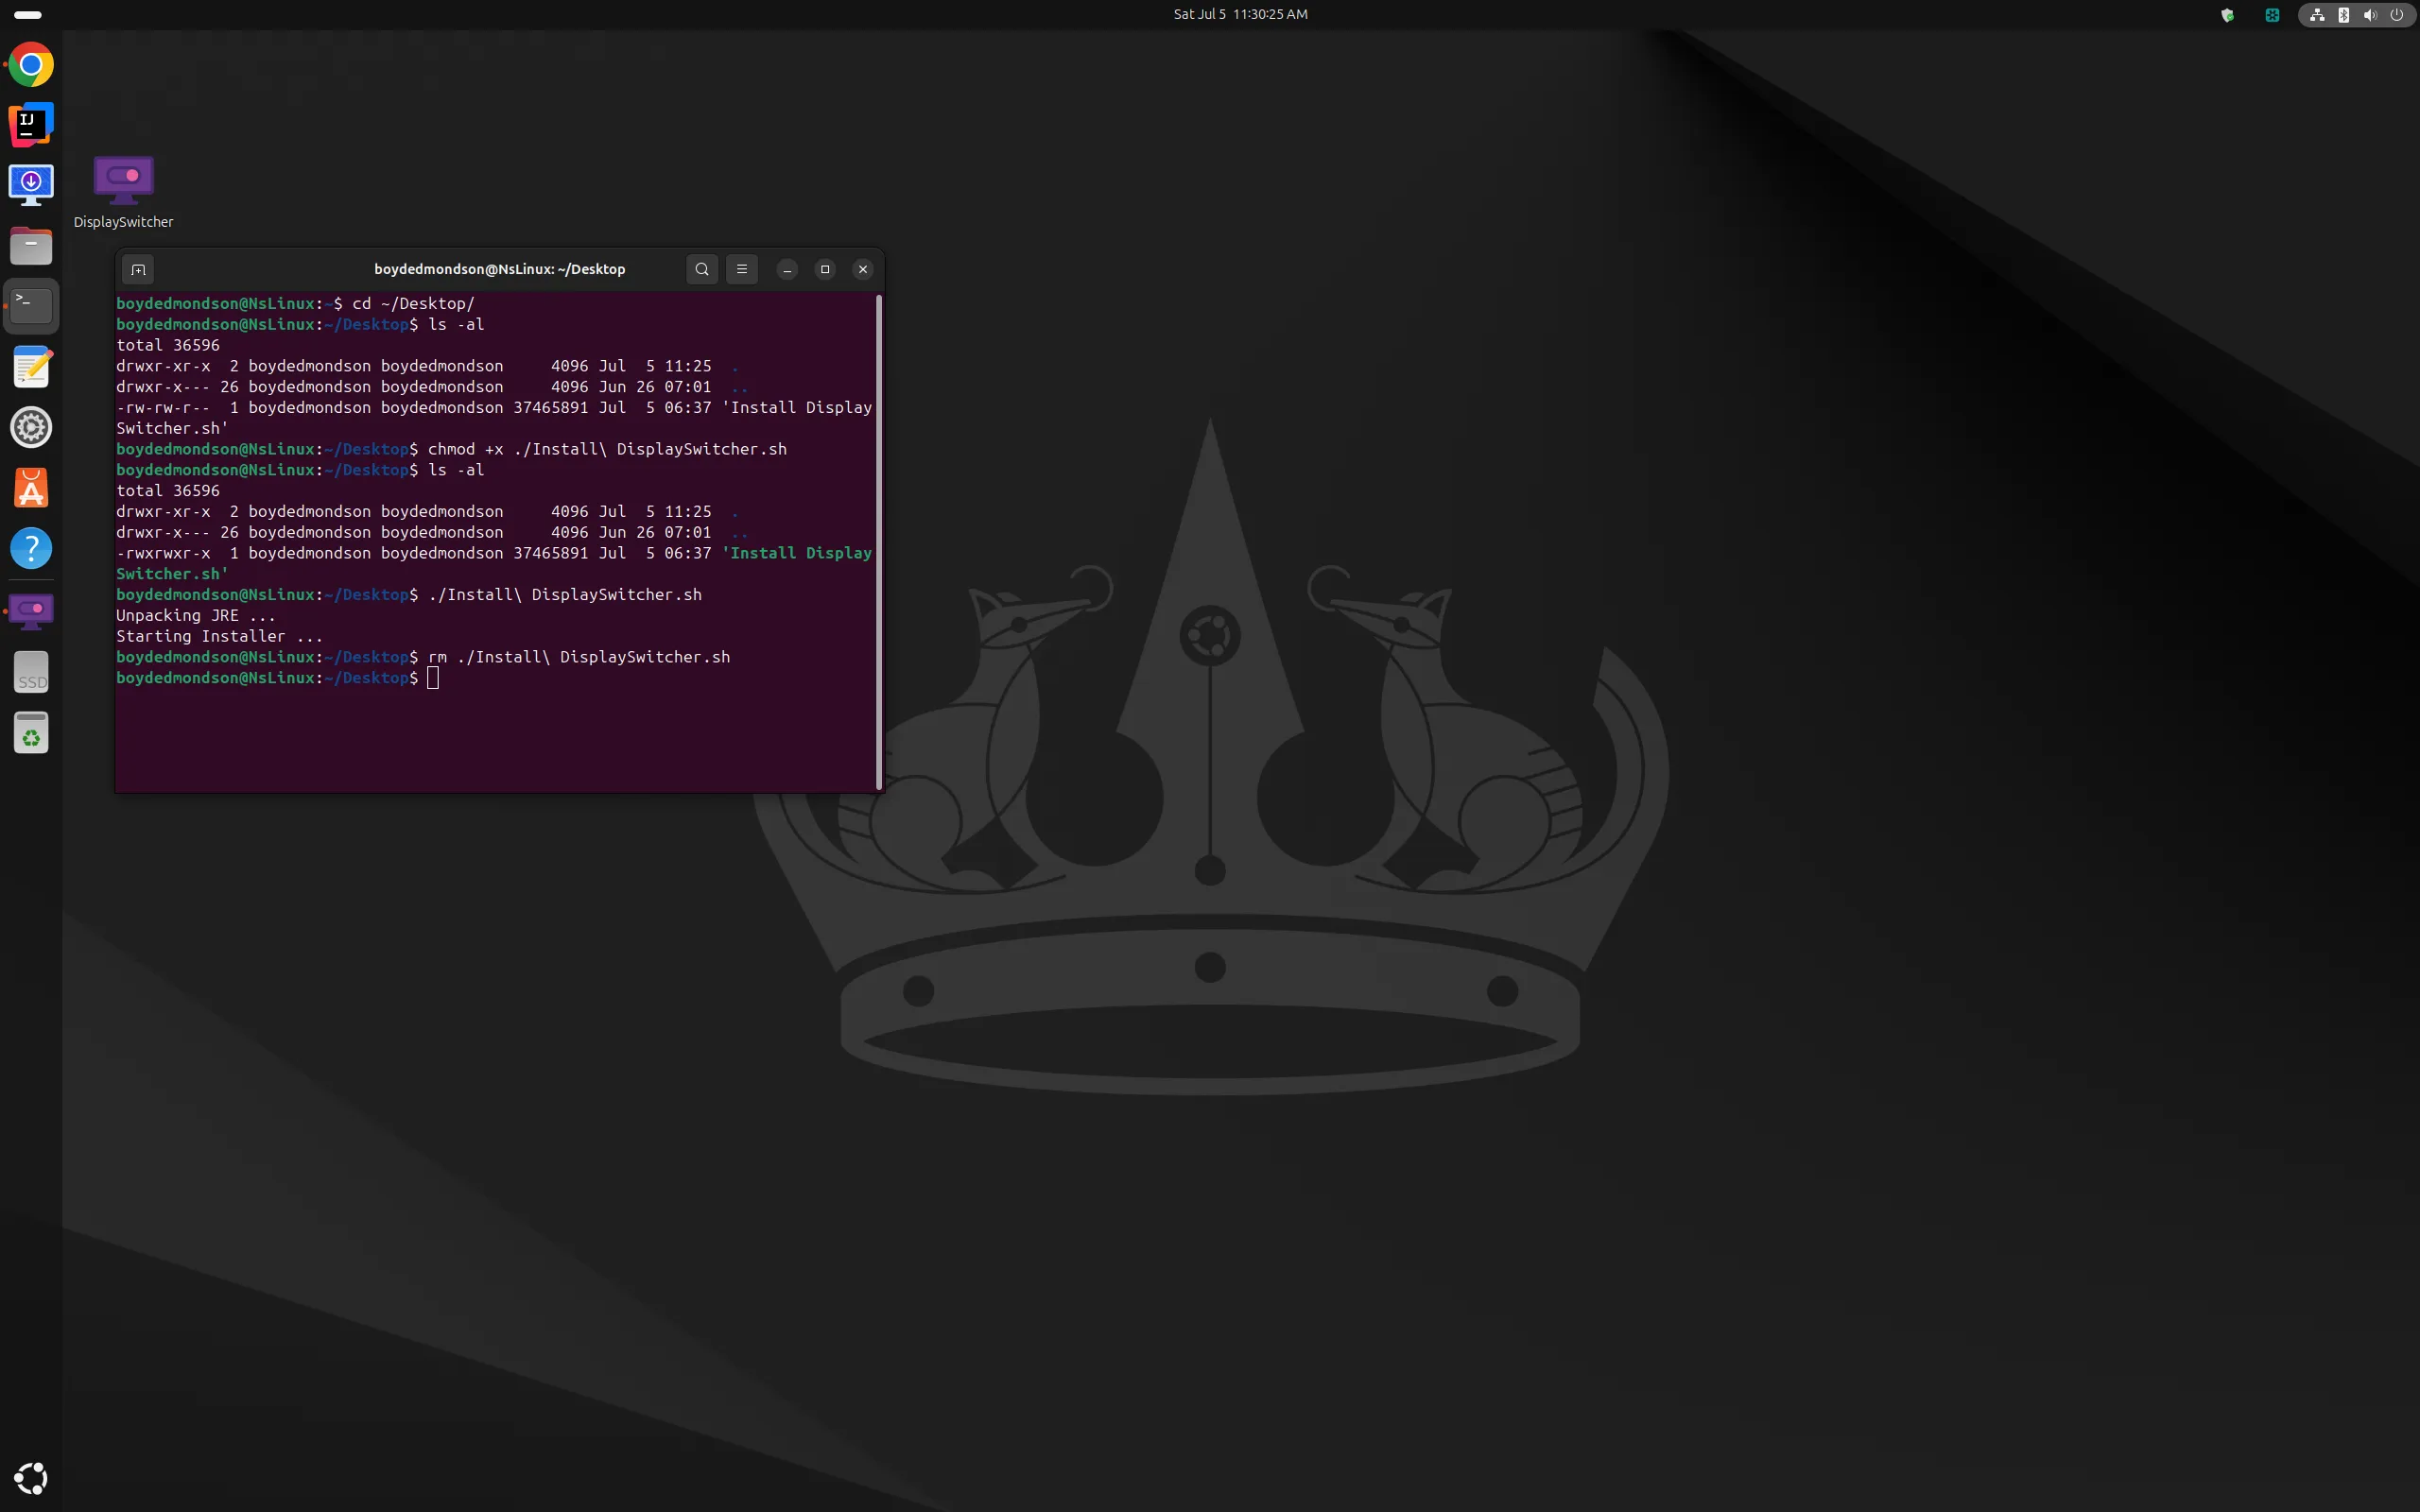
The installer, Install_DisplaySwitcher.sh, is a self-extracting script file. It must have its executable bit set to be able to run it. It must be run as the root user. Here is how to launch the installer.
Read instructions below, or watch this demo video.
Open a Terminal.
Go to the location where you downloaded Install_DisplaySwitcher.sh.
Optionally list the files in the directory.
4. Set the executable bit on Install_DisplaySwitcher.sh. Note that the filename is case sensitive. Terminal allows you to press the TAB key to complete the typing of a filename for you. For example, type chmod +x ./I and then press TAB and your terminal prompt text will change to chmod +x ./Install_DisplaySwitcher.sh.
Optionally list the files in the directory.
Run the installer. Again, type ./I and then TAB to finish the typing for you.
It will ask for your root (sudo) password.
After the installer user interface closes, and the terminal prompt is ready again, delete the installer because it is no longer needed.
How to Pin to Dash
Linux has an Application Icon area called "Dash". You may pin DisplaySwitcher to Dash to make it easier to launch DisplaySwitcher.
Read instructions below, or watch this demo video.
Run DisplaySwitcher.
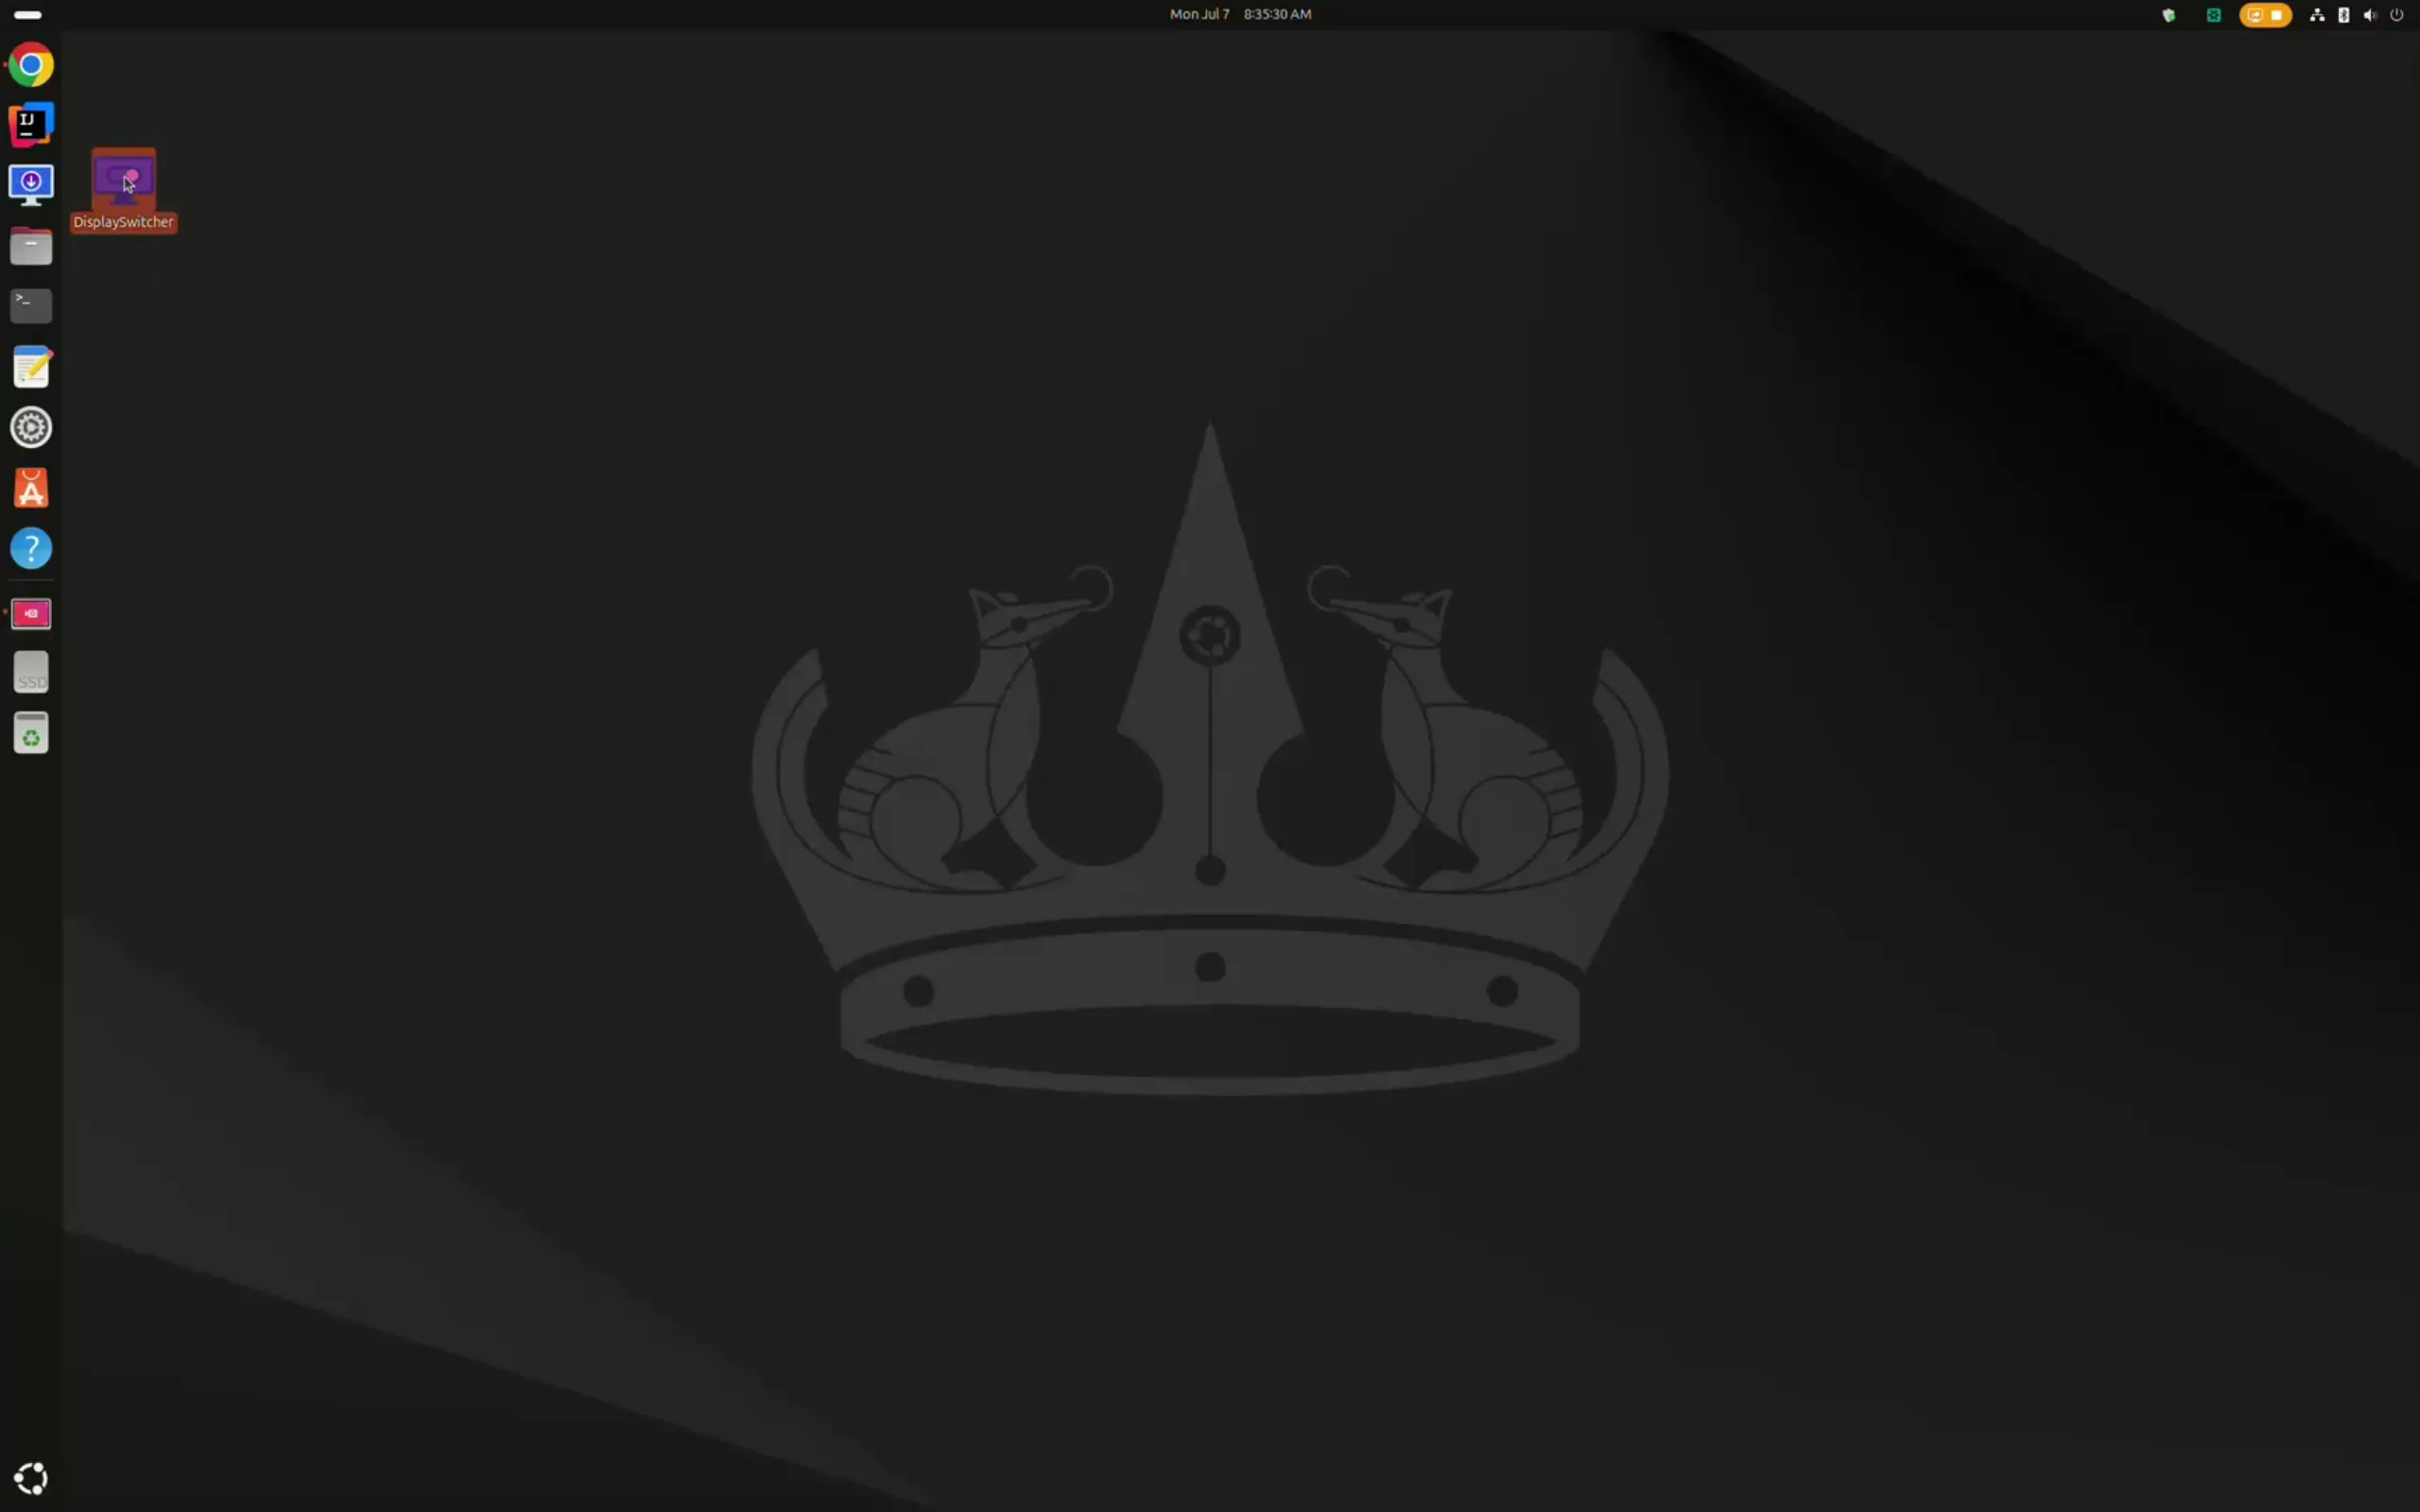
Right click DisplaySwitcher application icon on the Linux Dash and choose Pin to Dash from the menu.
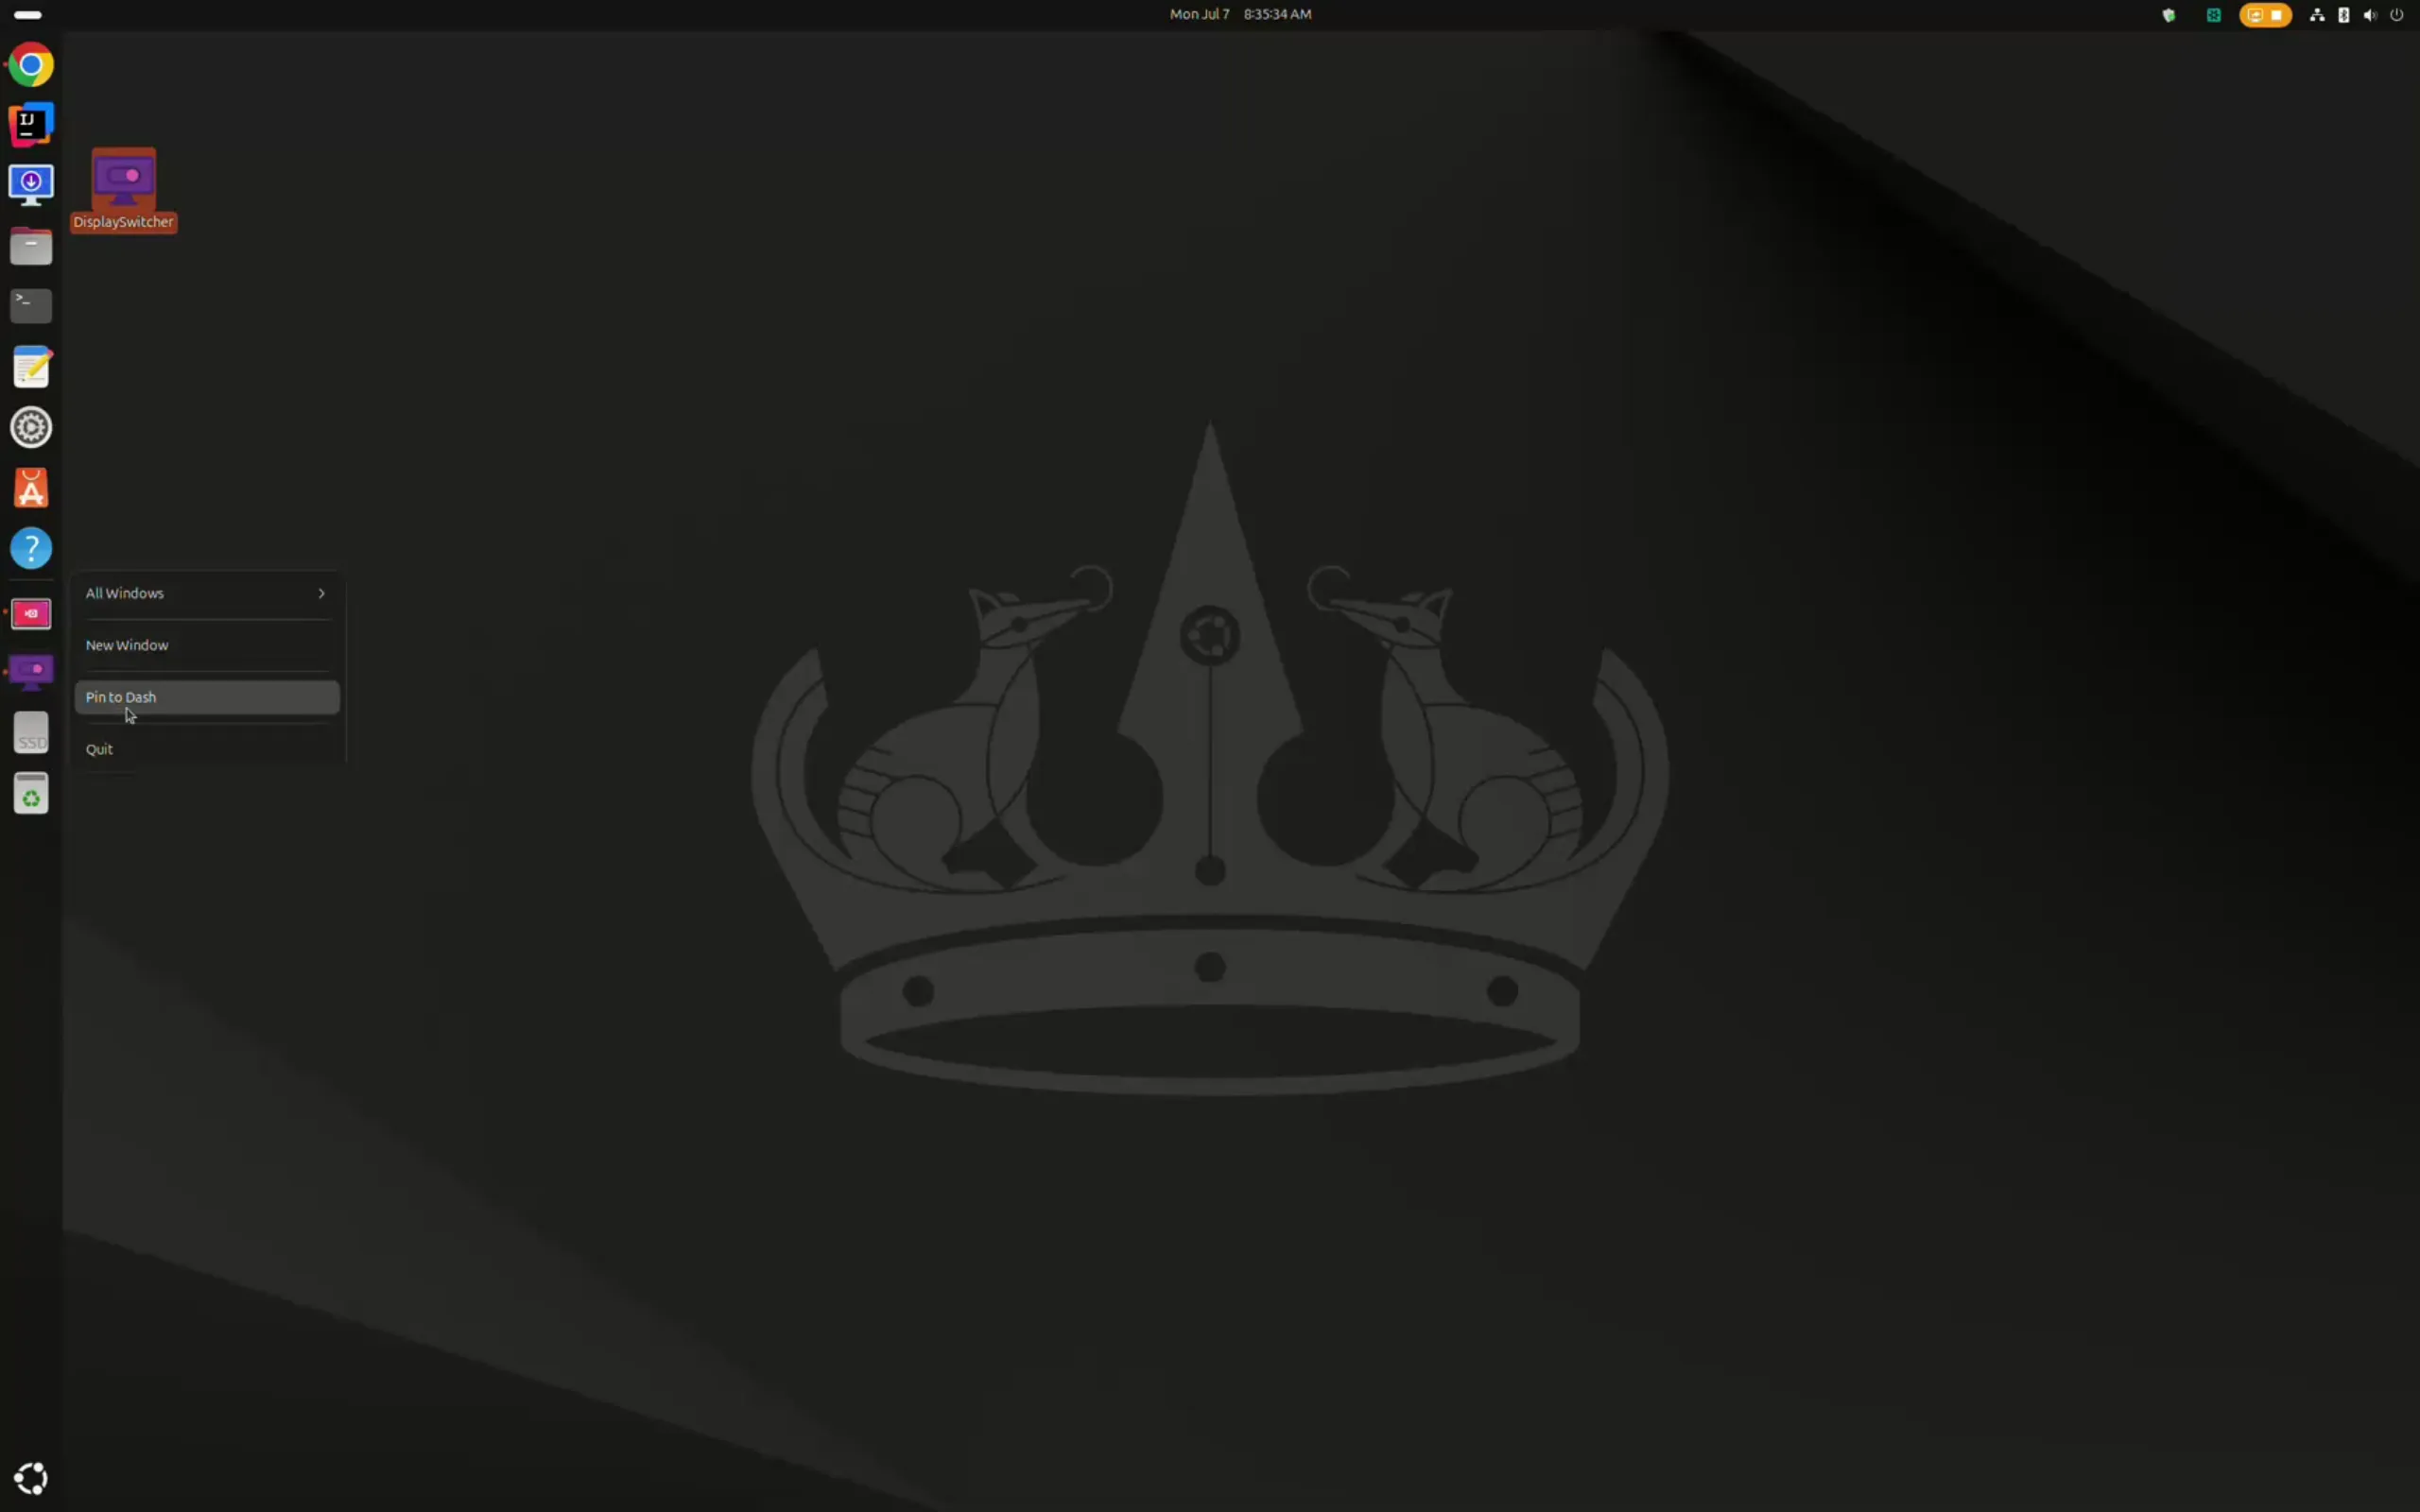
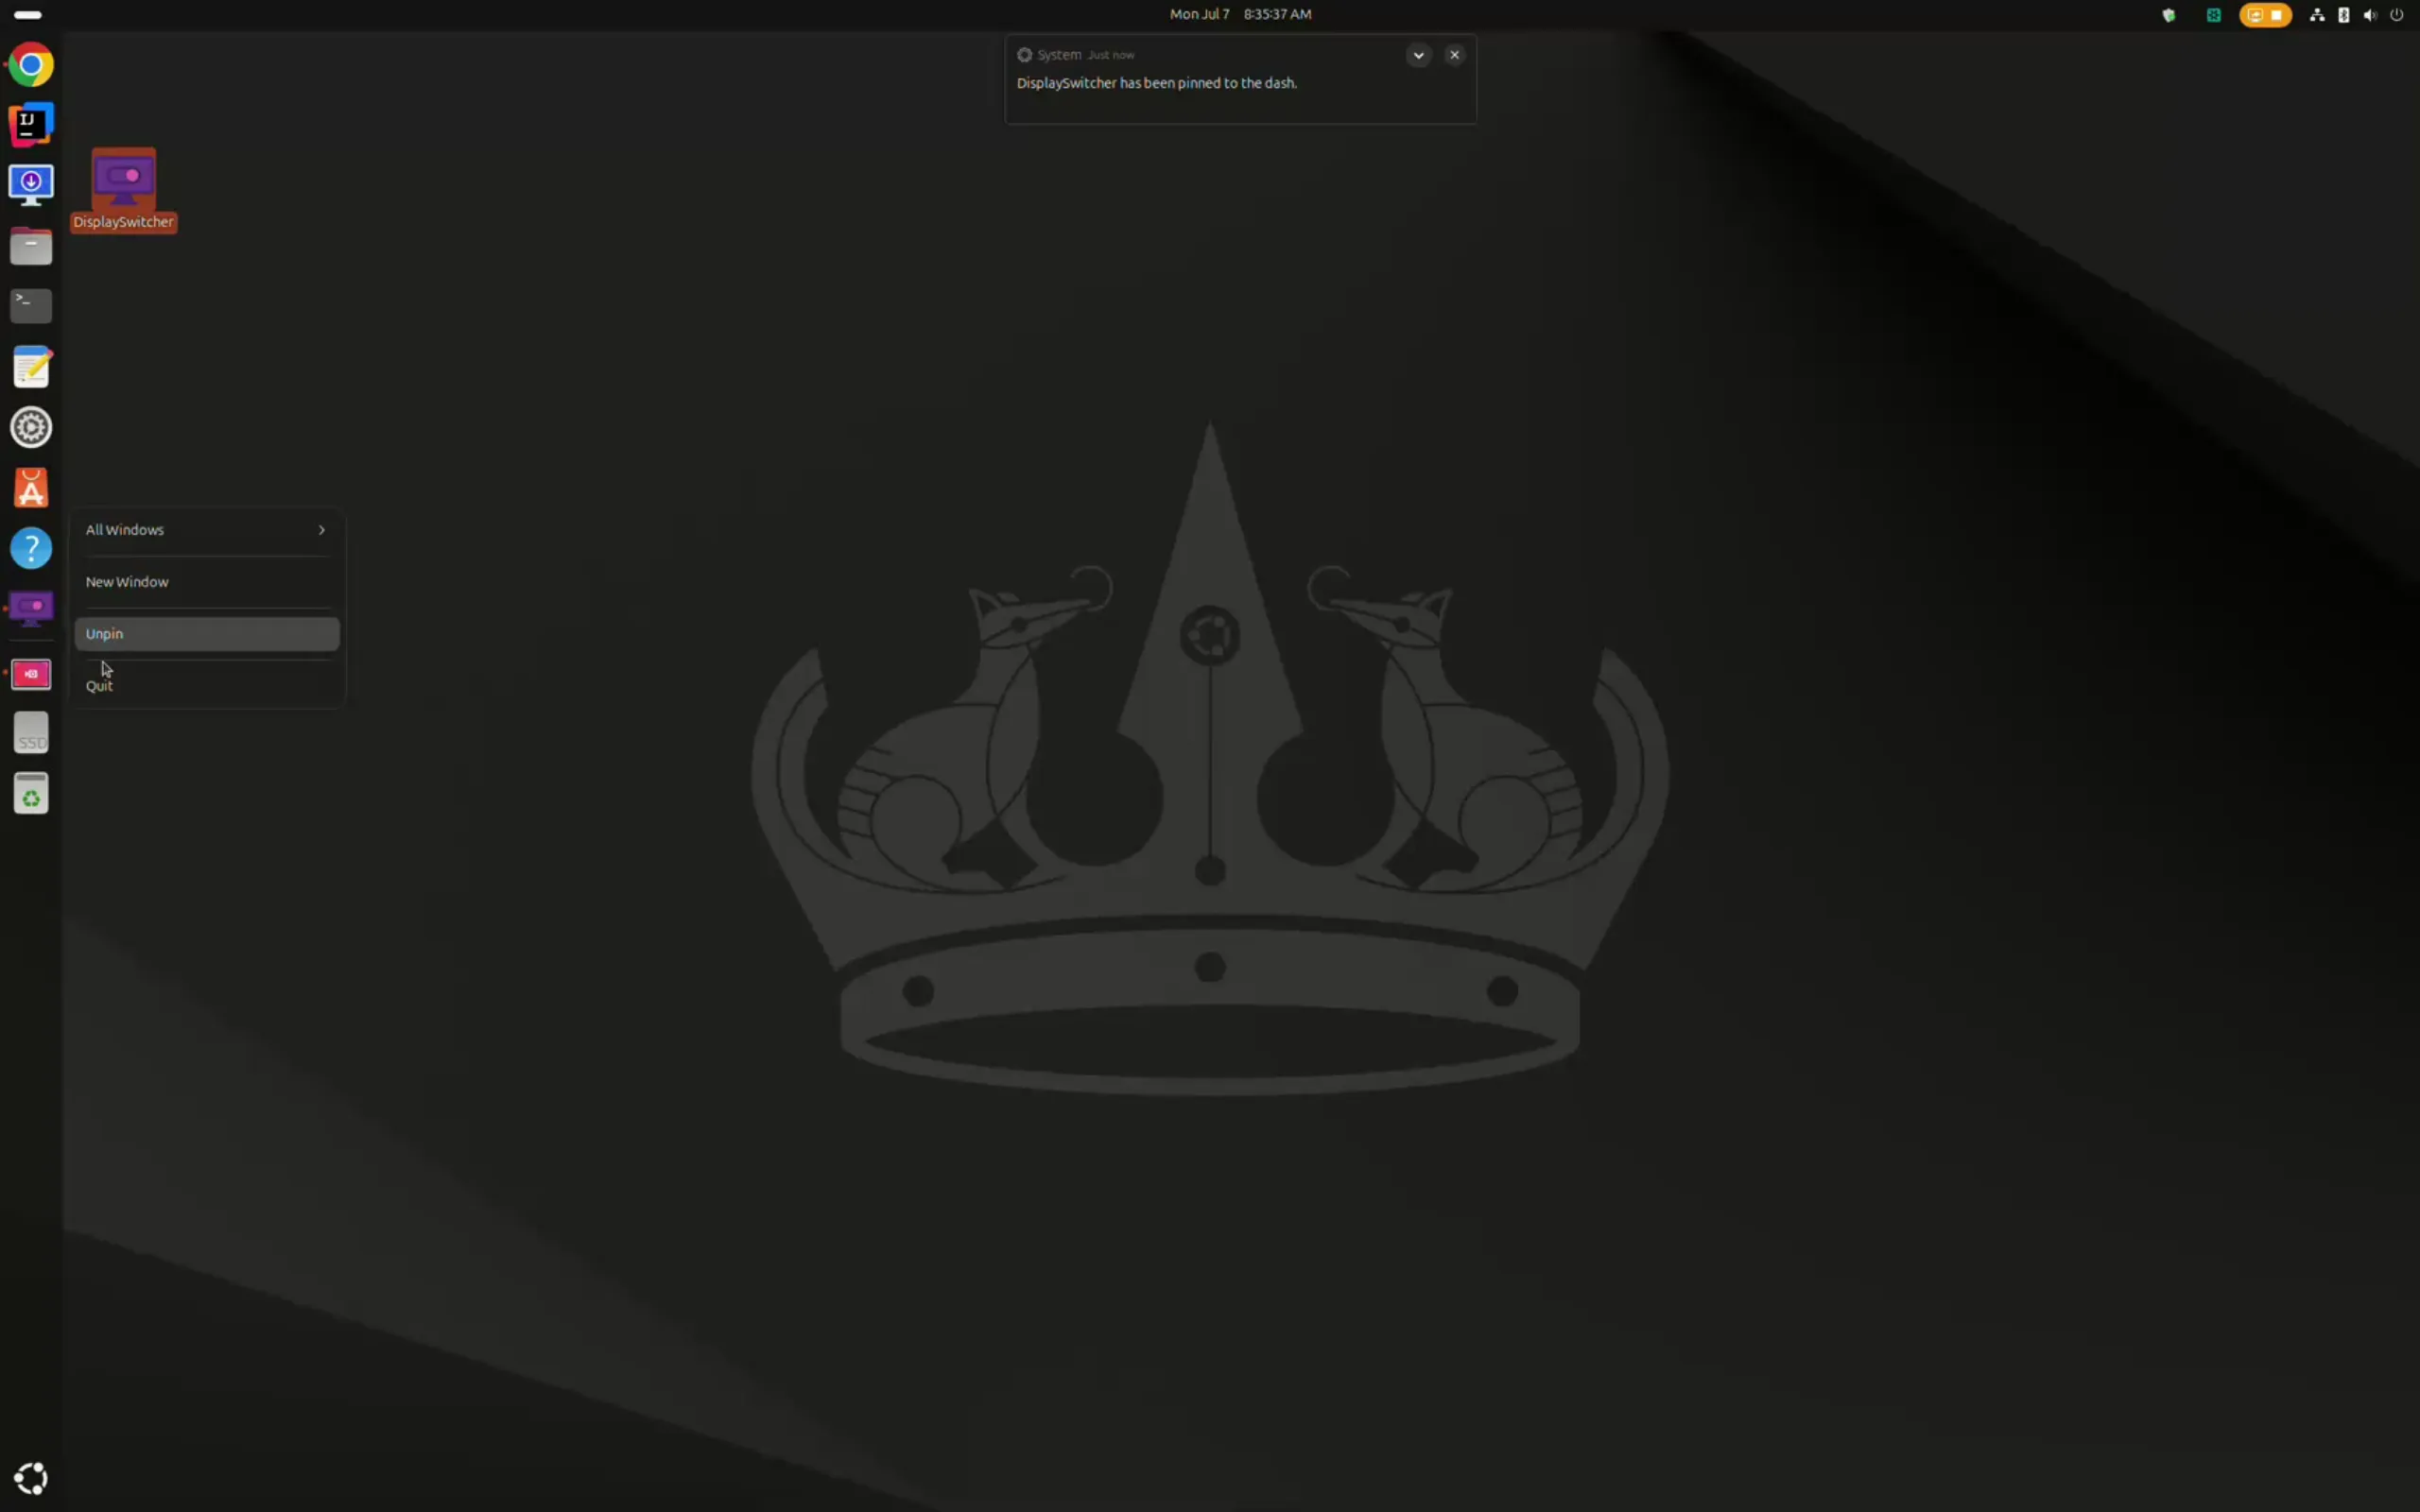
If you want to remove DisplaySwitcher from the Dash, right click and choose Unpin from the menu.
Enable/Disable Run at Logon
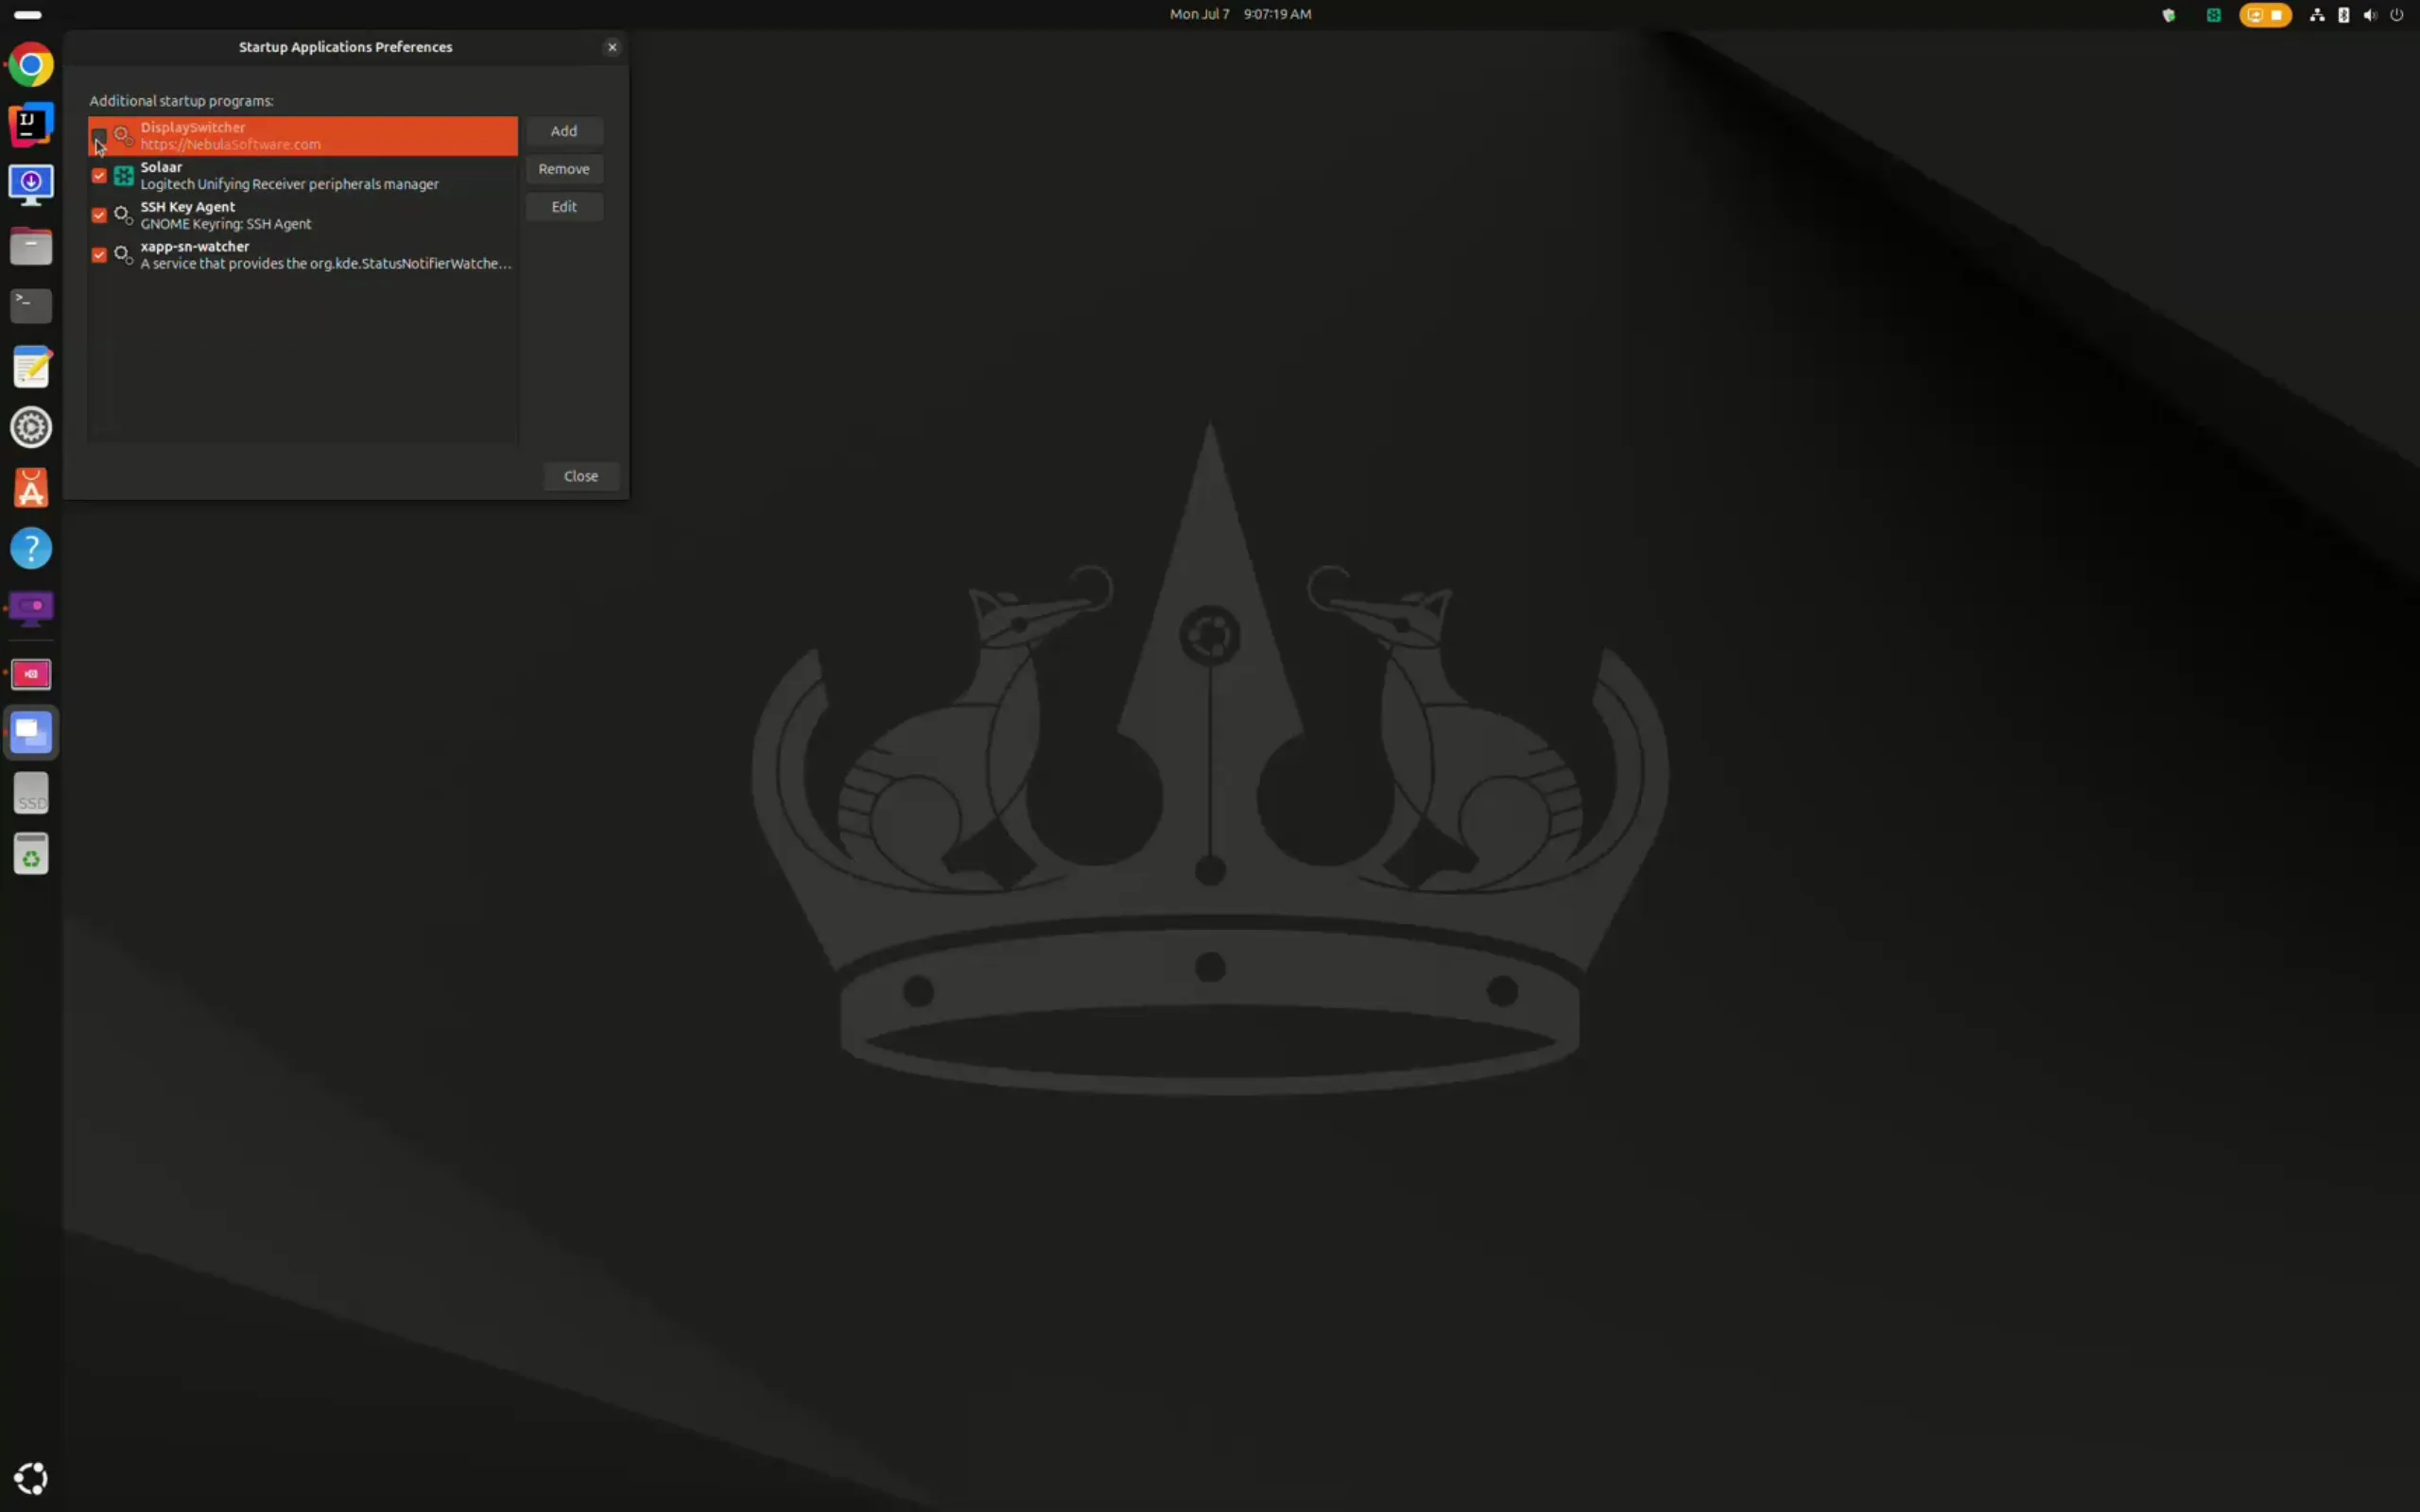
After running the installer, DisplaySwitcher is automatically set to run when you logon to Linux. You may disable that in Linux Startup Applications.
Note that if you uninstall and reinstall, the last state you made to Run at Logon , Desktop Icon, and Show Apps are preserved.
Read instructions below, or watch this demo video.
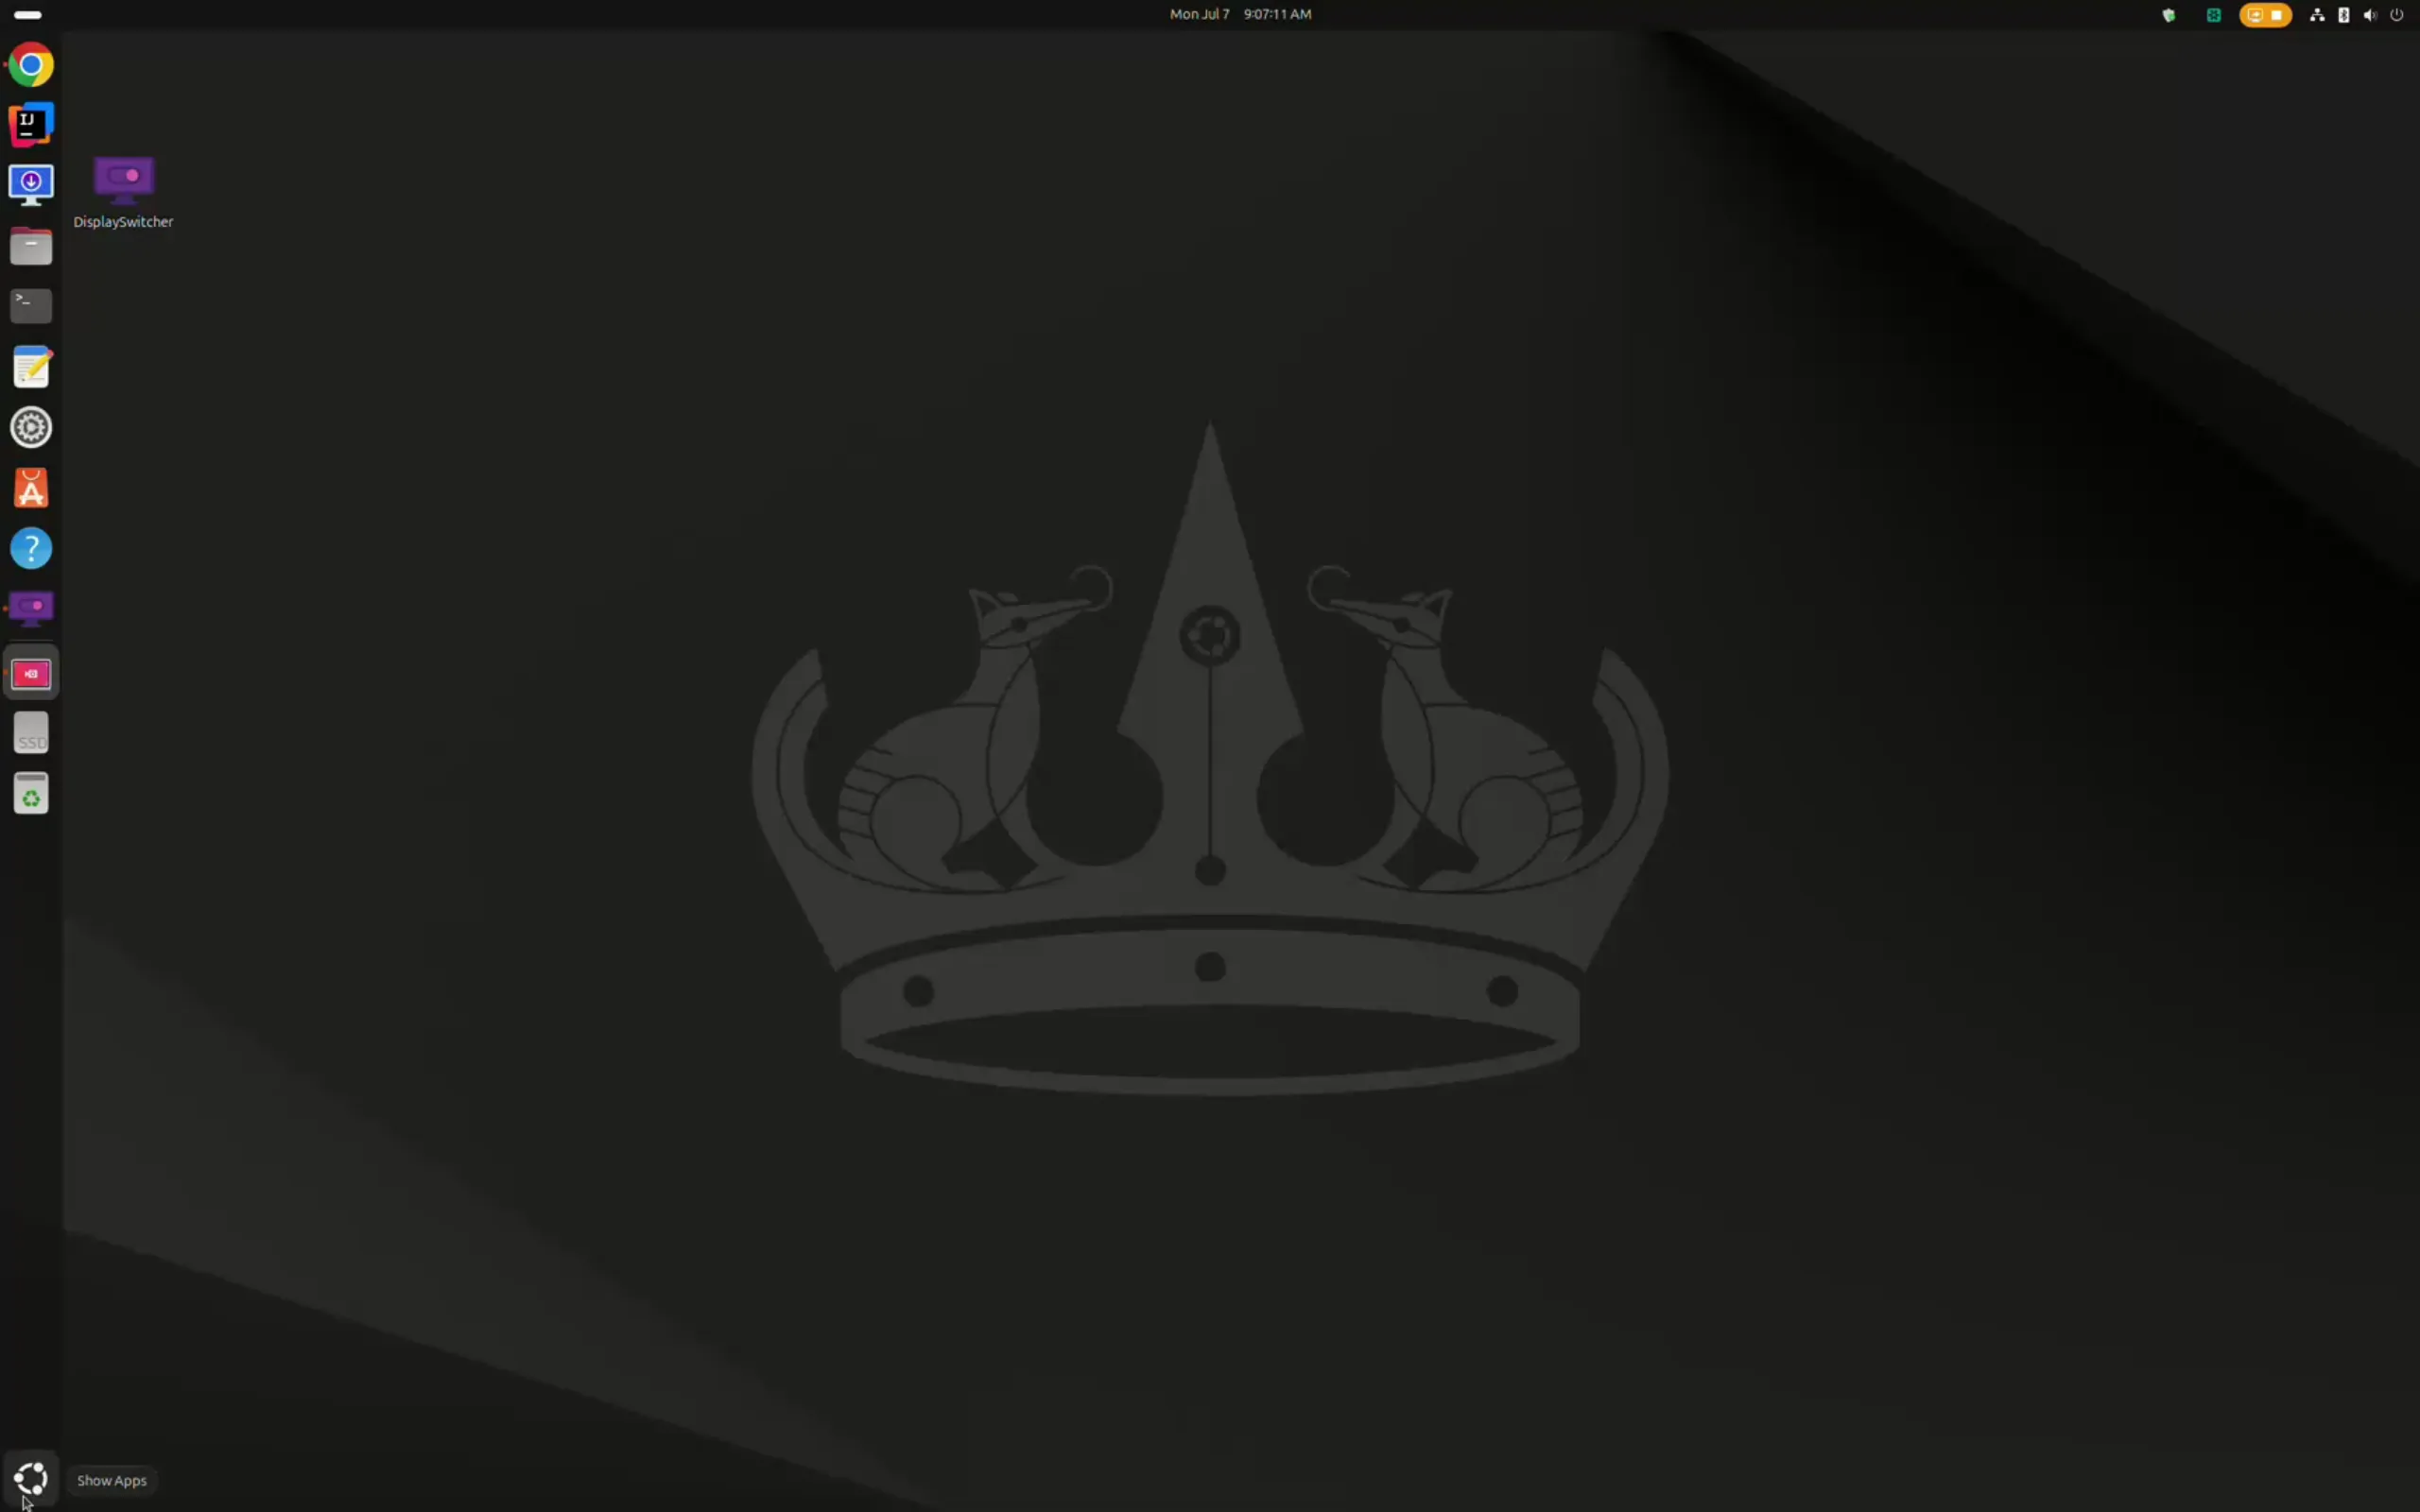
Click Show Apps.
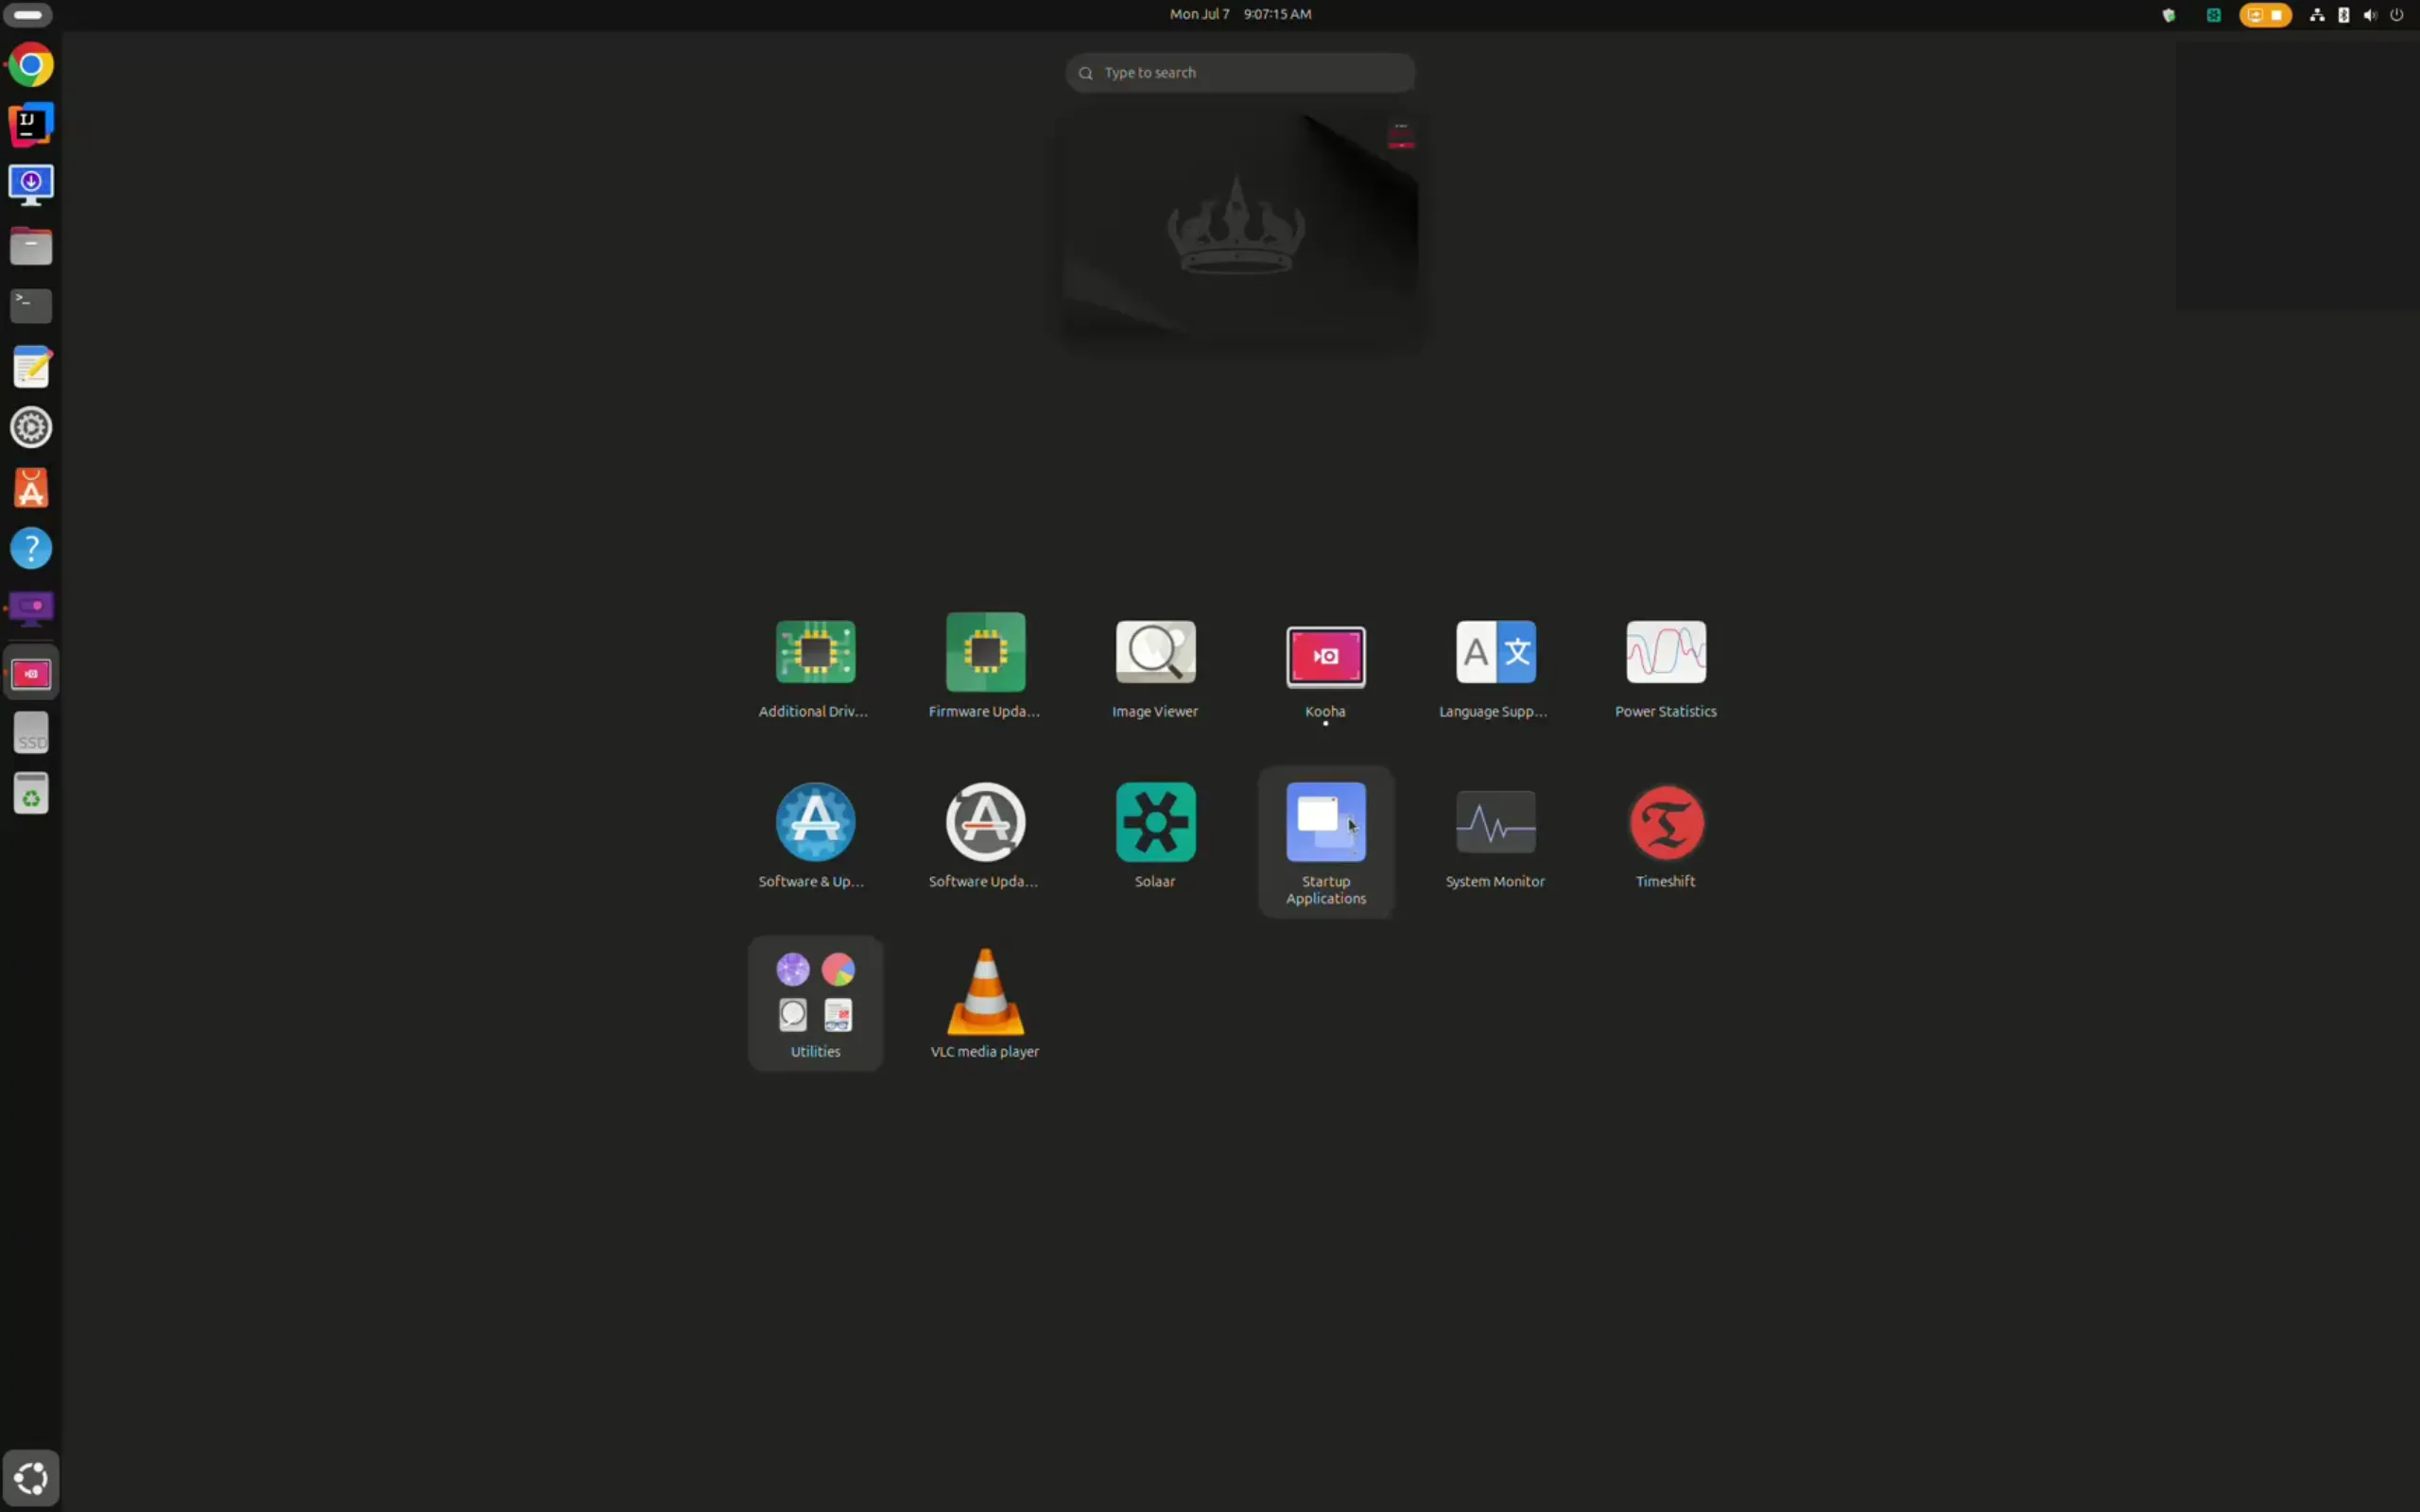
Select Startup Applications.
Uncheck DisplaySwitcher.
Mac
Requirements
DisplaySwitcher requires macOS 11.0 Big Sur or later on Apple Silicon Macs (arm64). (Not available for Intel CPU based Macs.)
“Not sure which version you’re running? See this chart of macOS version names and numbers: https://en.wikipedia.org/wiki/MacOS_version_history
Monitor with DDC/CI Support [What is DDC/CI?]
- DisplaySwitcher only works with external monitors that support DDC/CI over the active connection (USB-C, DisplayPort, HDMI, etc.)
- Internal MacBook/iMac displays are not supported
- Some monitors require DDC/CI to be enabled manually in their on-screen display (OSD) settings
- Apple Silicon notes:
- DDC/CI works best over DisplayPort or USB-C
- HDMI may not support DDC/CI on some Apple Silicon Macs (especially via the built-in HDMI port)
- USB-C to HDMI adapters are frequently unreliable — direct USB-C or DisplayPort is recommended
Security
- DisplaySwitcher is signed and notarized by Apple for security and compatibility with macOS Gatekeeper.
Uninstall
The installer automatically replaces previous installations, so you don't ever need to uninstall, else you want to stop using DisplaySwitcher.
Just dragging /Applications/DisplaySwitcher folder to the Trash will leave a few items behind. Run the uninstall to remove that folder plus:
- The macOS entry for the Open at Login running of DisplaySwitcher.
- The Desktop DisplaySwitcher icon.
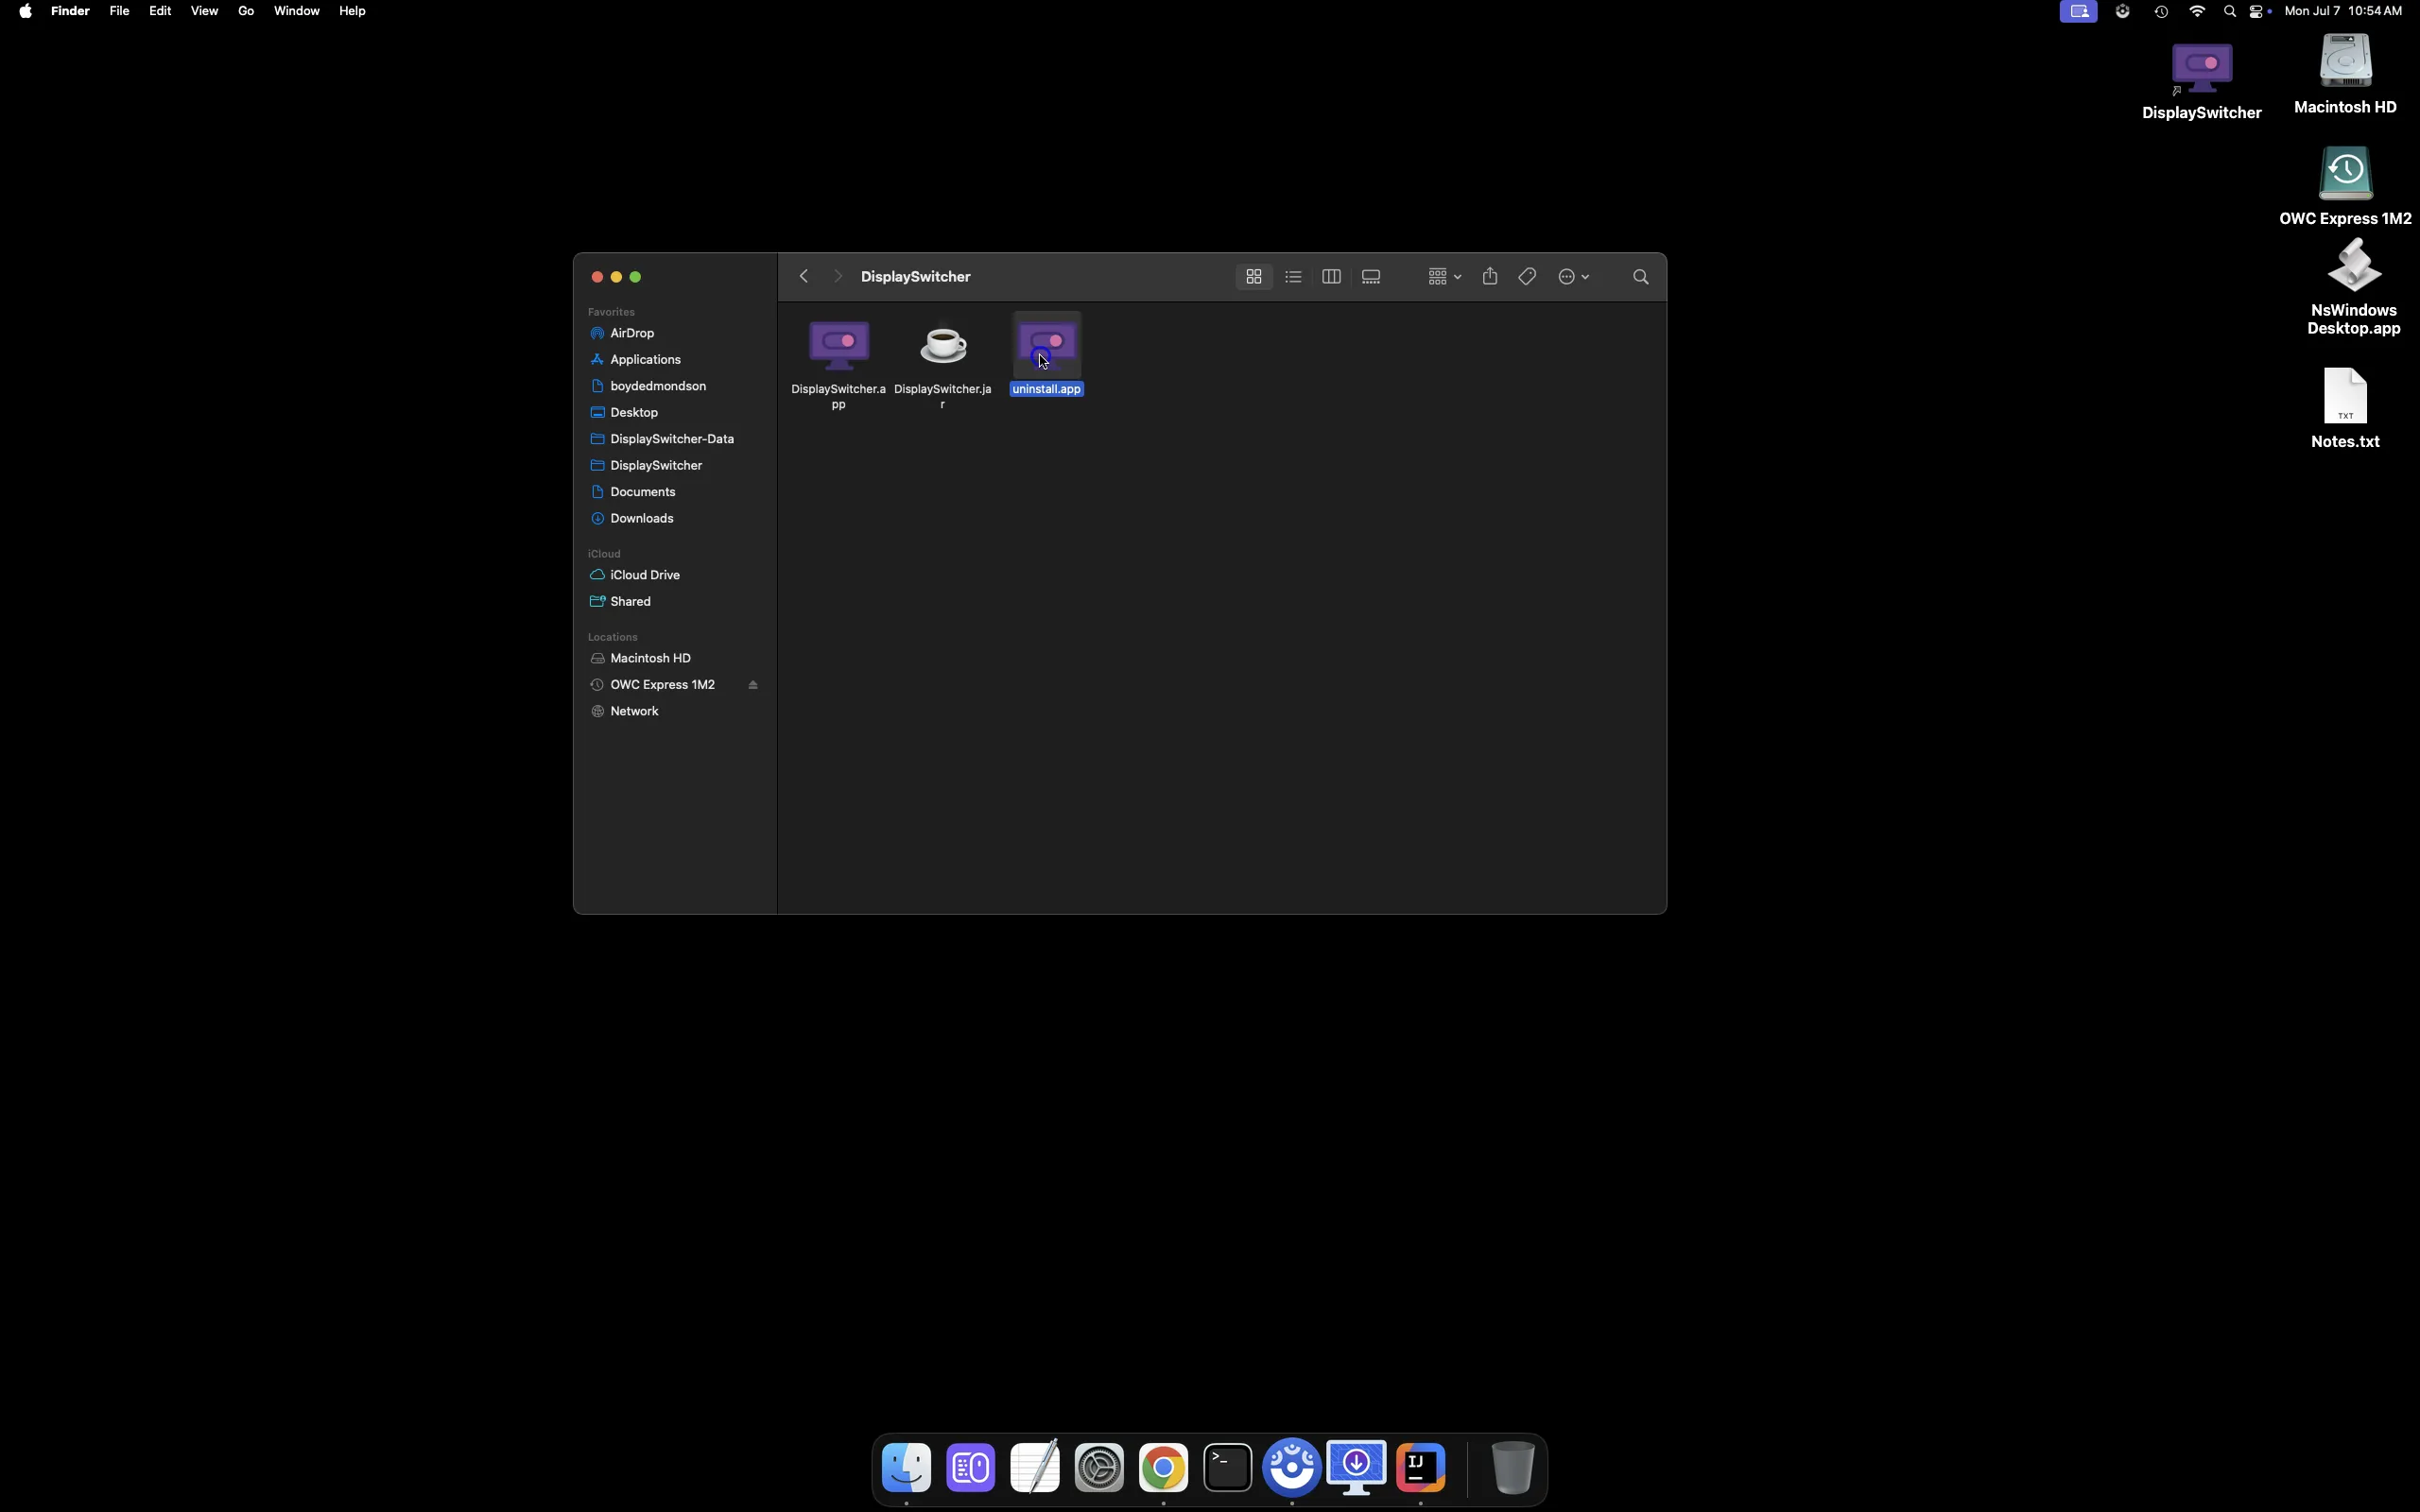
Read instructions below, or watch this demo video.
Using Finder, open /Applications/DisplaySwitcher and double click uninstall.app.
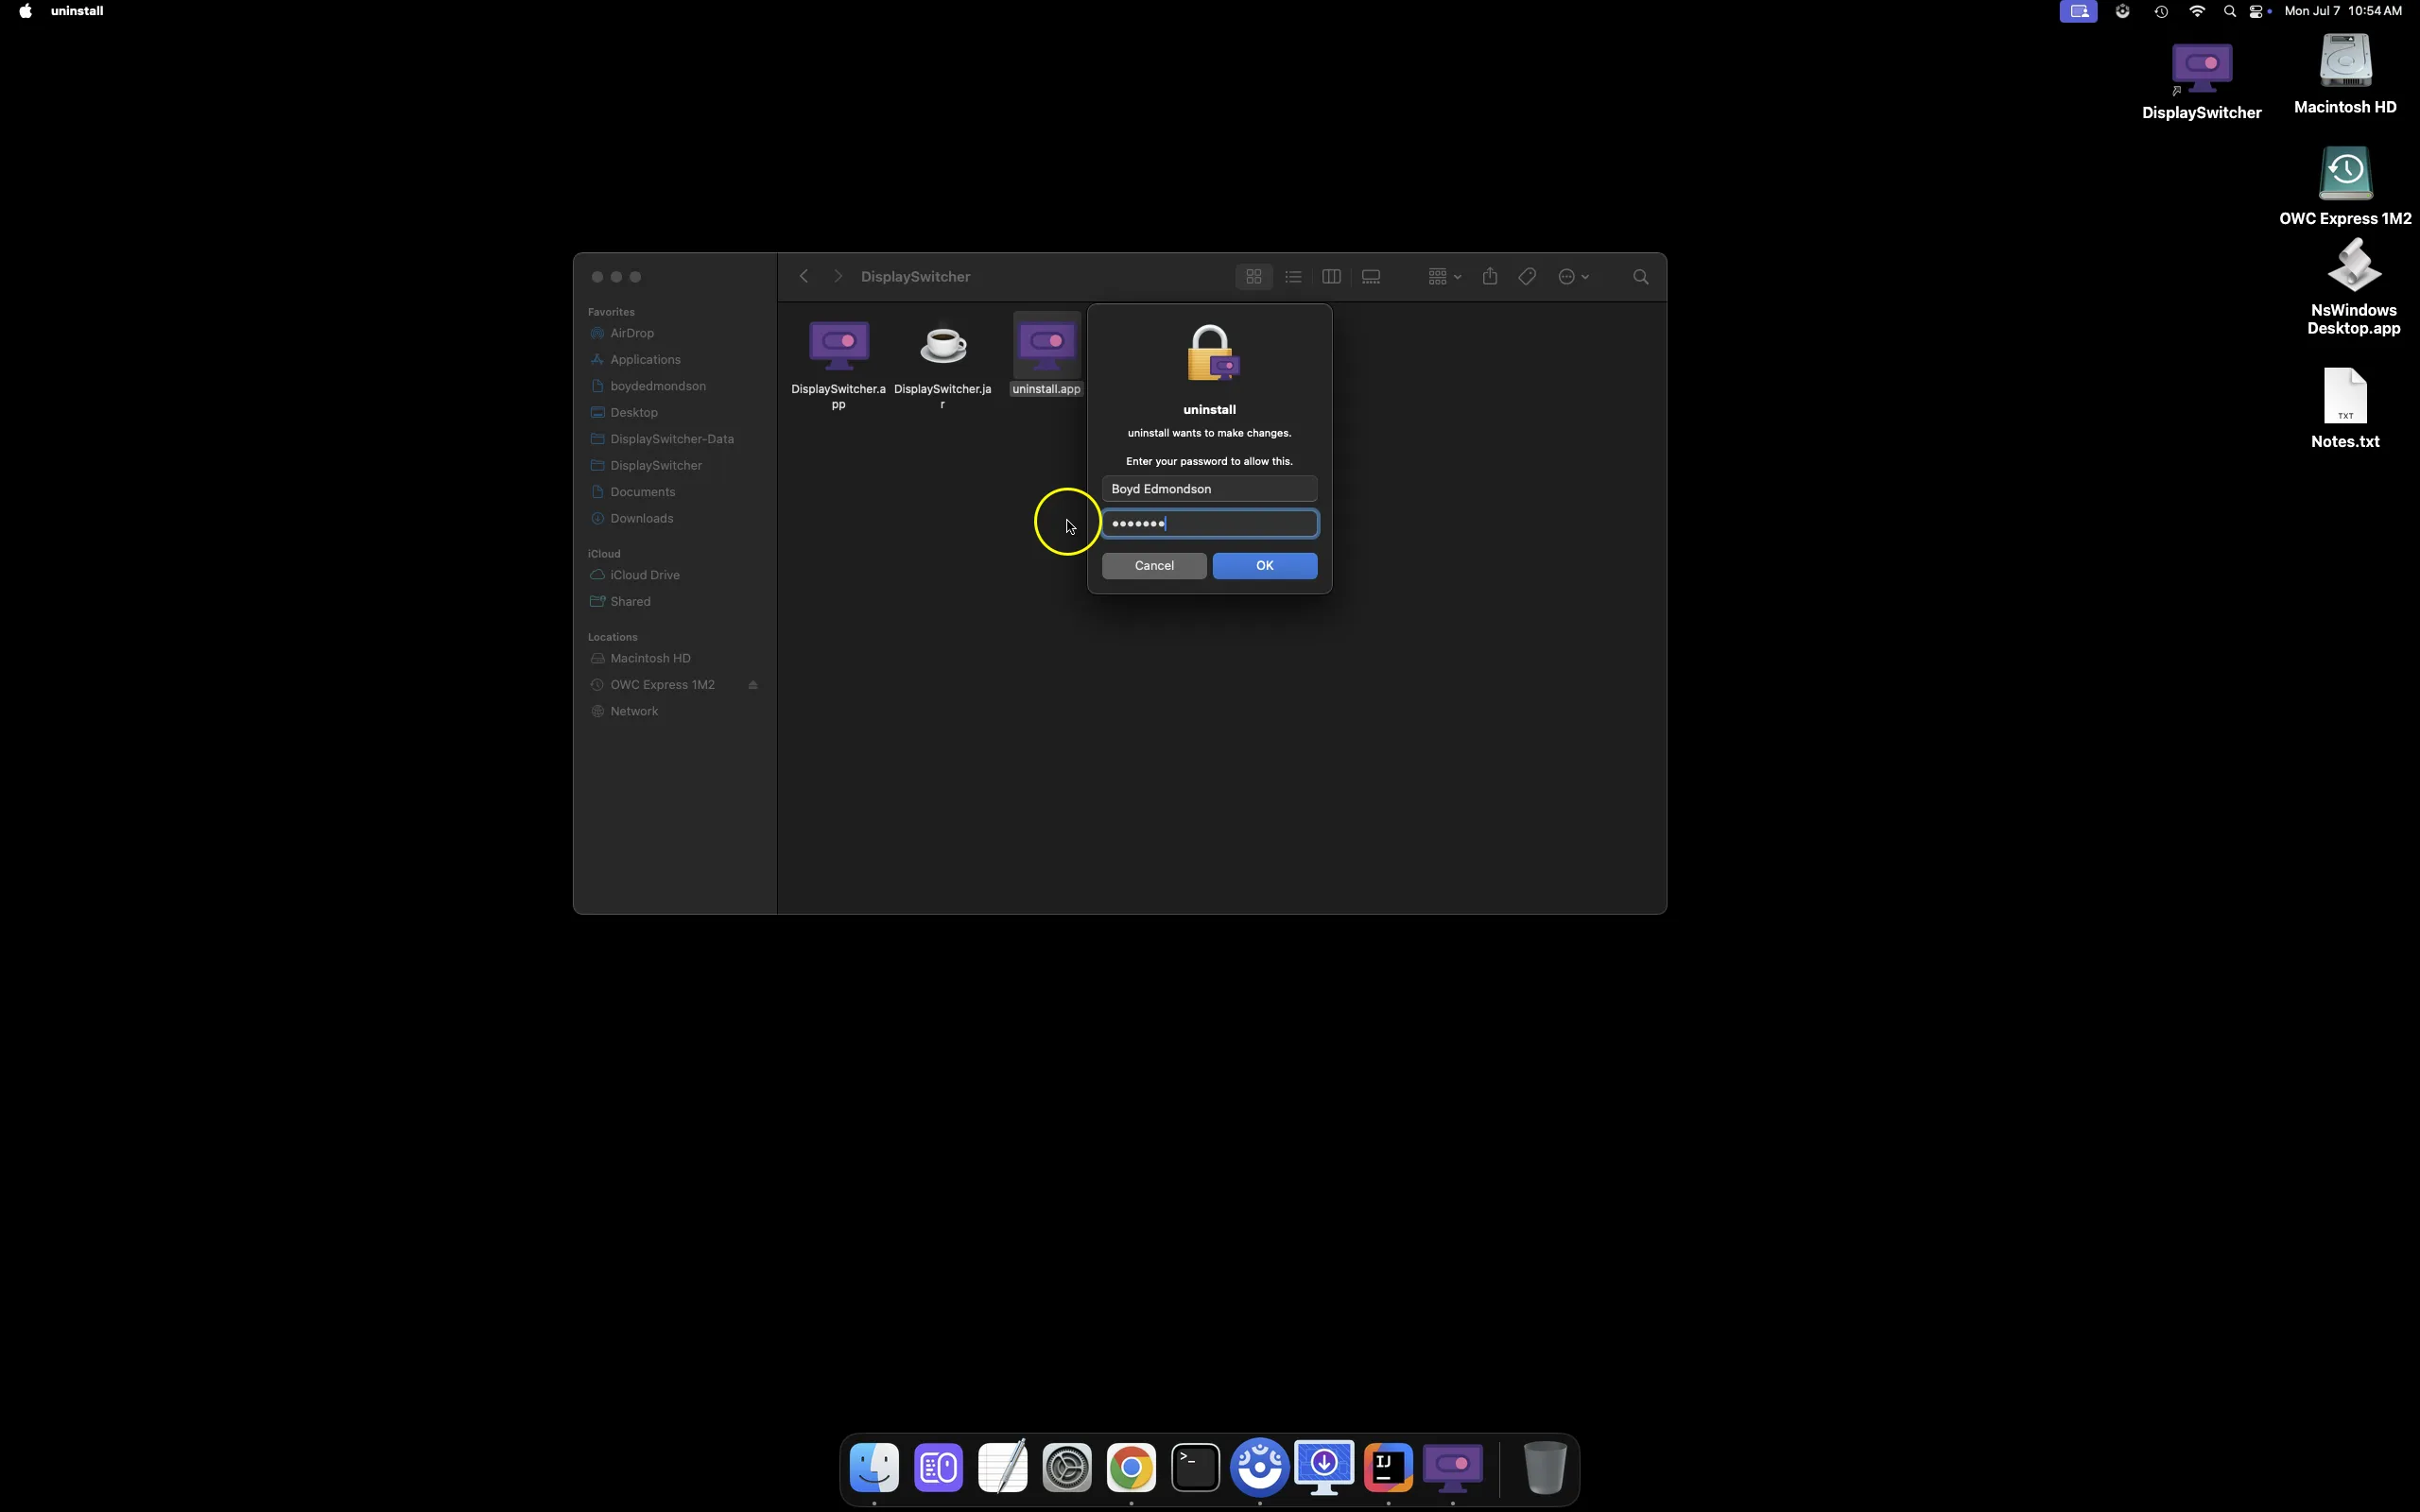
It will ask for your administrator password.
Install
Use the installer, Install_DisplaySwitcher.dmg, to install DisplaySwitcher.
Read instructions below, or watch this demo video.
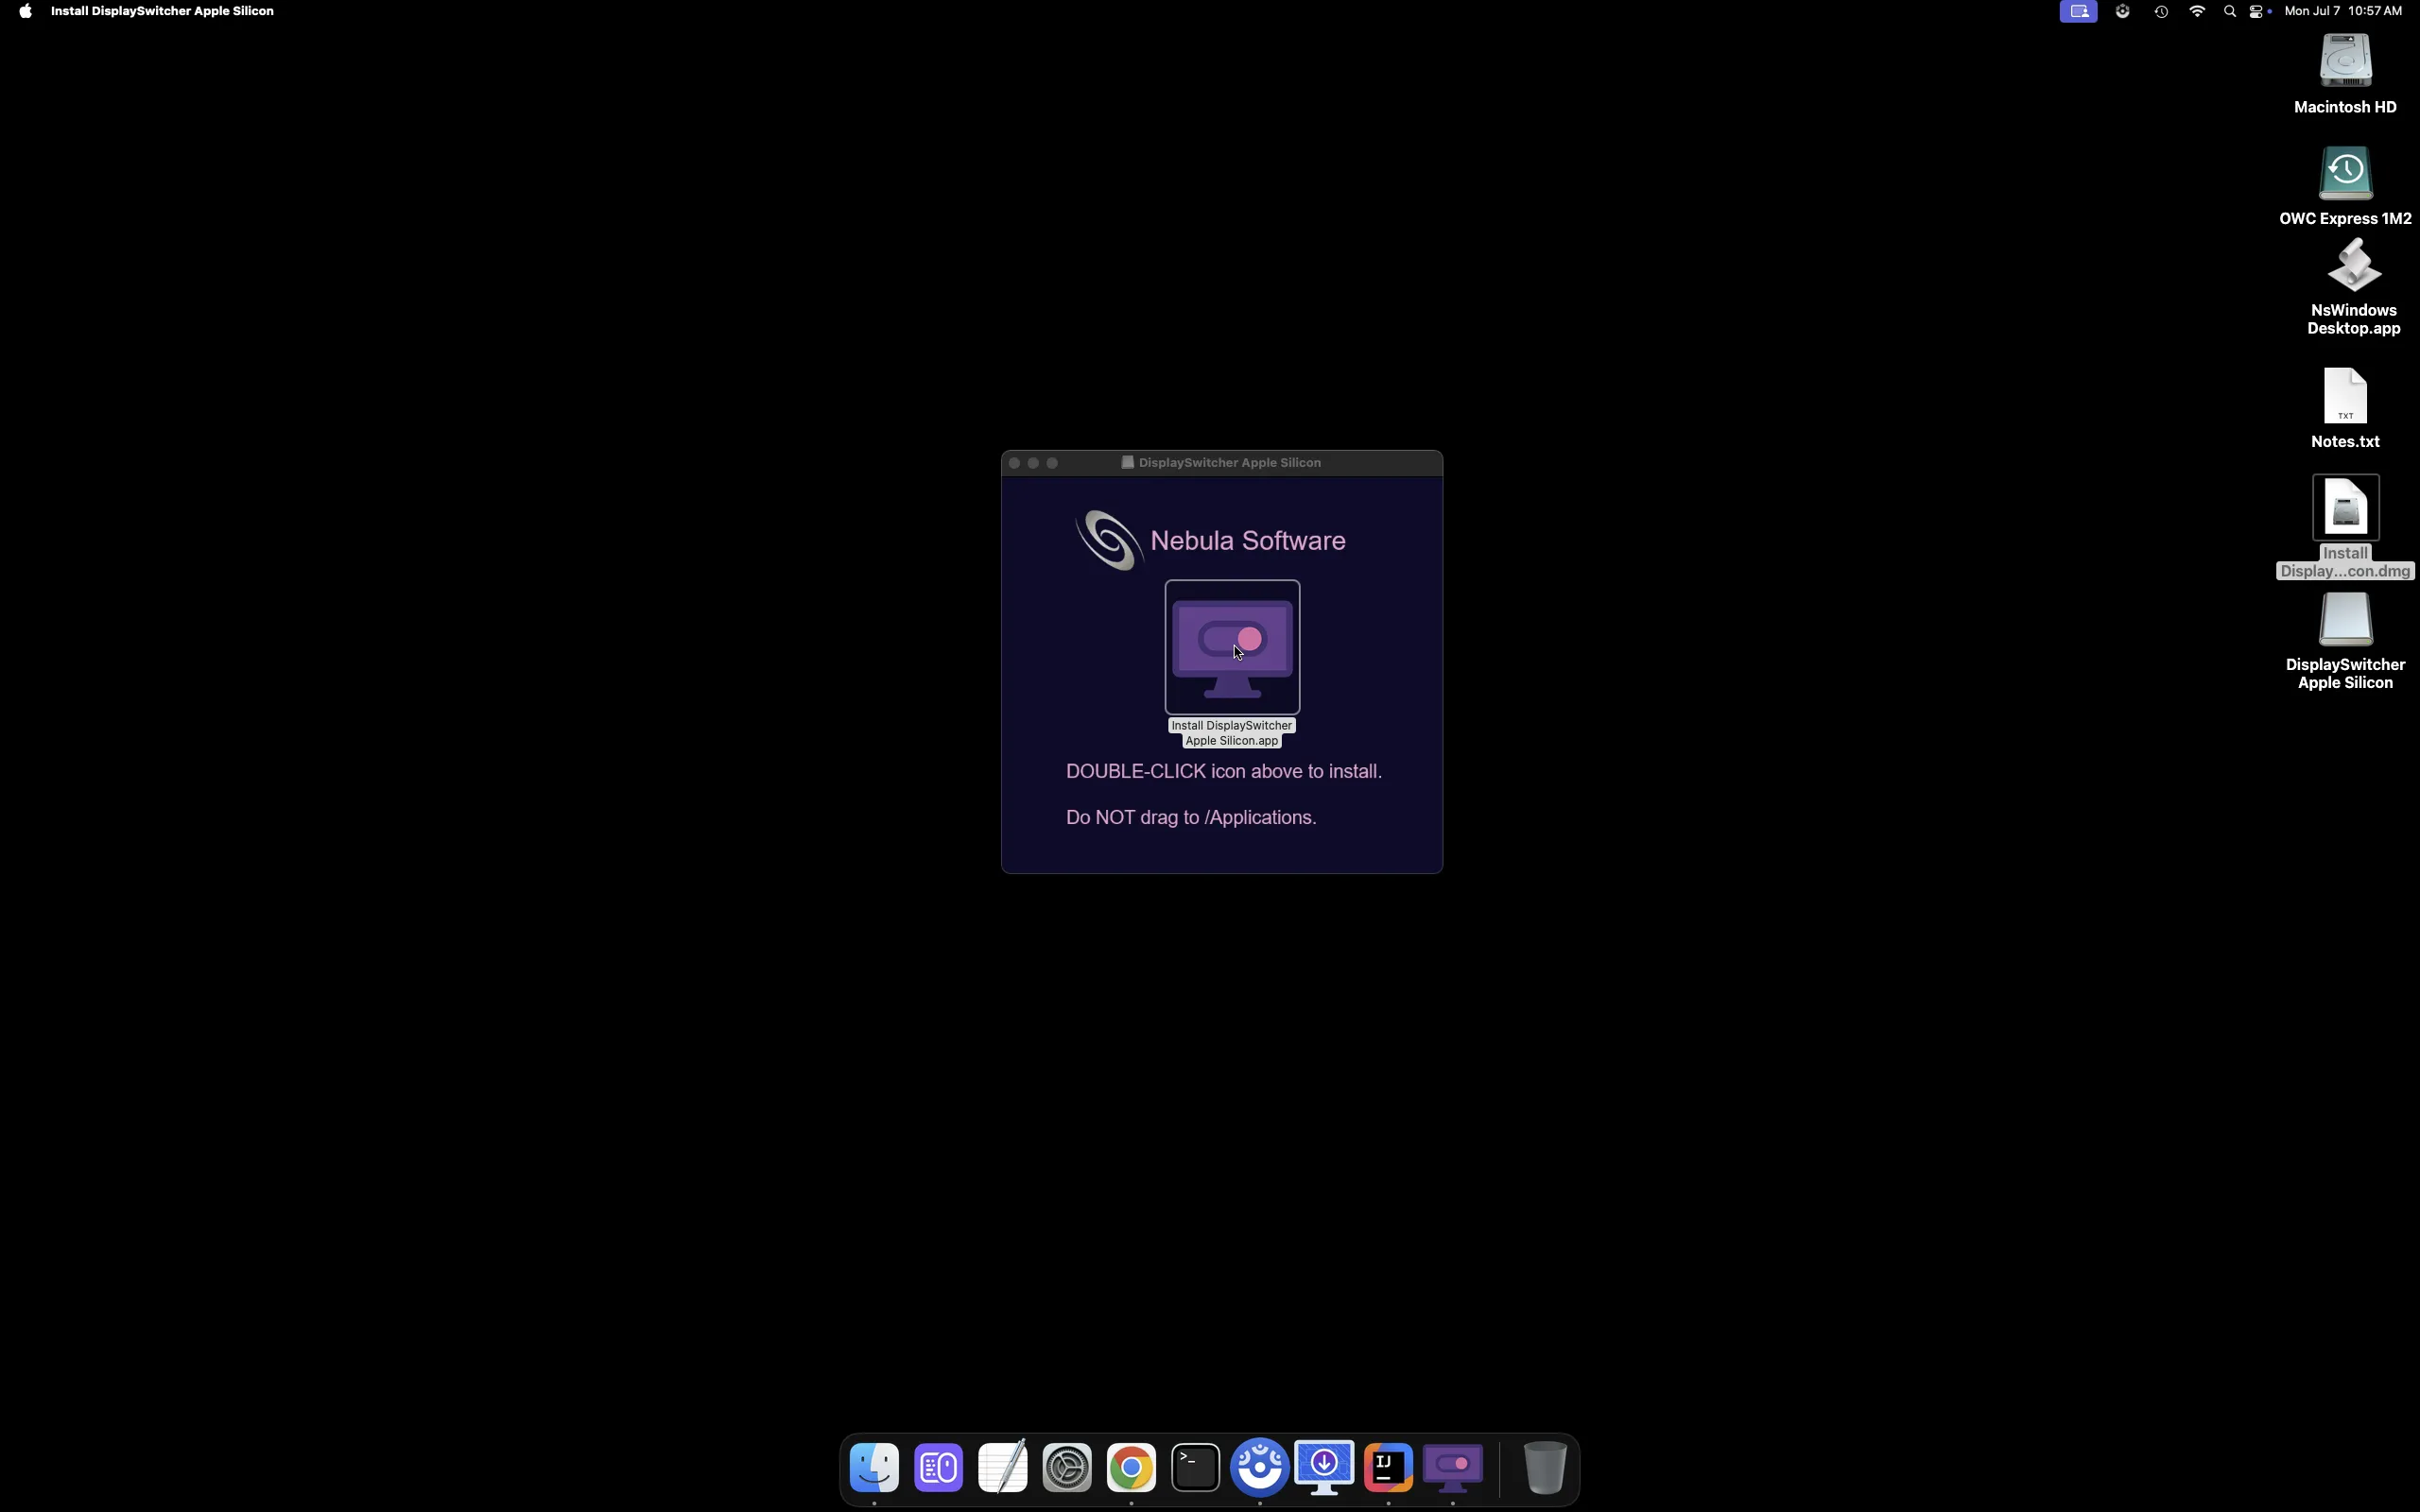
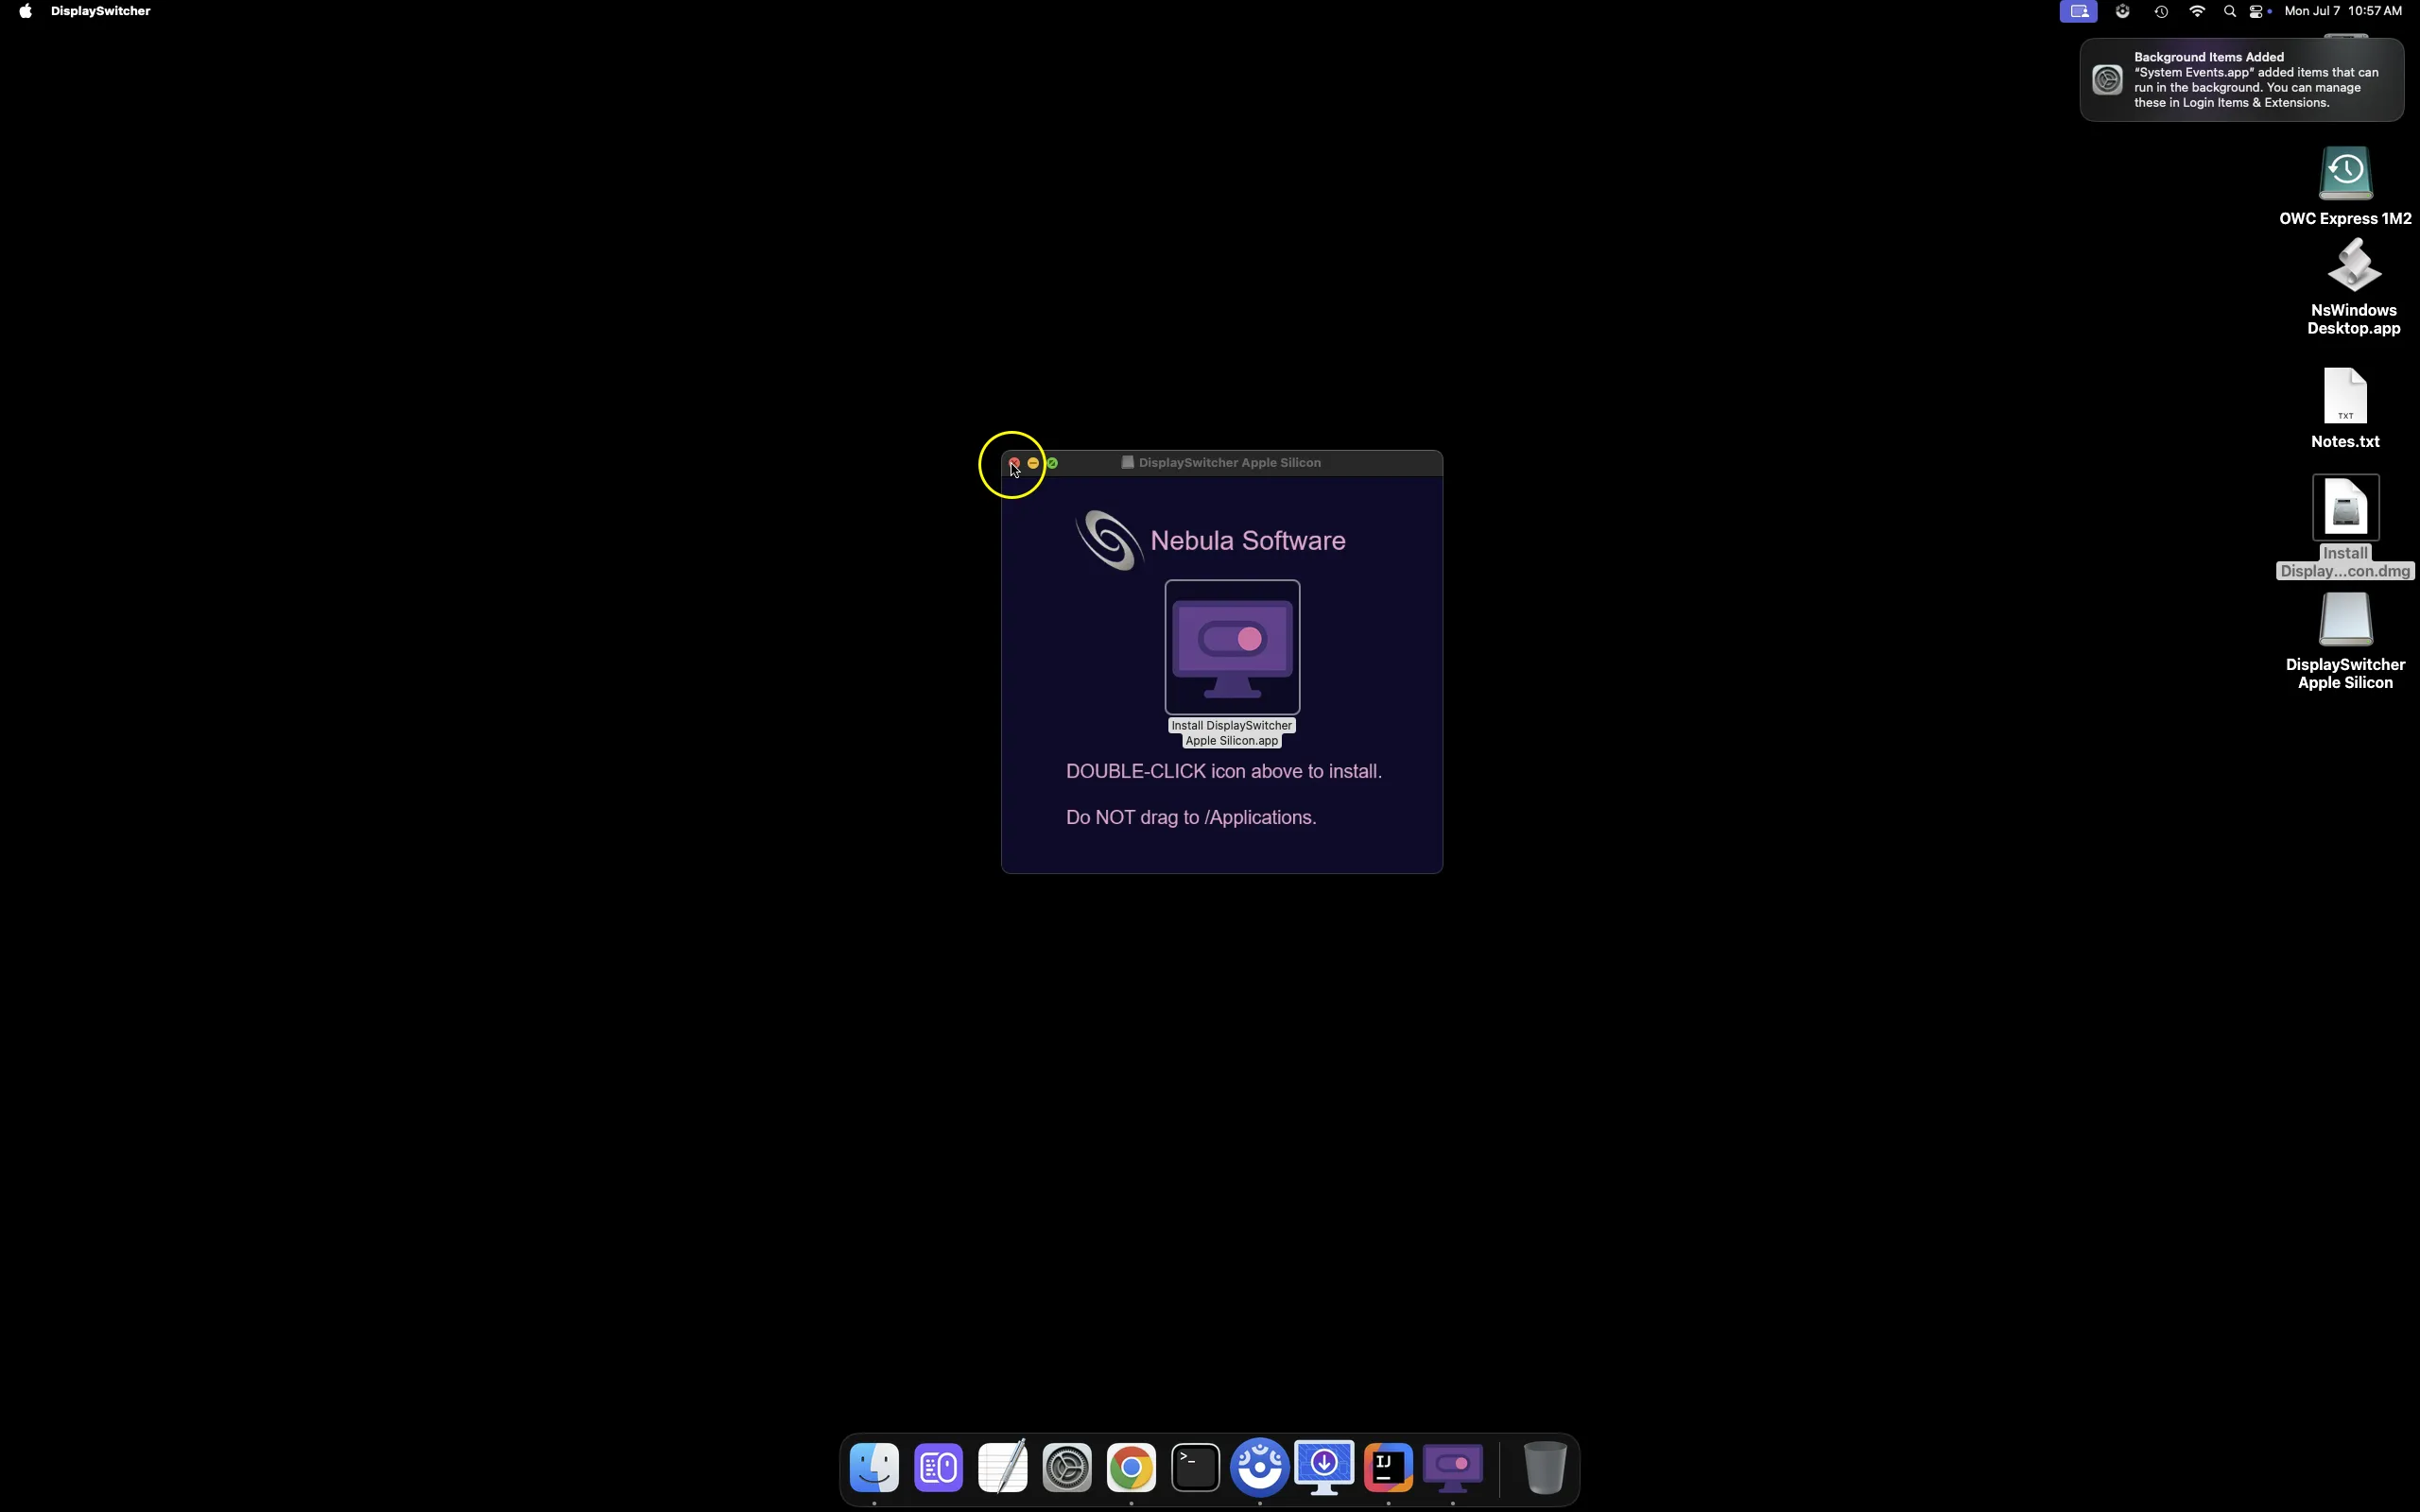
Double click the installer's .dmg file to open its volume, which shows the actual DisplaySwitcher installer.
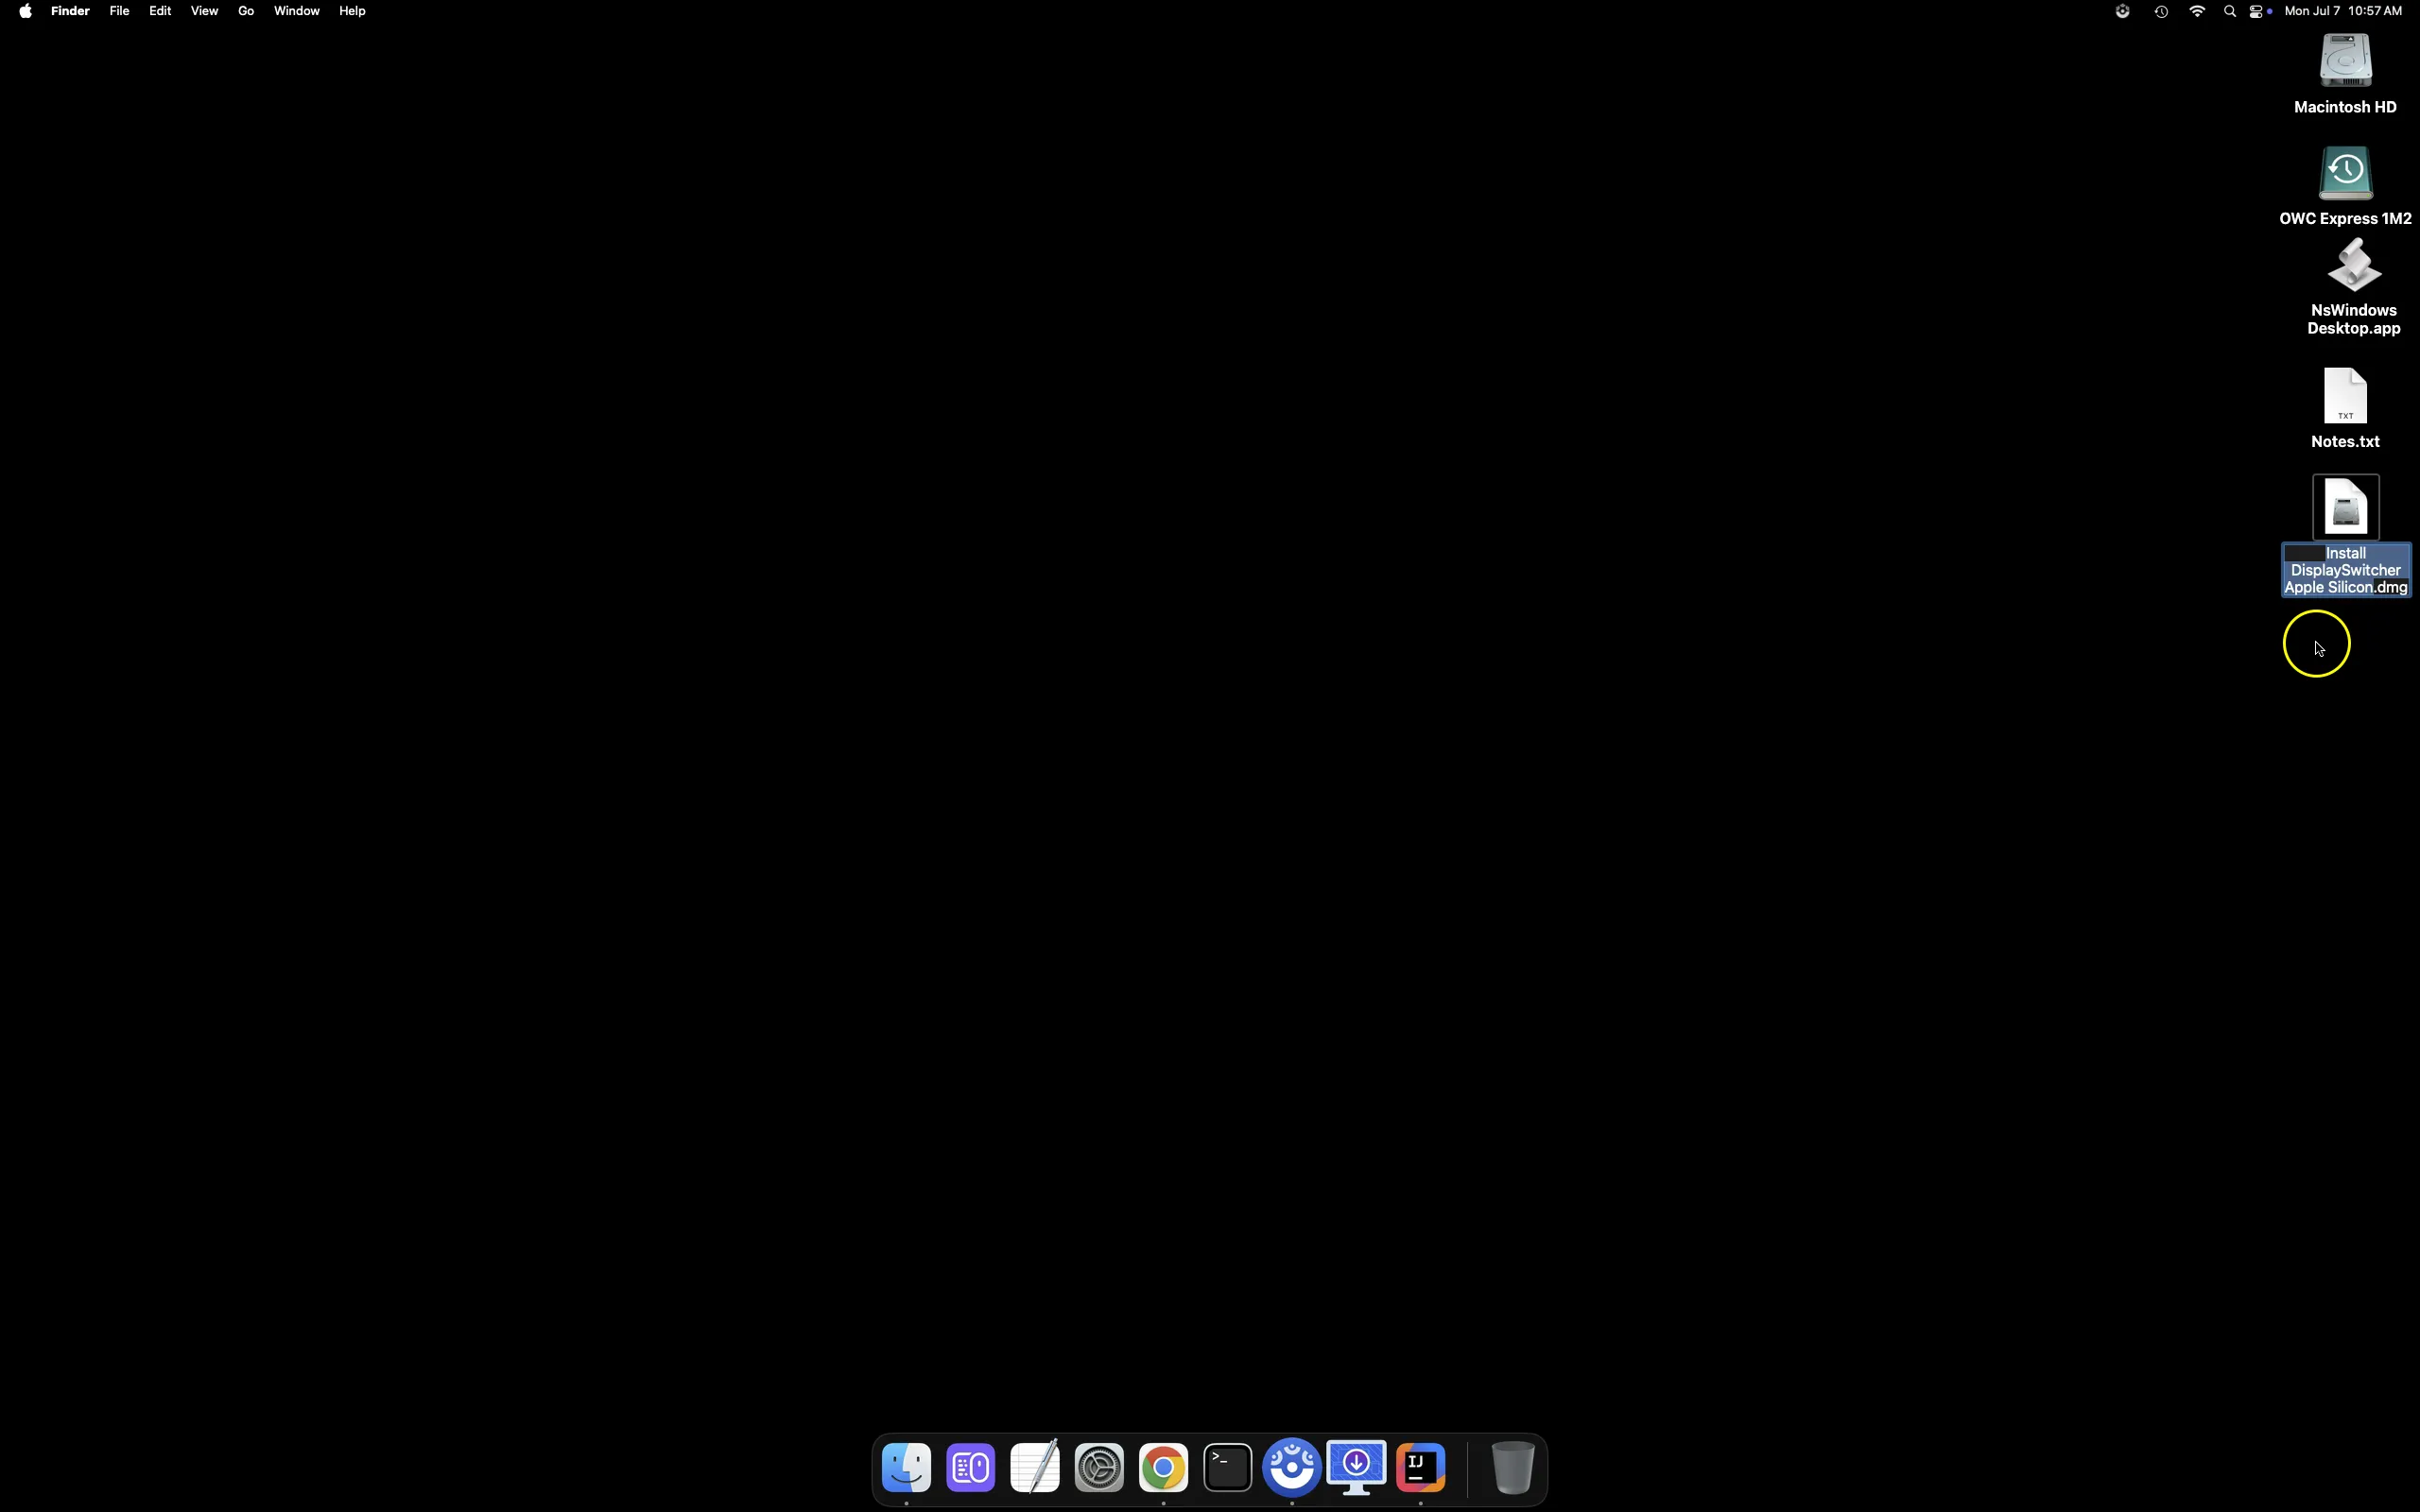
Double click the installer in the .dmg's opened volume.
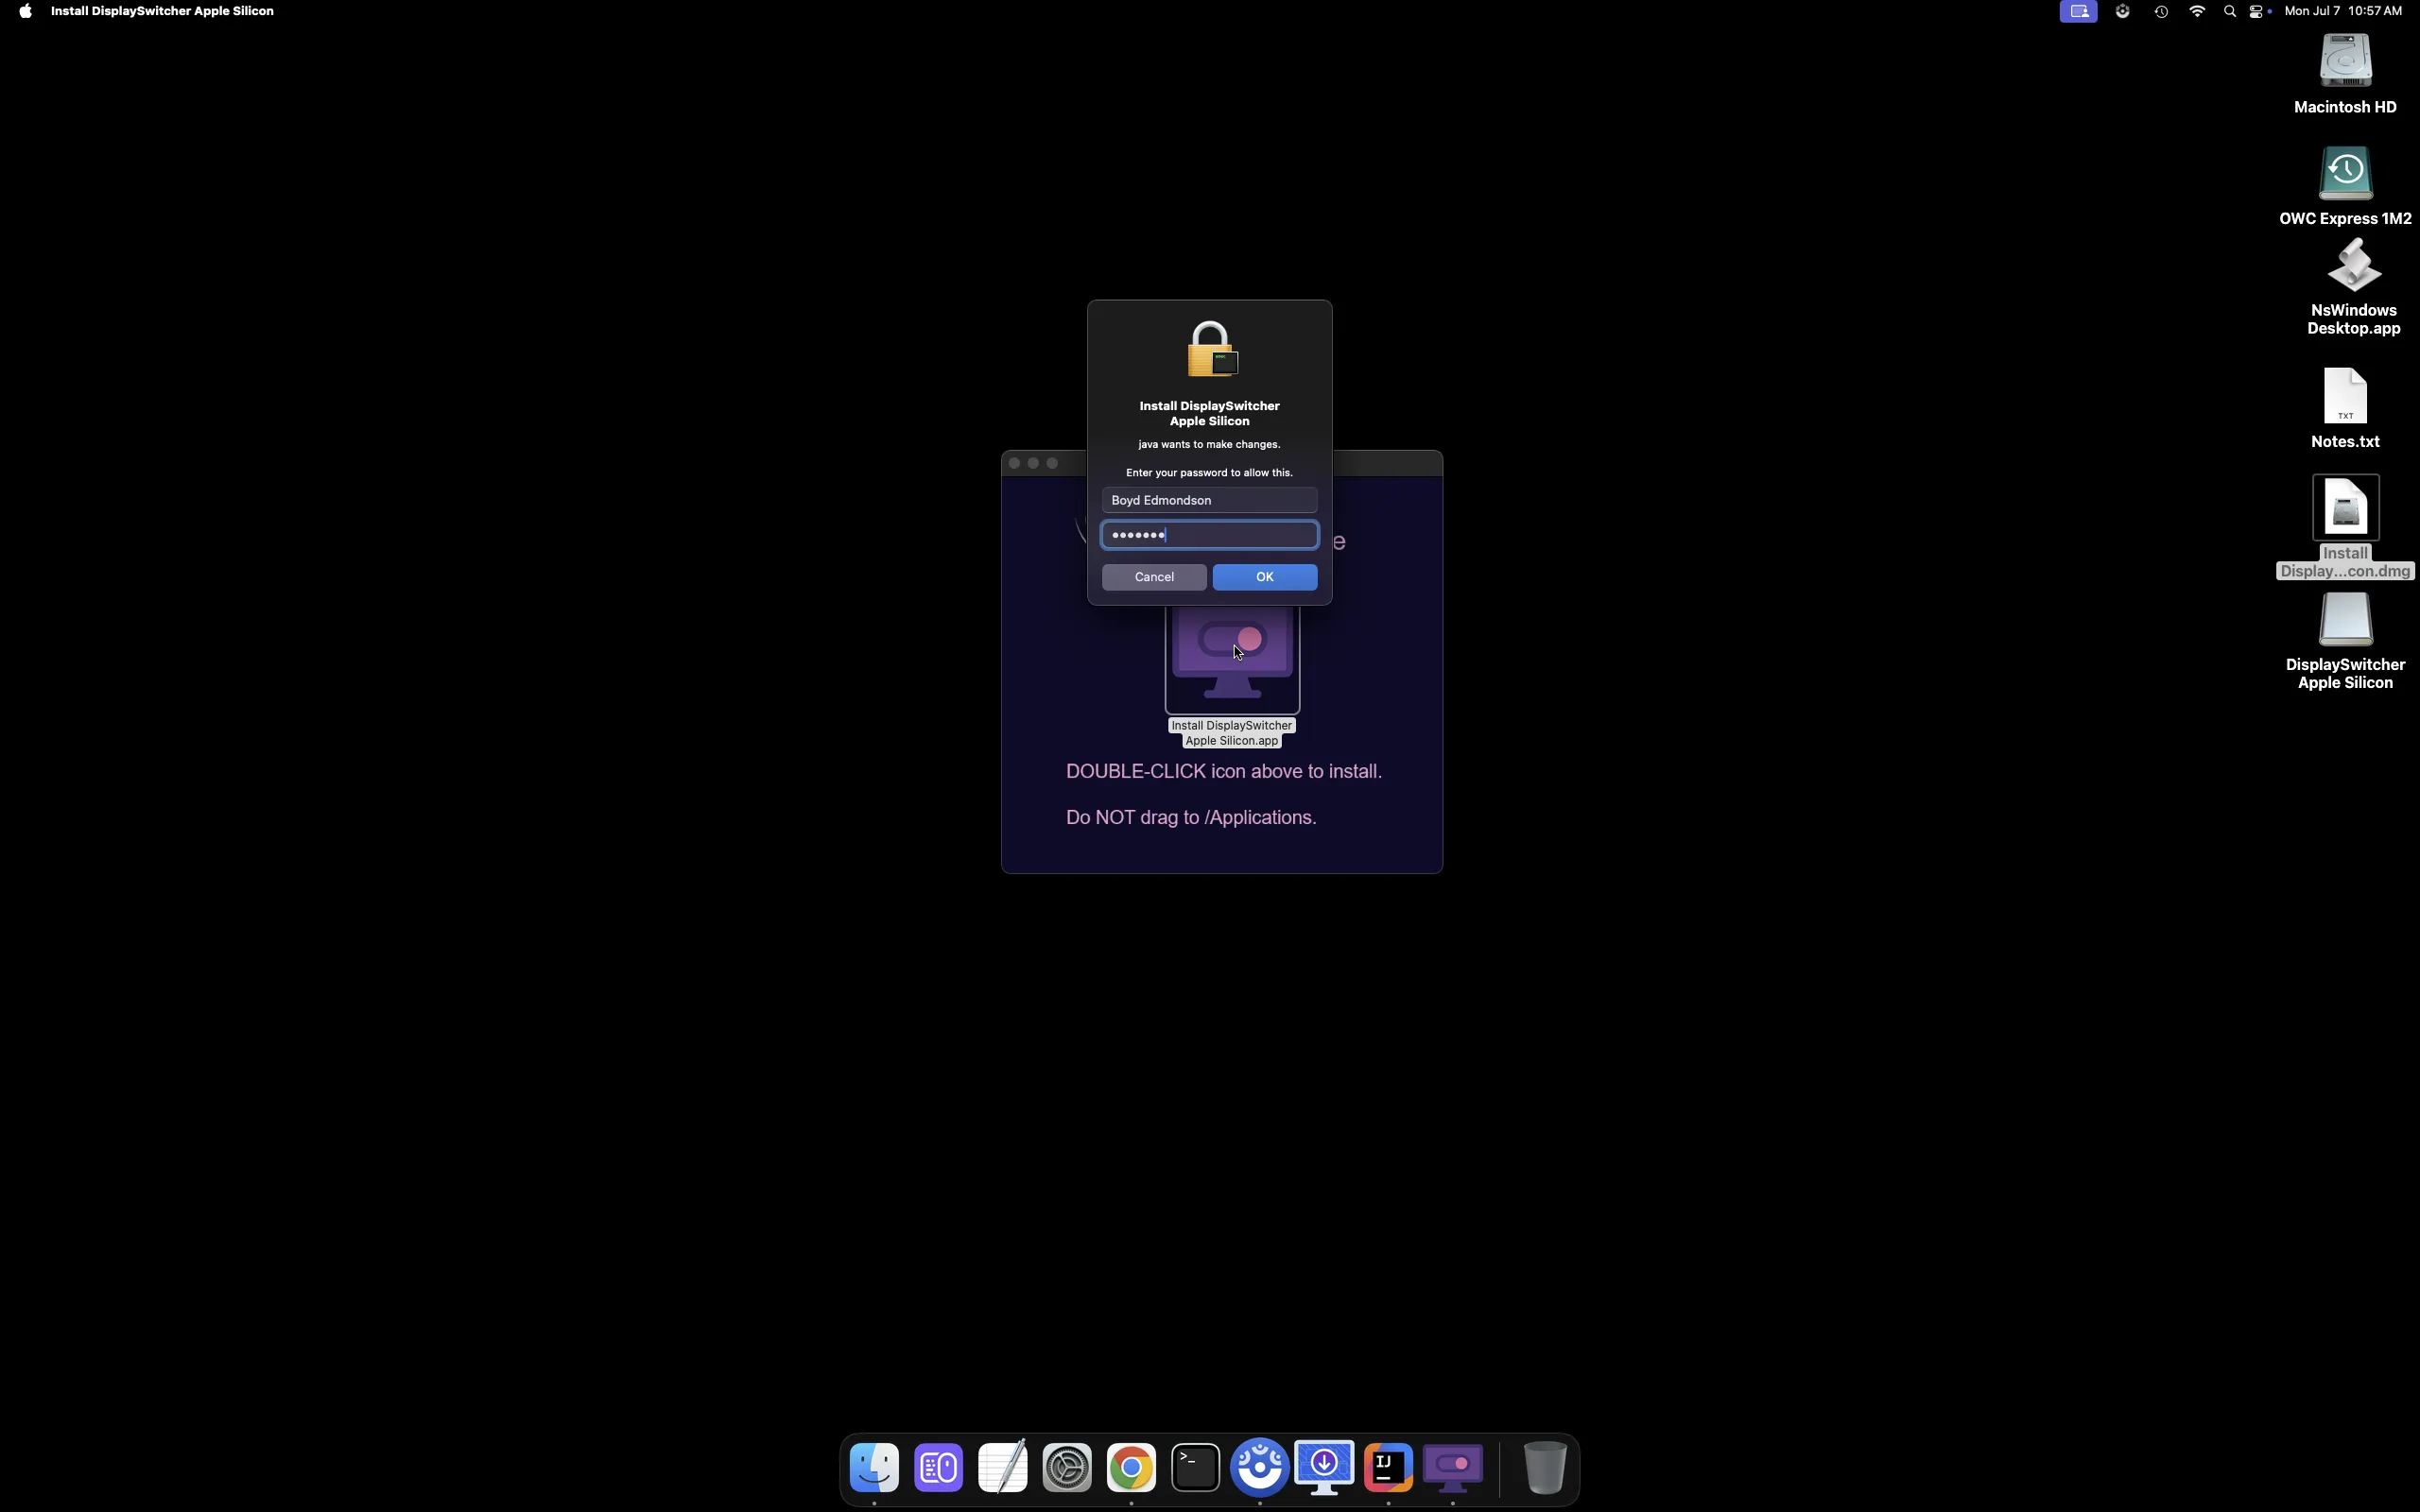
It will ask for your administrator password.
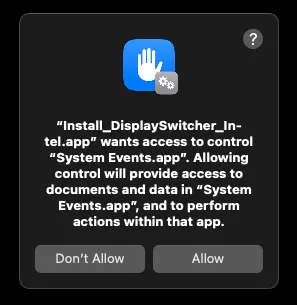
While the installer is running, macOS may ask you to grant some permissions by clicking "Allow" when it asks you.
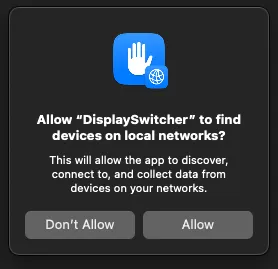
After the installer completes, close the .dmg open volume, eject the .dmg volume, delete the .dmg. Dismiss the Background Items Added notice.
How to Keep in Dock
macOS has an Application Icon area called the "Dock". You may keep DisplaySwitcher in the Dock to make it easier to launch DisplaySwitcher.
Read instructions below, or watch this demo video.
Run DisplaySwitcher.
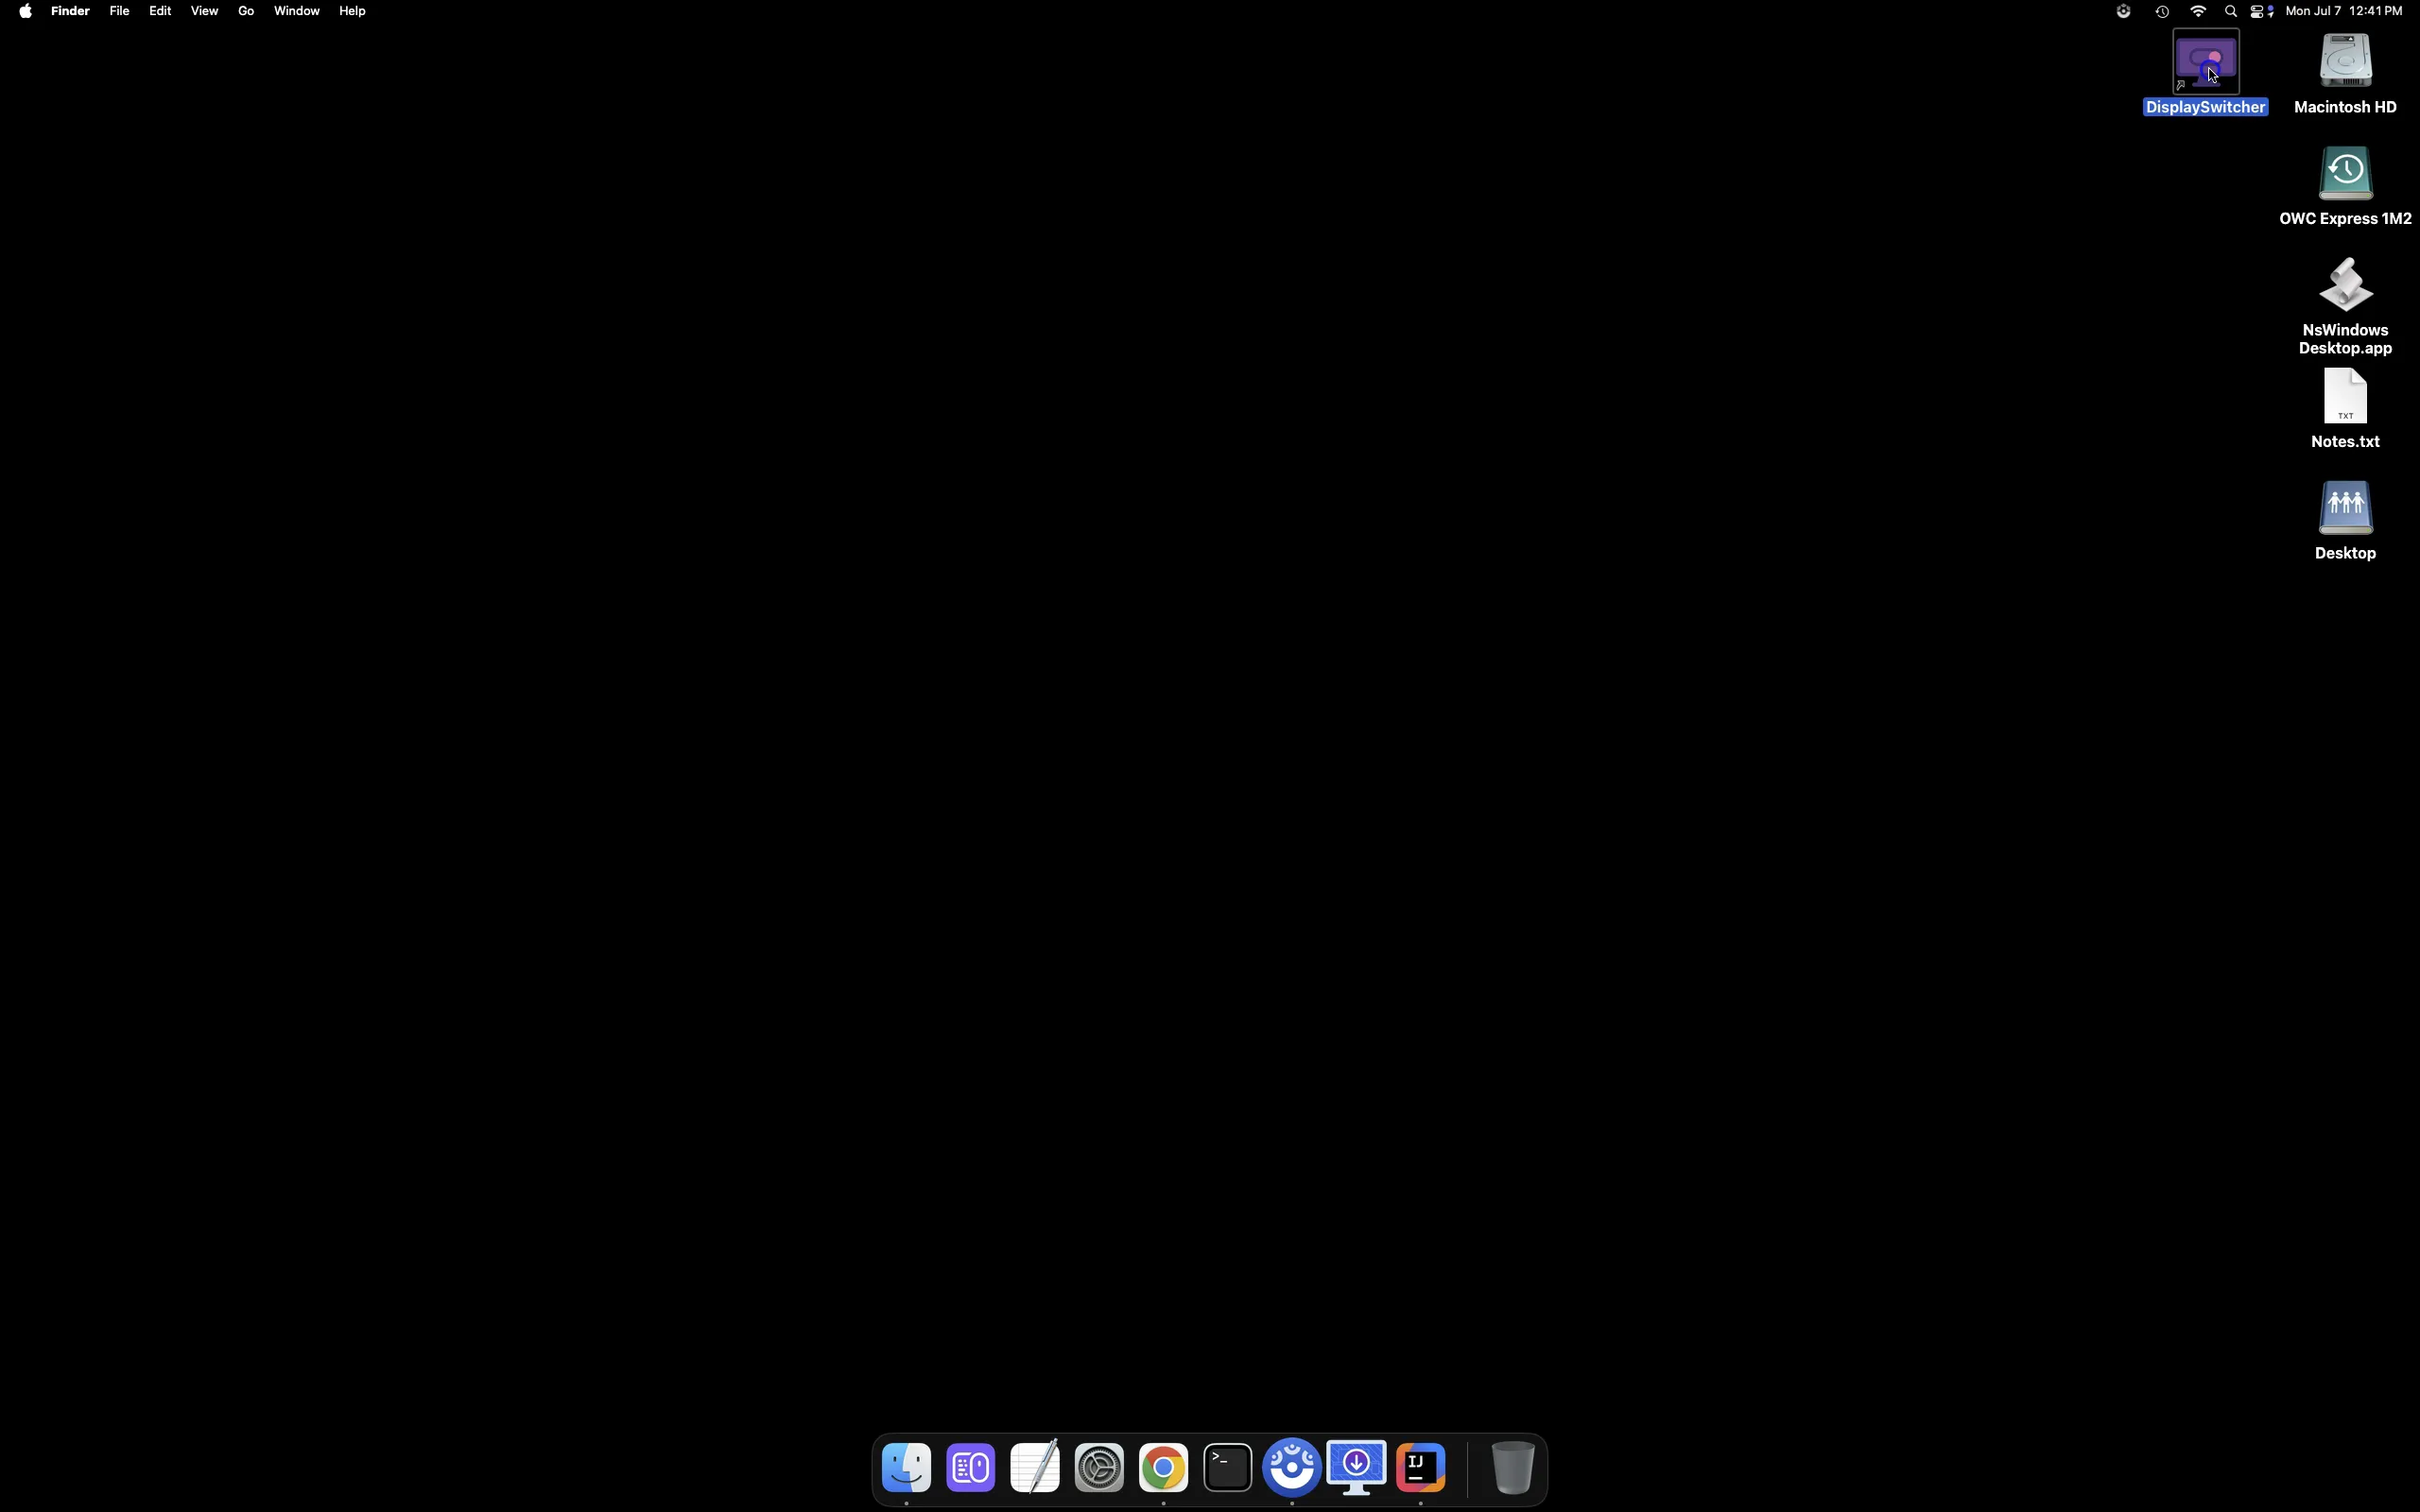
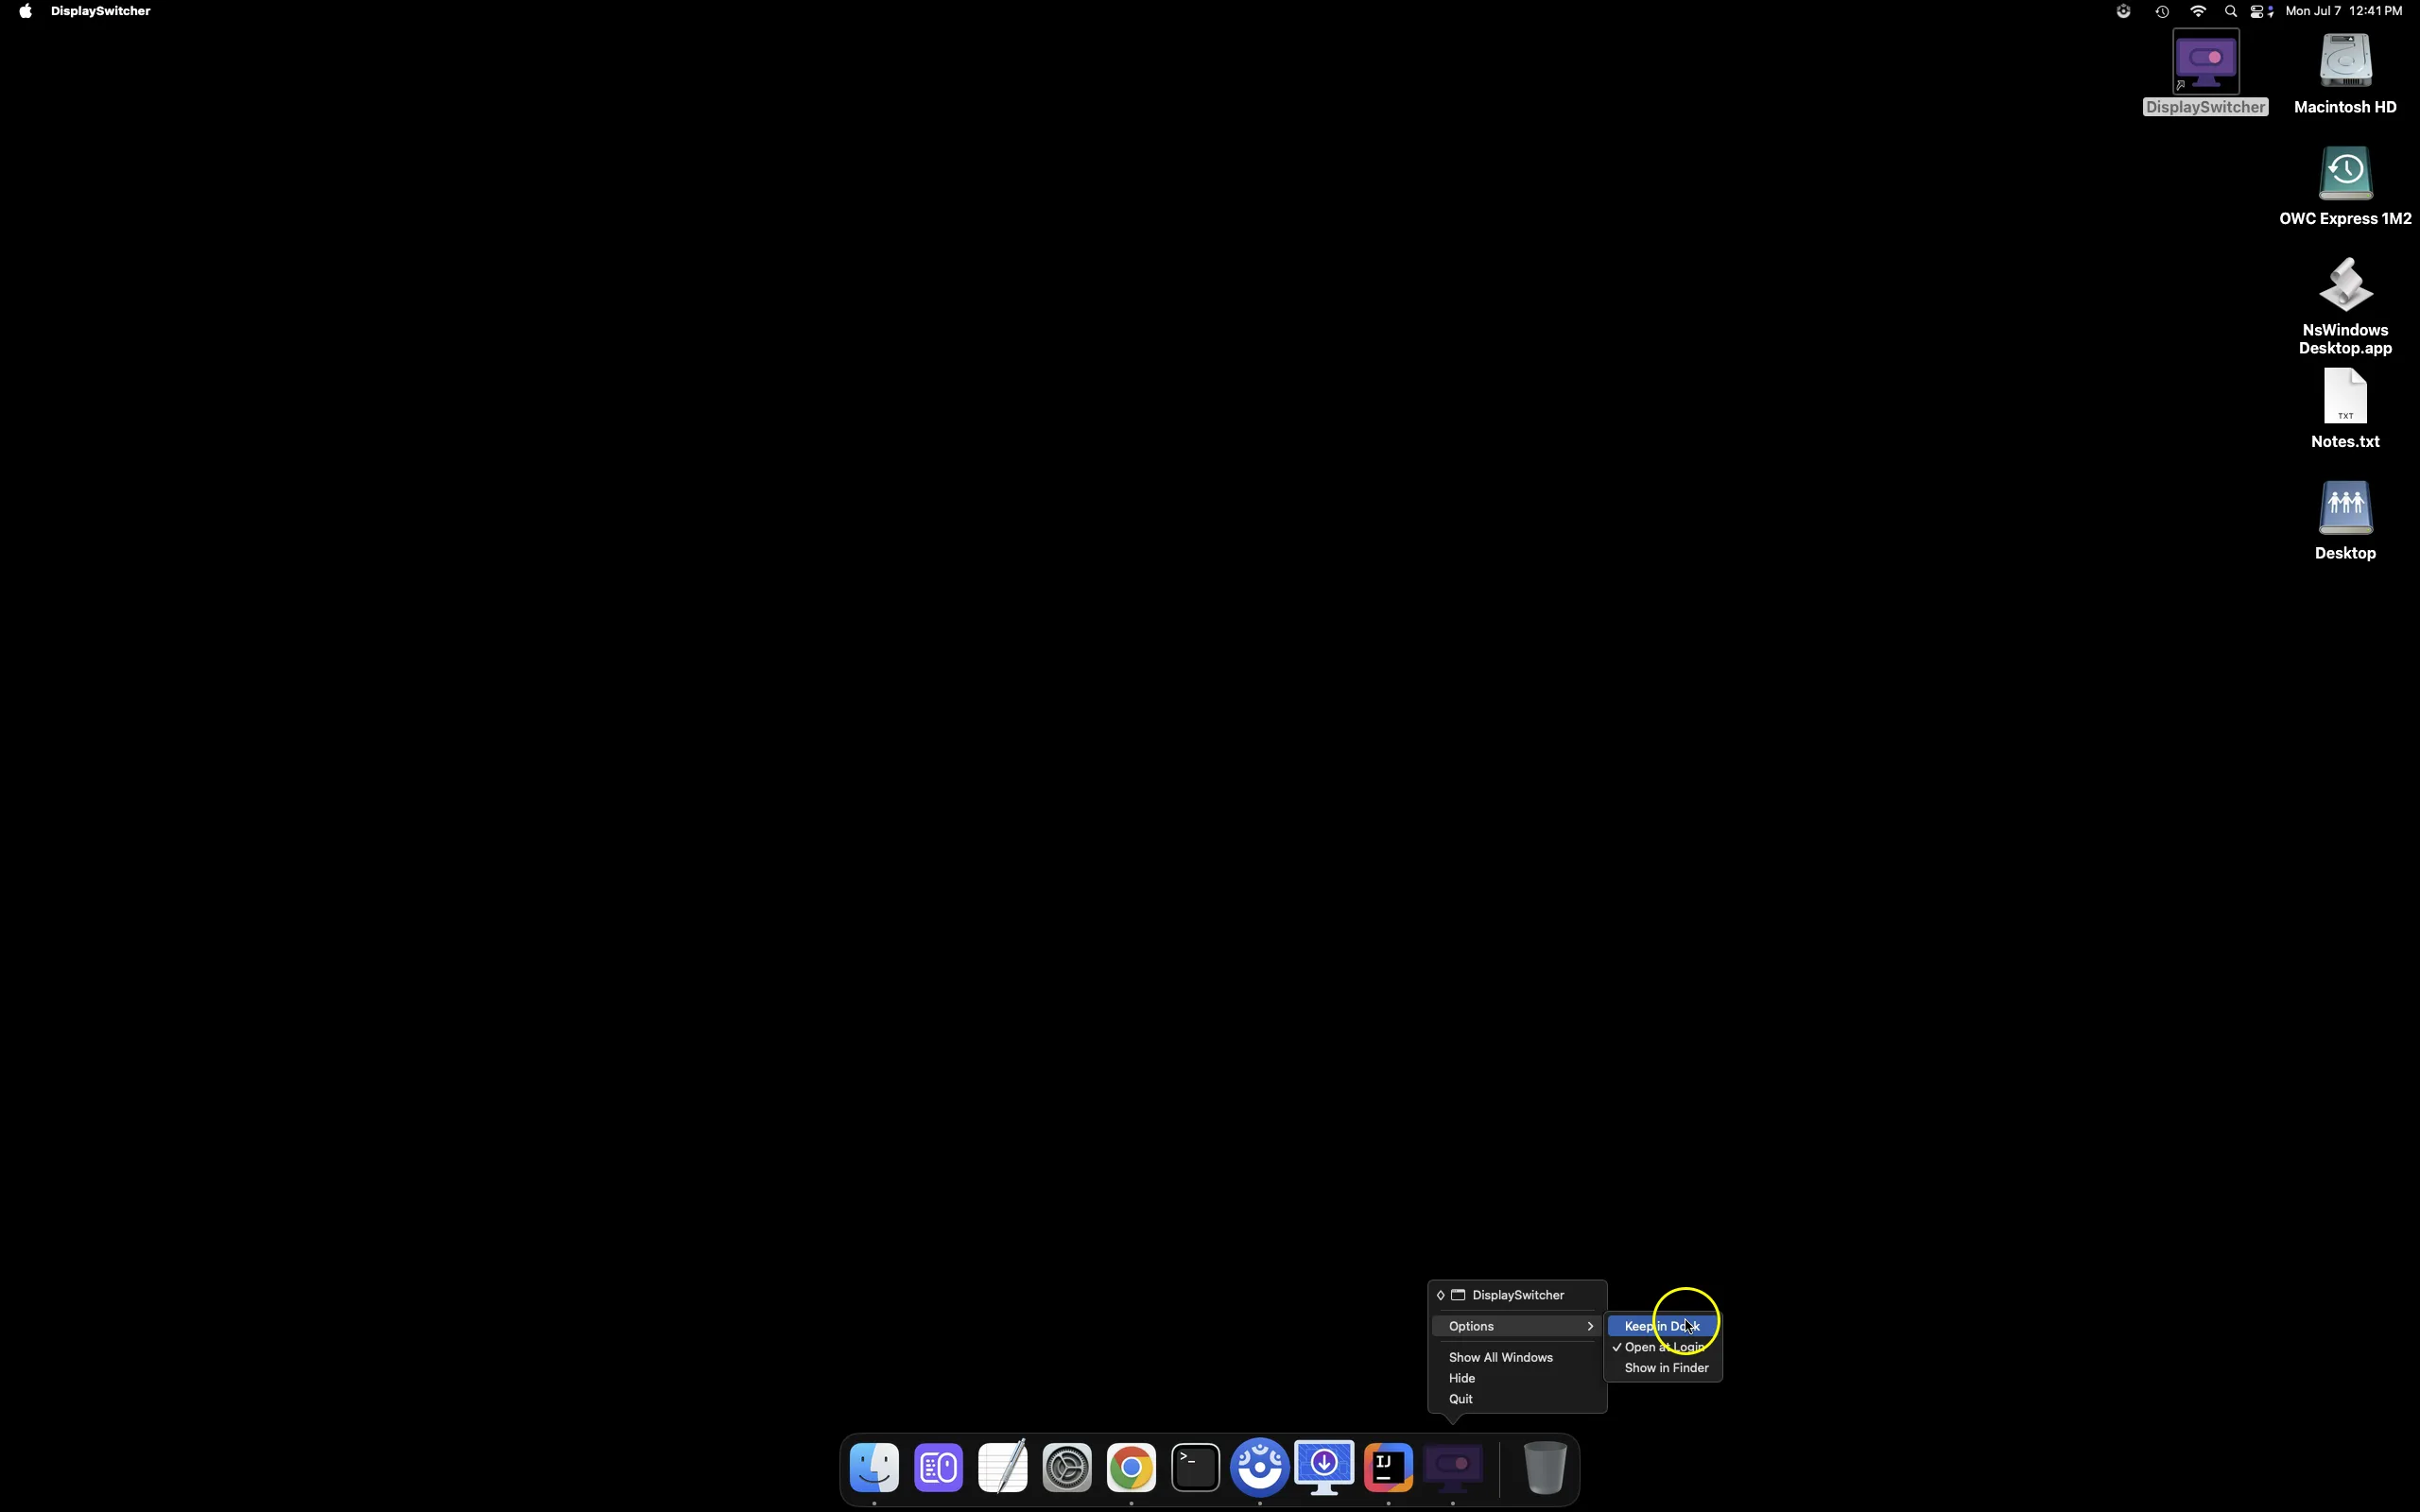
Find DisplaySwitcher application icon on the Dock, right click it, choose Options > Keep in Dock from the menu.
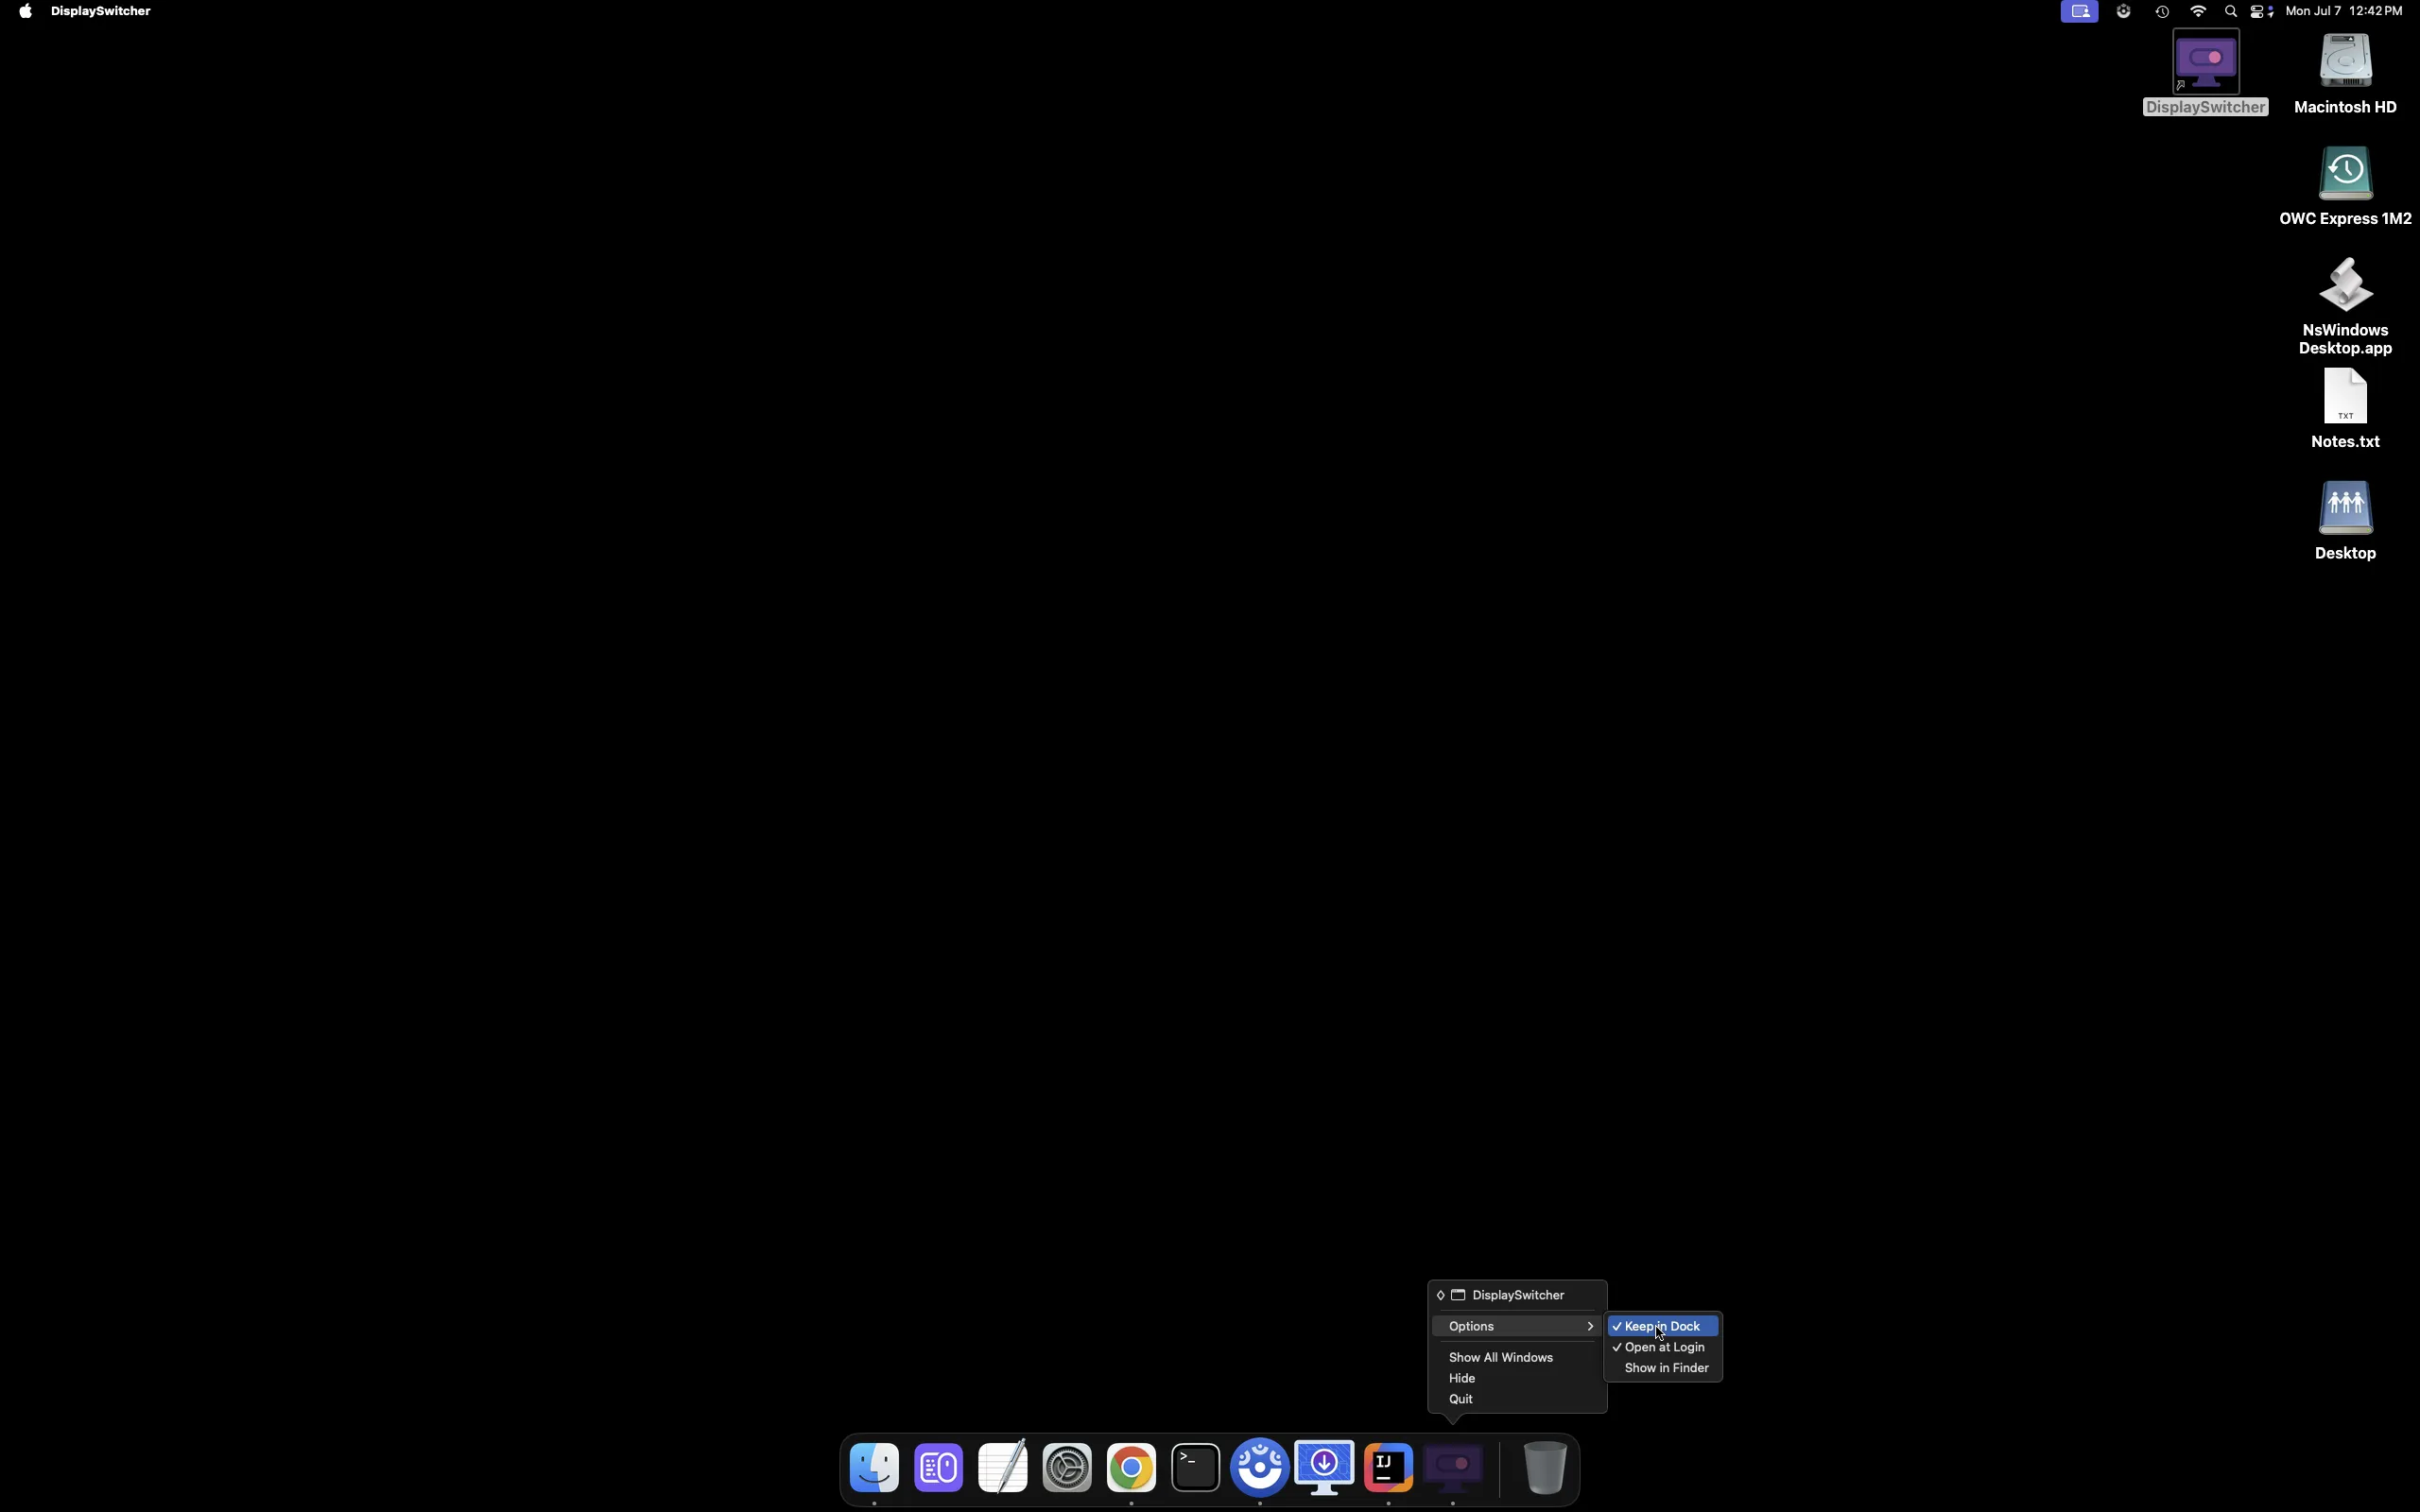
If you want to remove it from the Dock, then right click and remove the checkmark from Options > Keep in Dock.
Enable/Disable Open at Login
After running the installer, DisplaySwitcher is automatically set to run when you logon to Mac. You may disable that in Mac Settings.
Note that if you uninstall and reinstall, the last state you made to enable/disable of open at login is NOT preserved by macOS and you will have to manually disable it again, if you want it disabled.
Read instructions below, or watch this demo video.
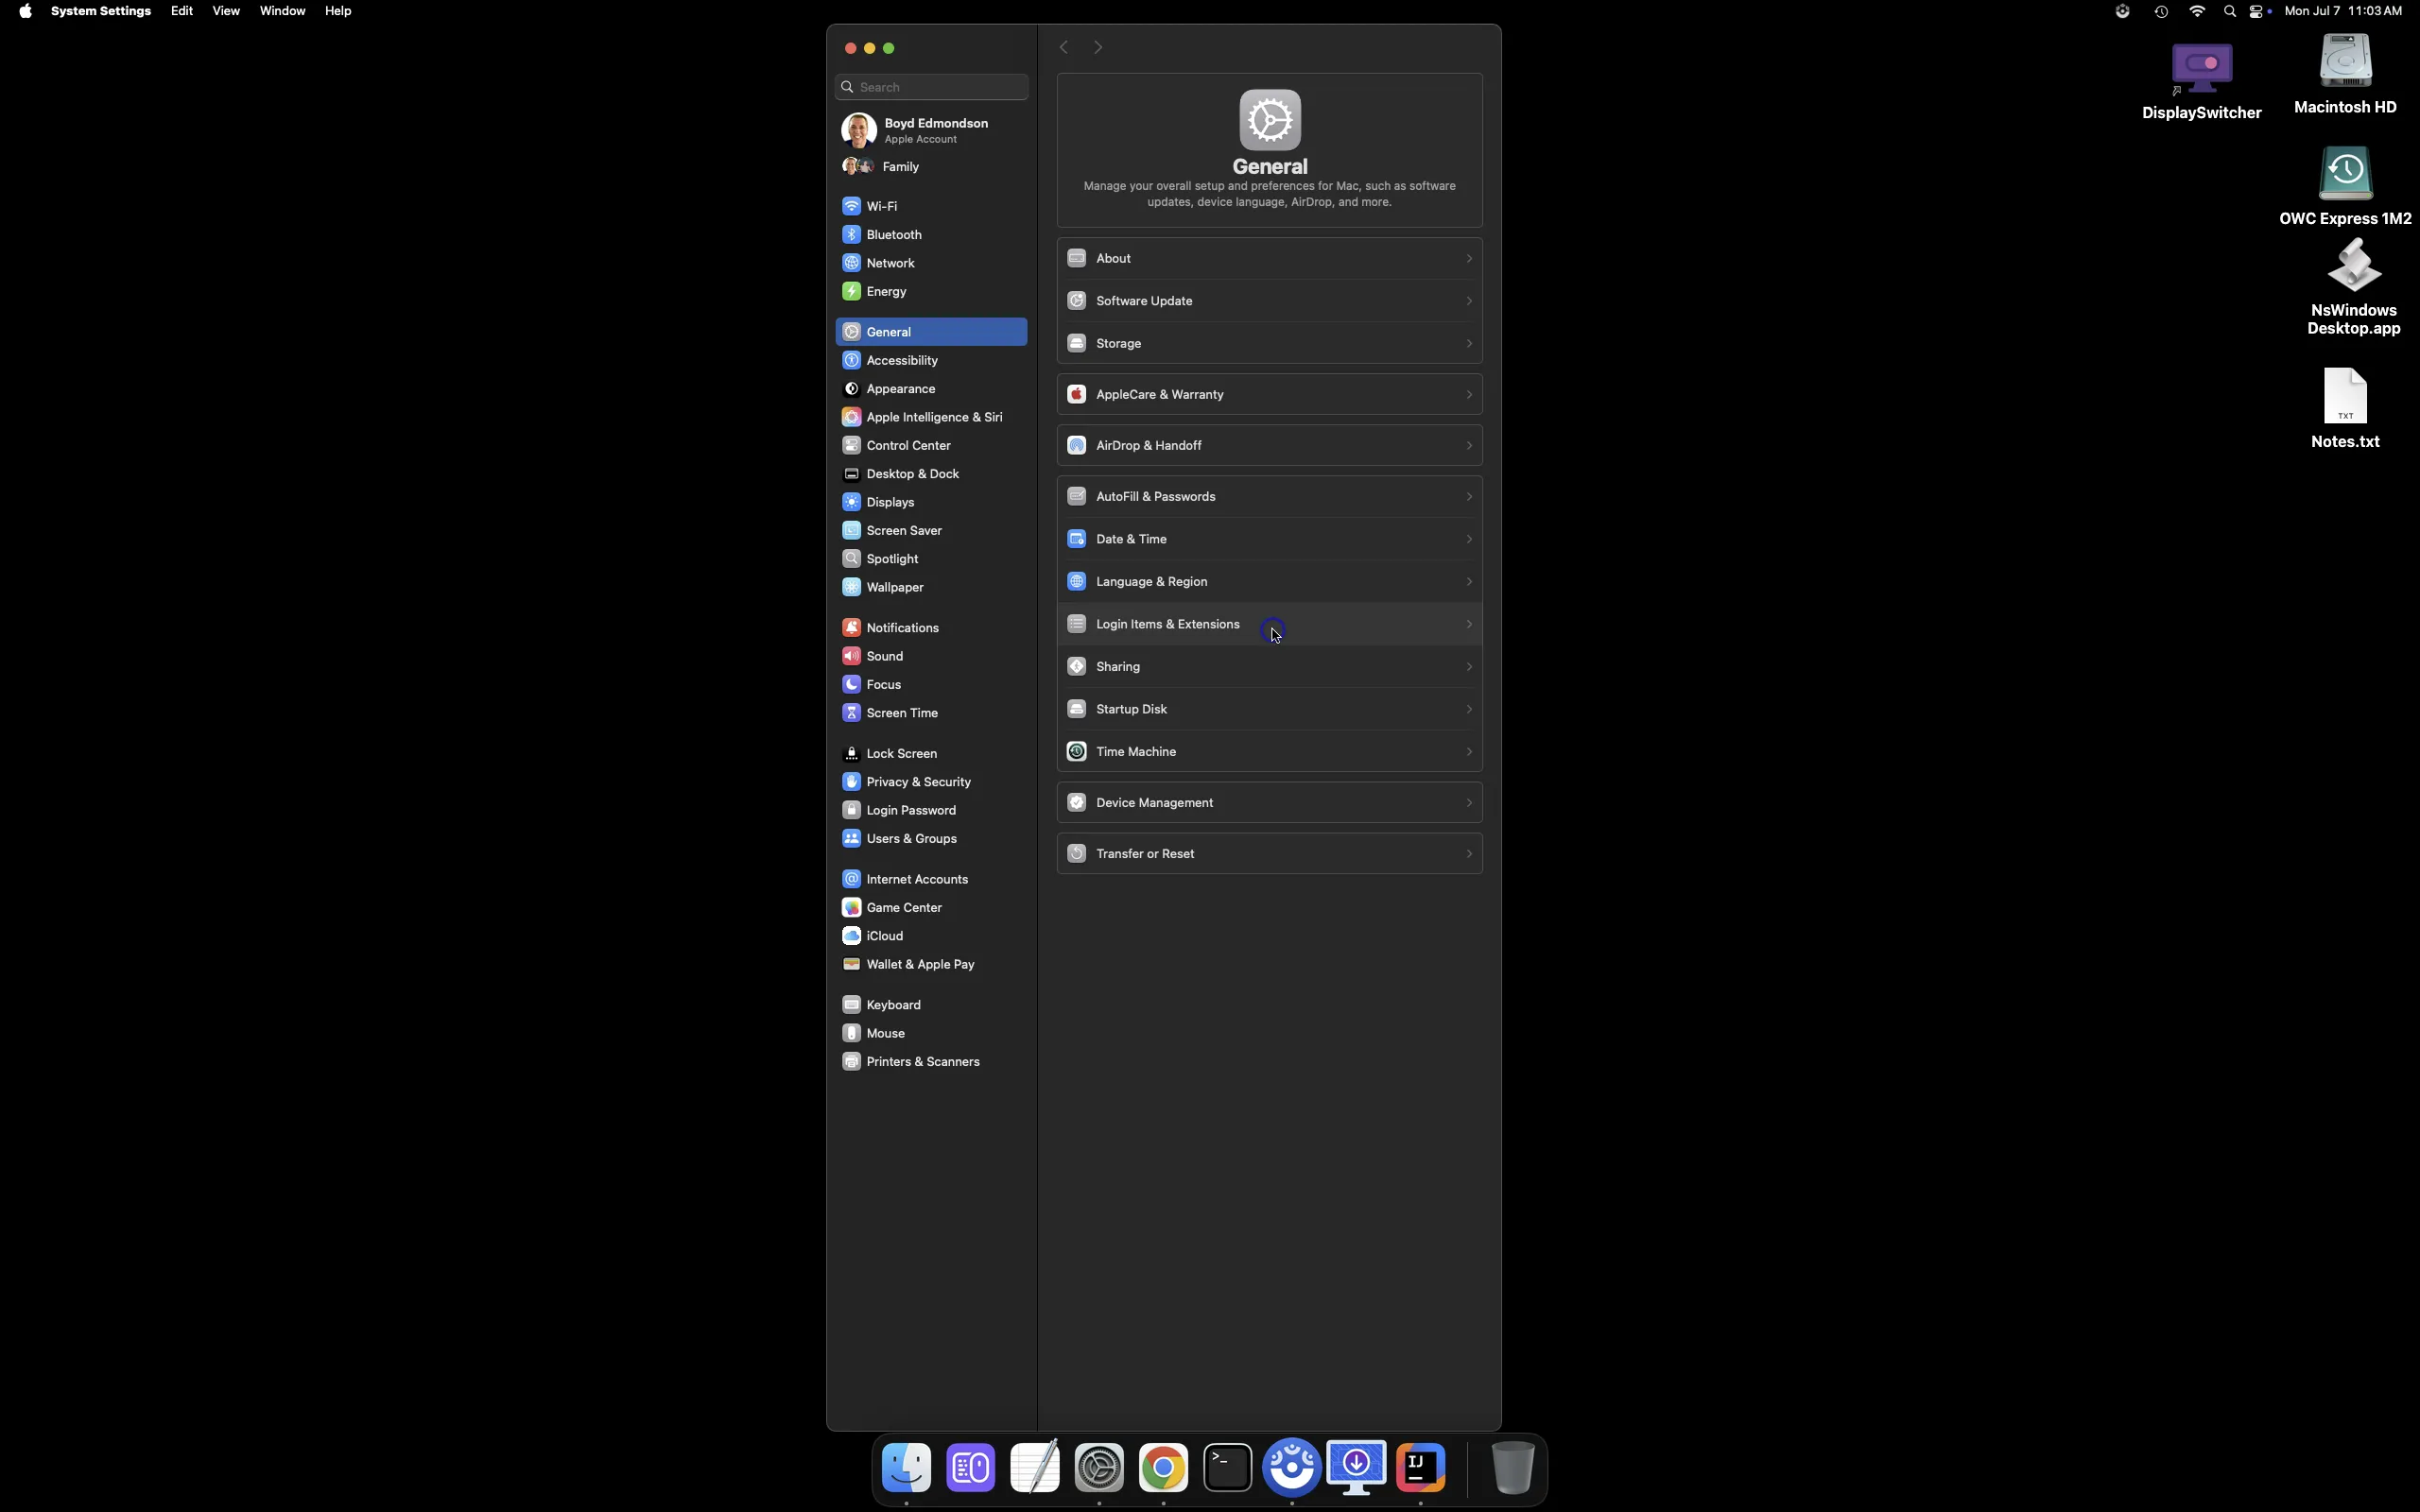
Open macOS Settings > General > Login Items & Extensions.
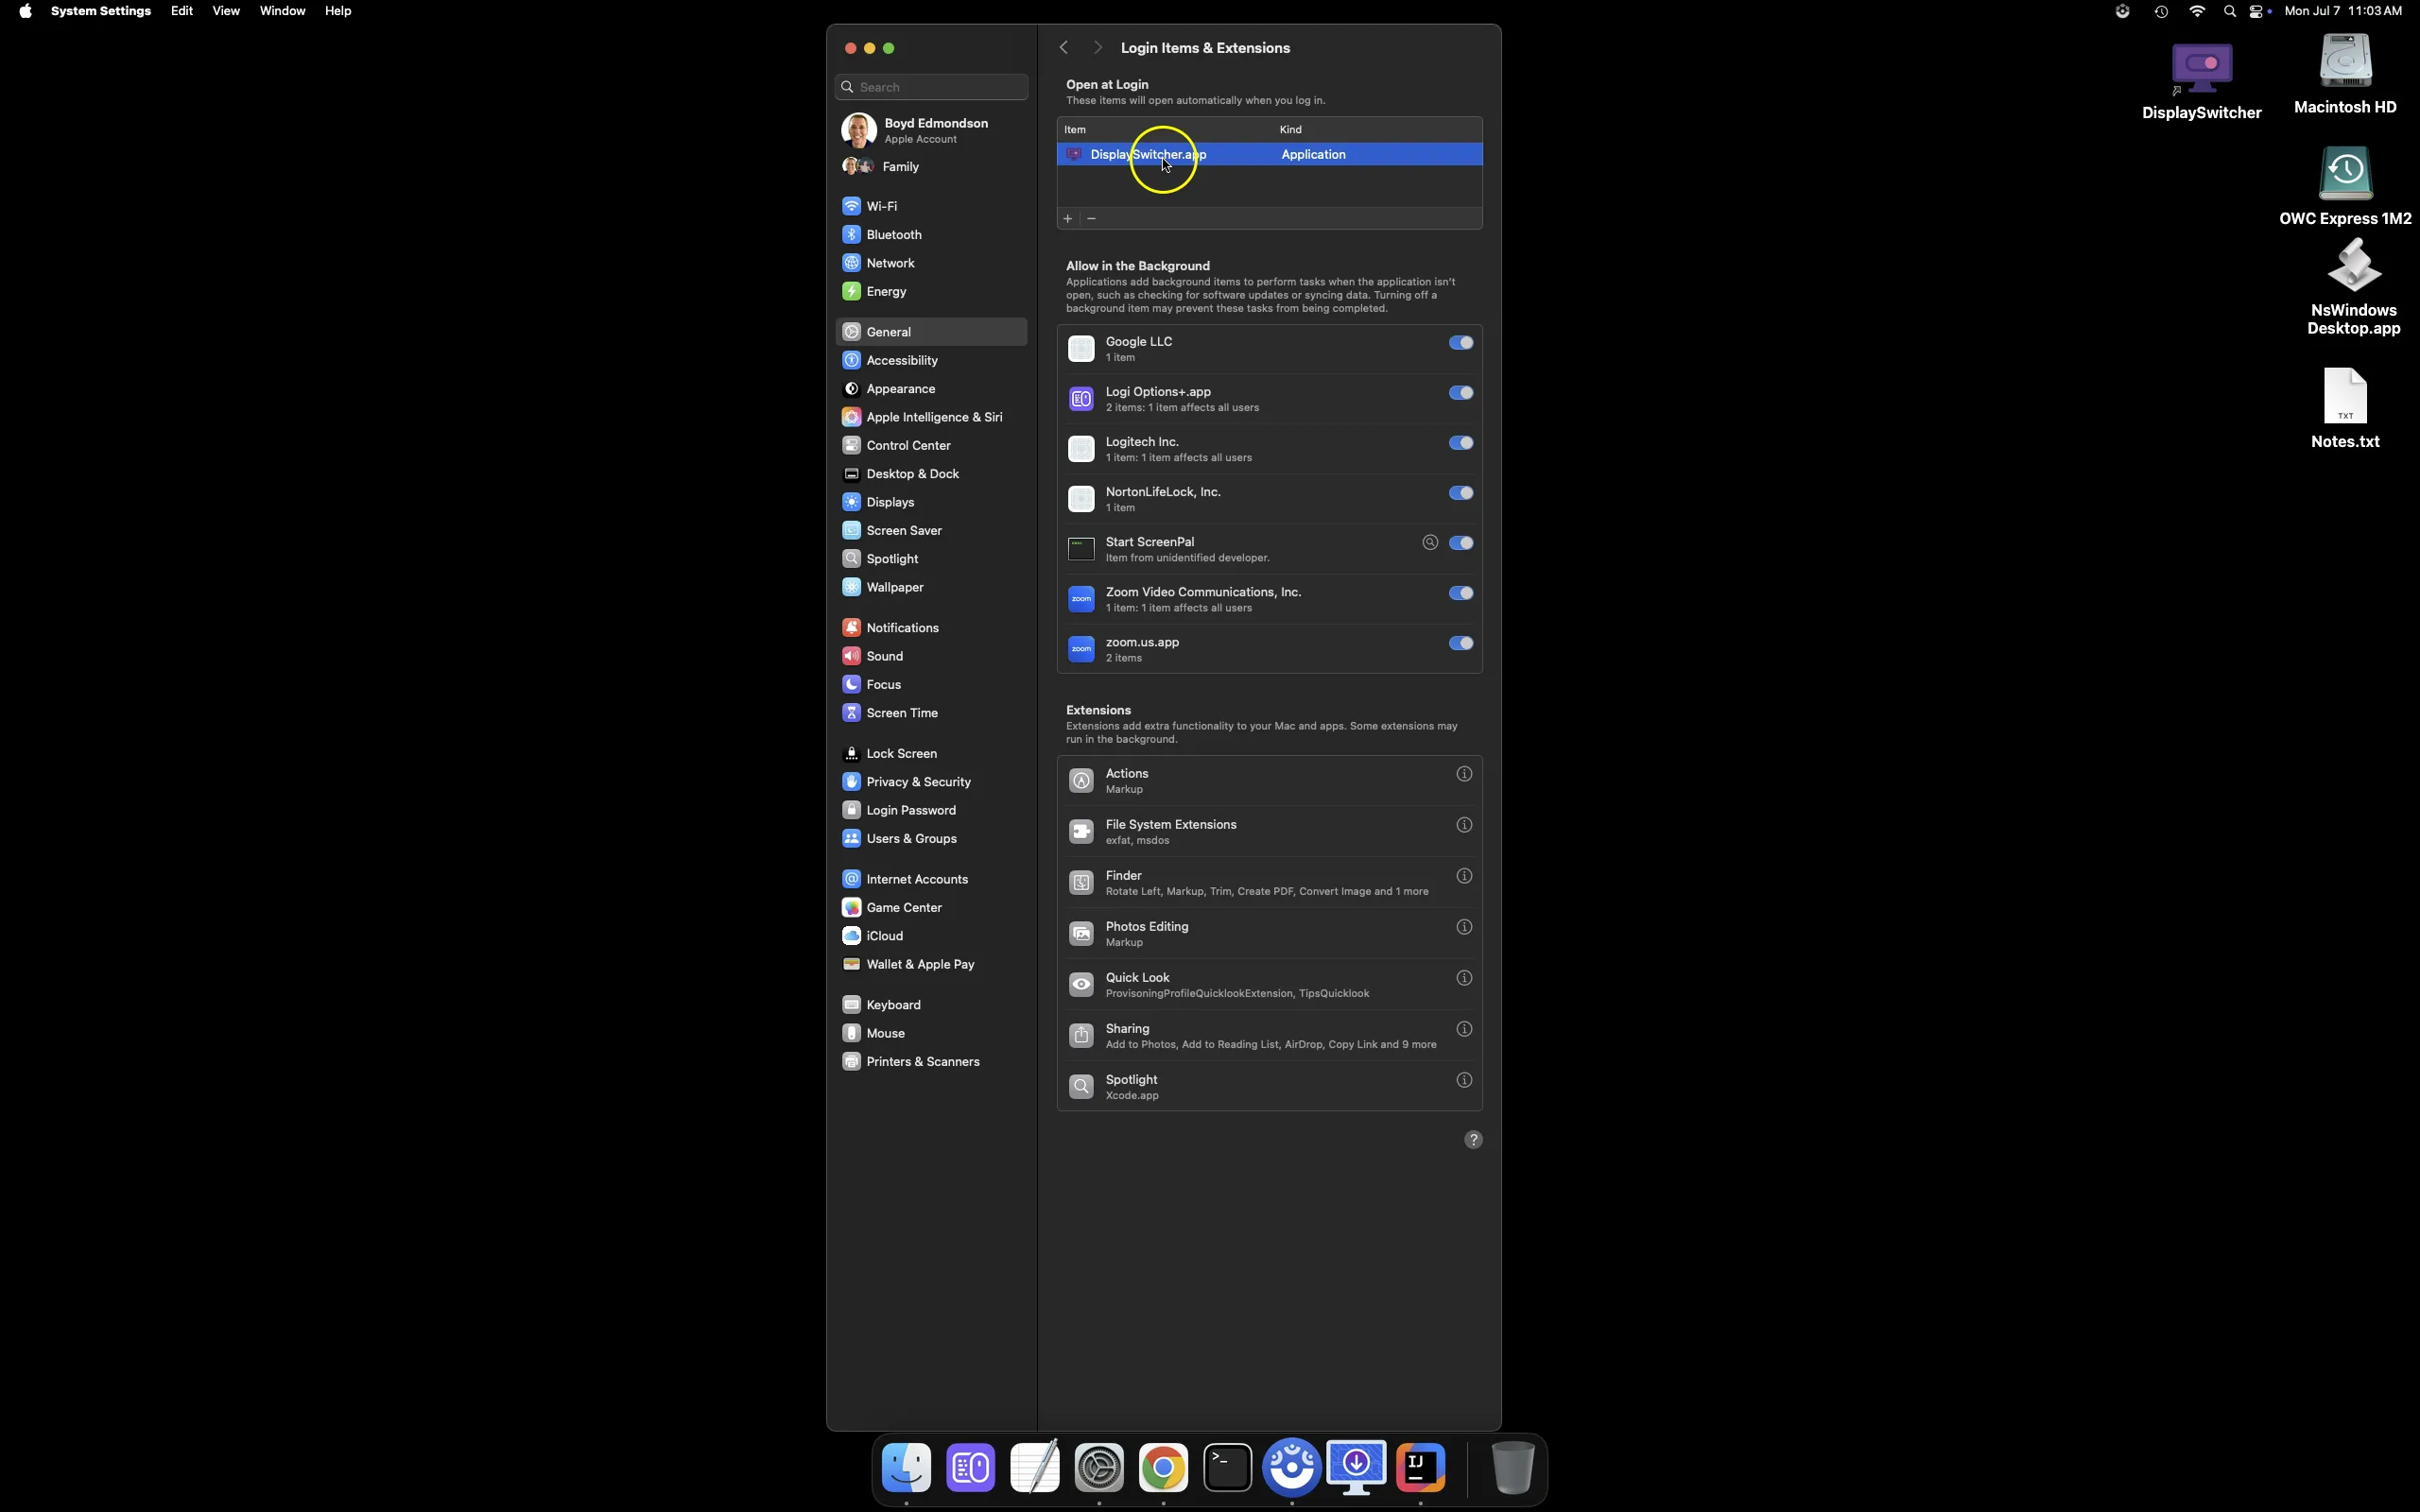
Find DisplaySwitcher.app in Open at Login and select it.
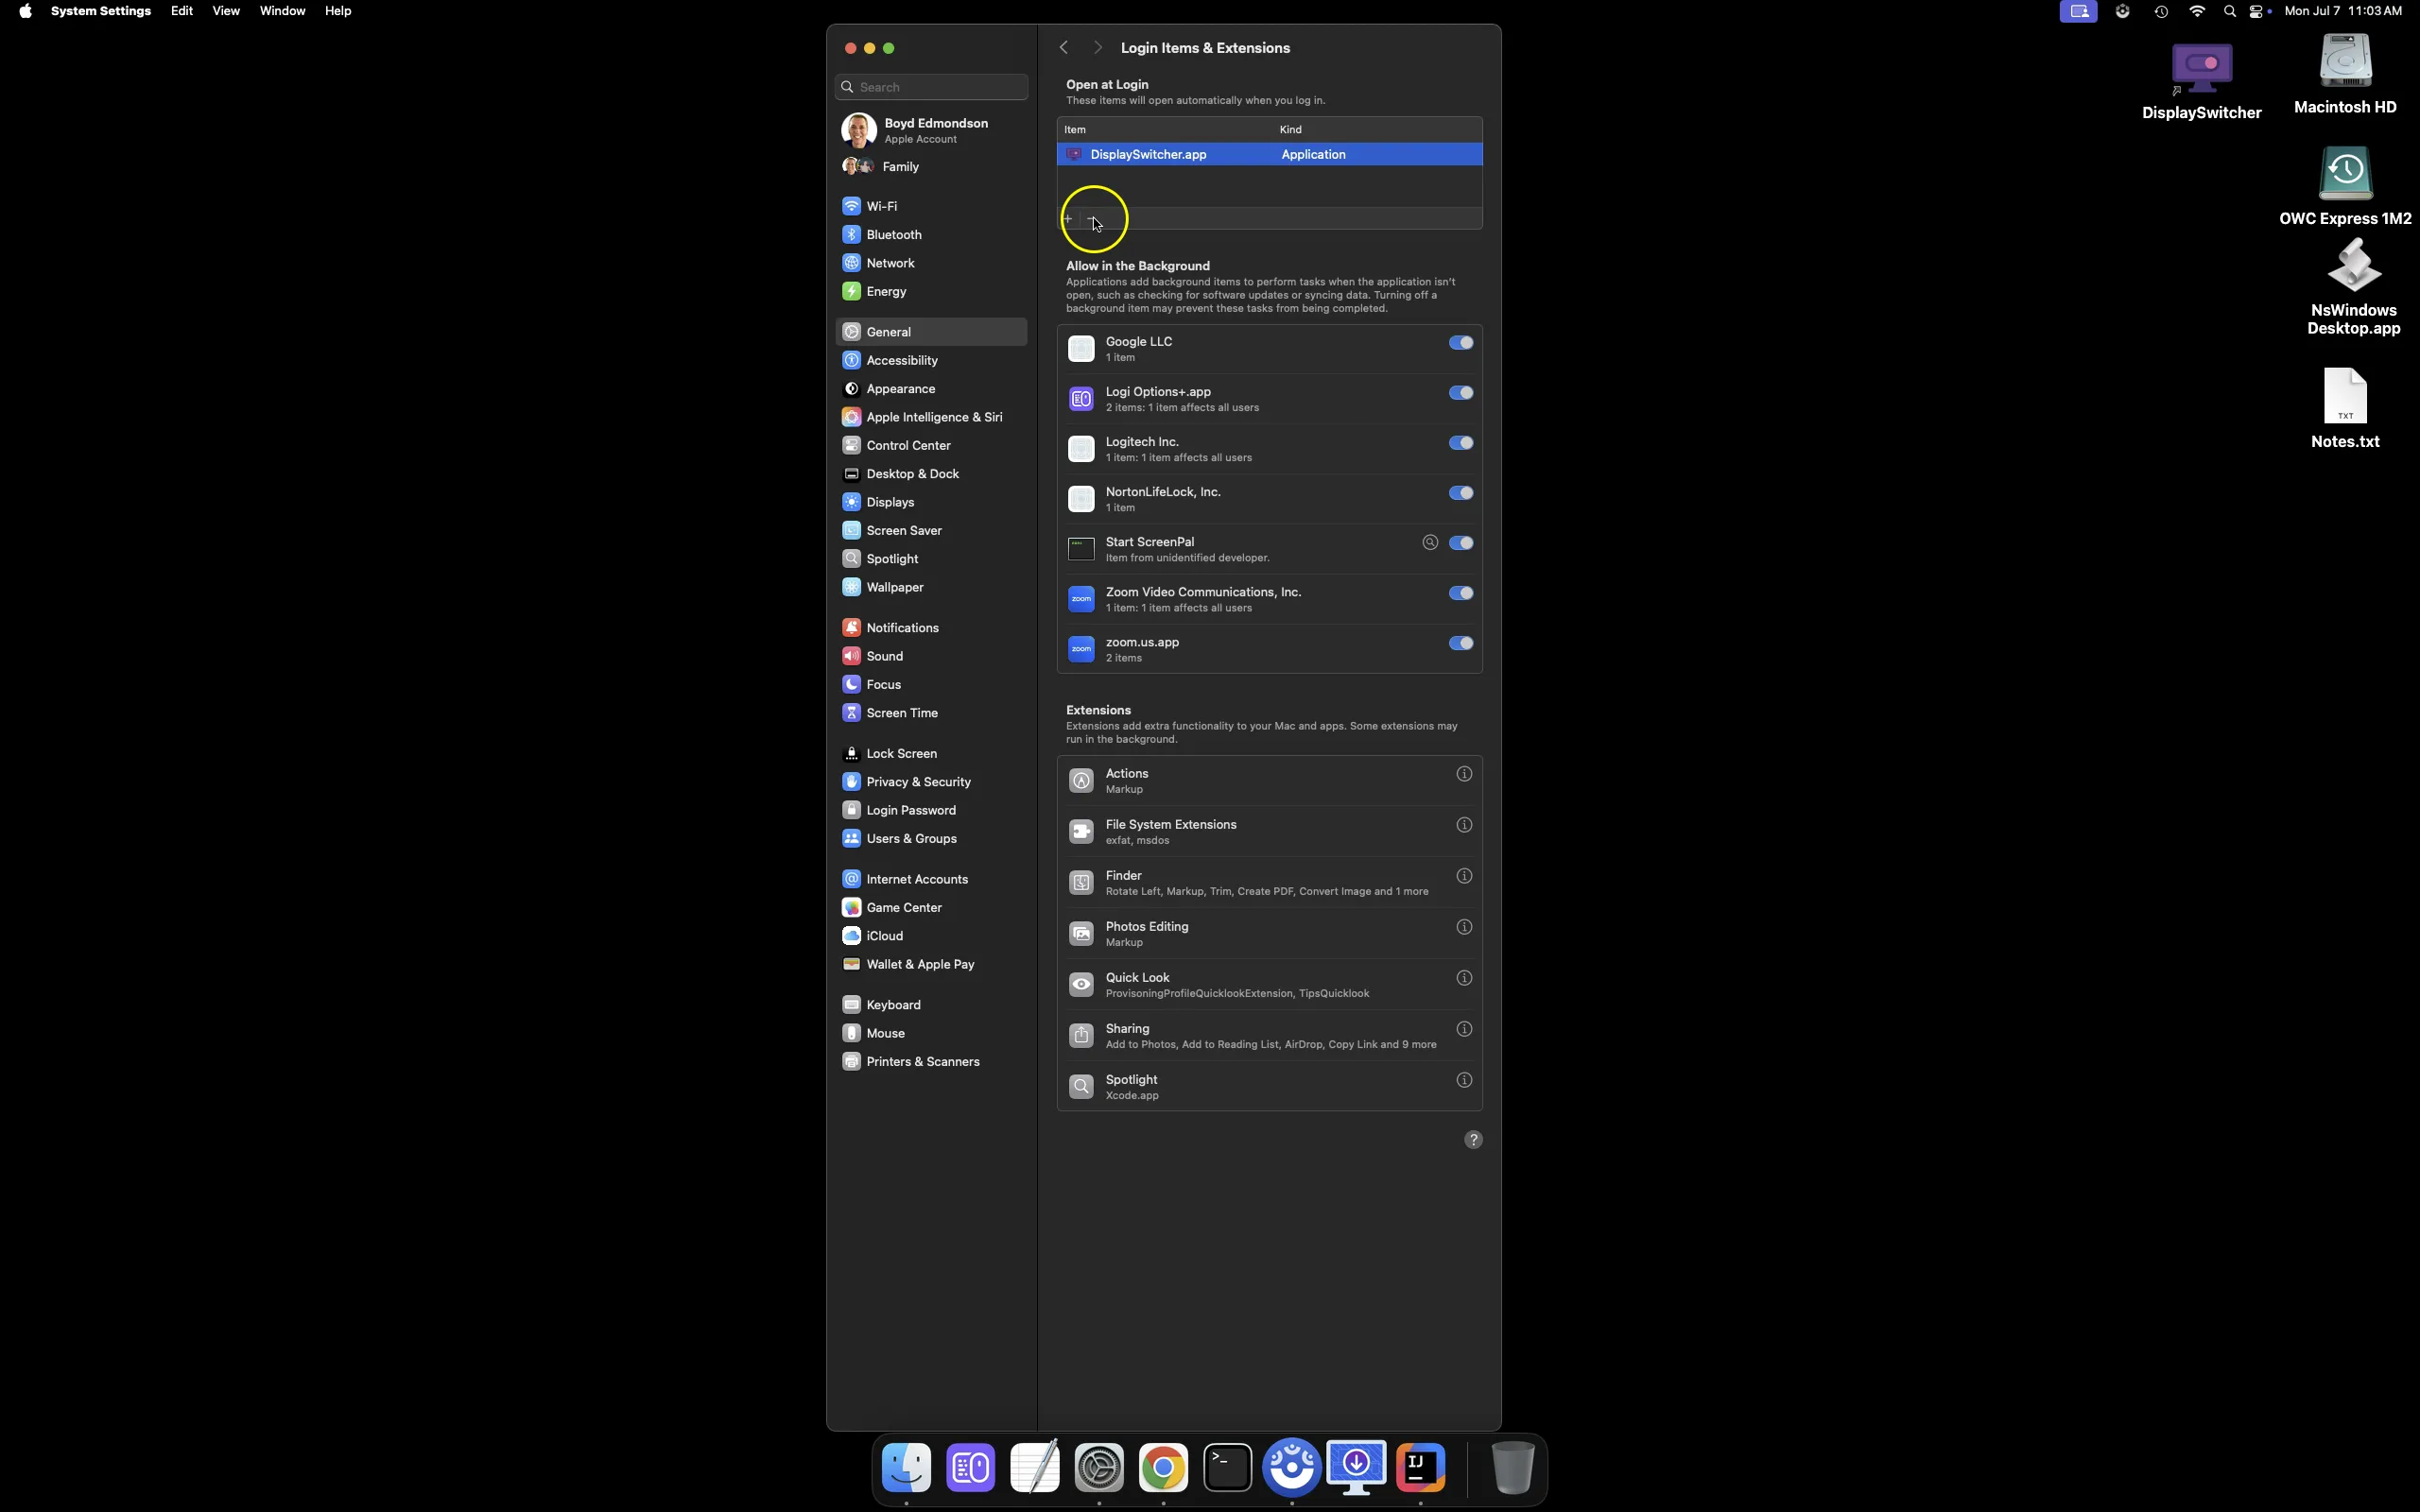
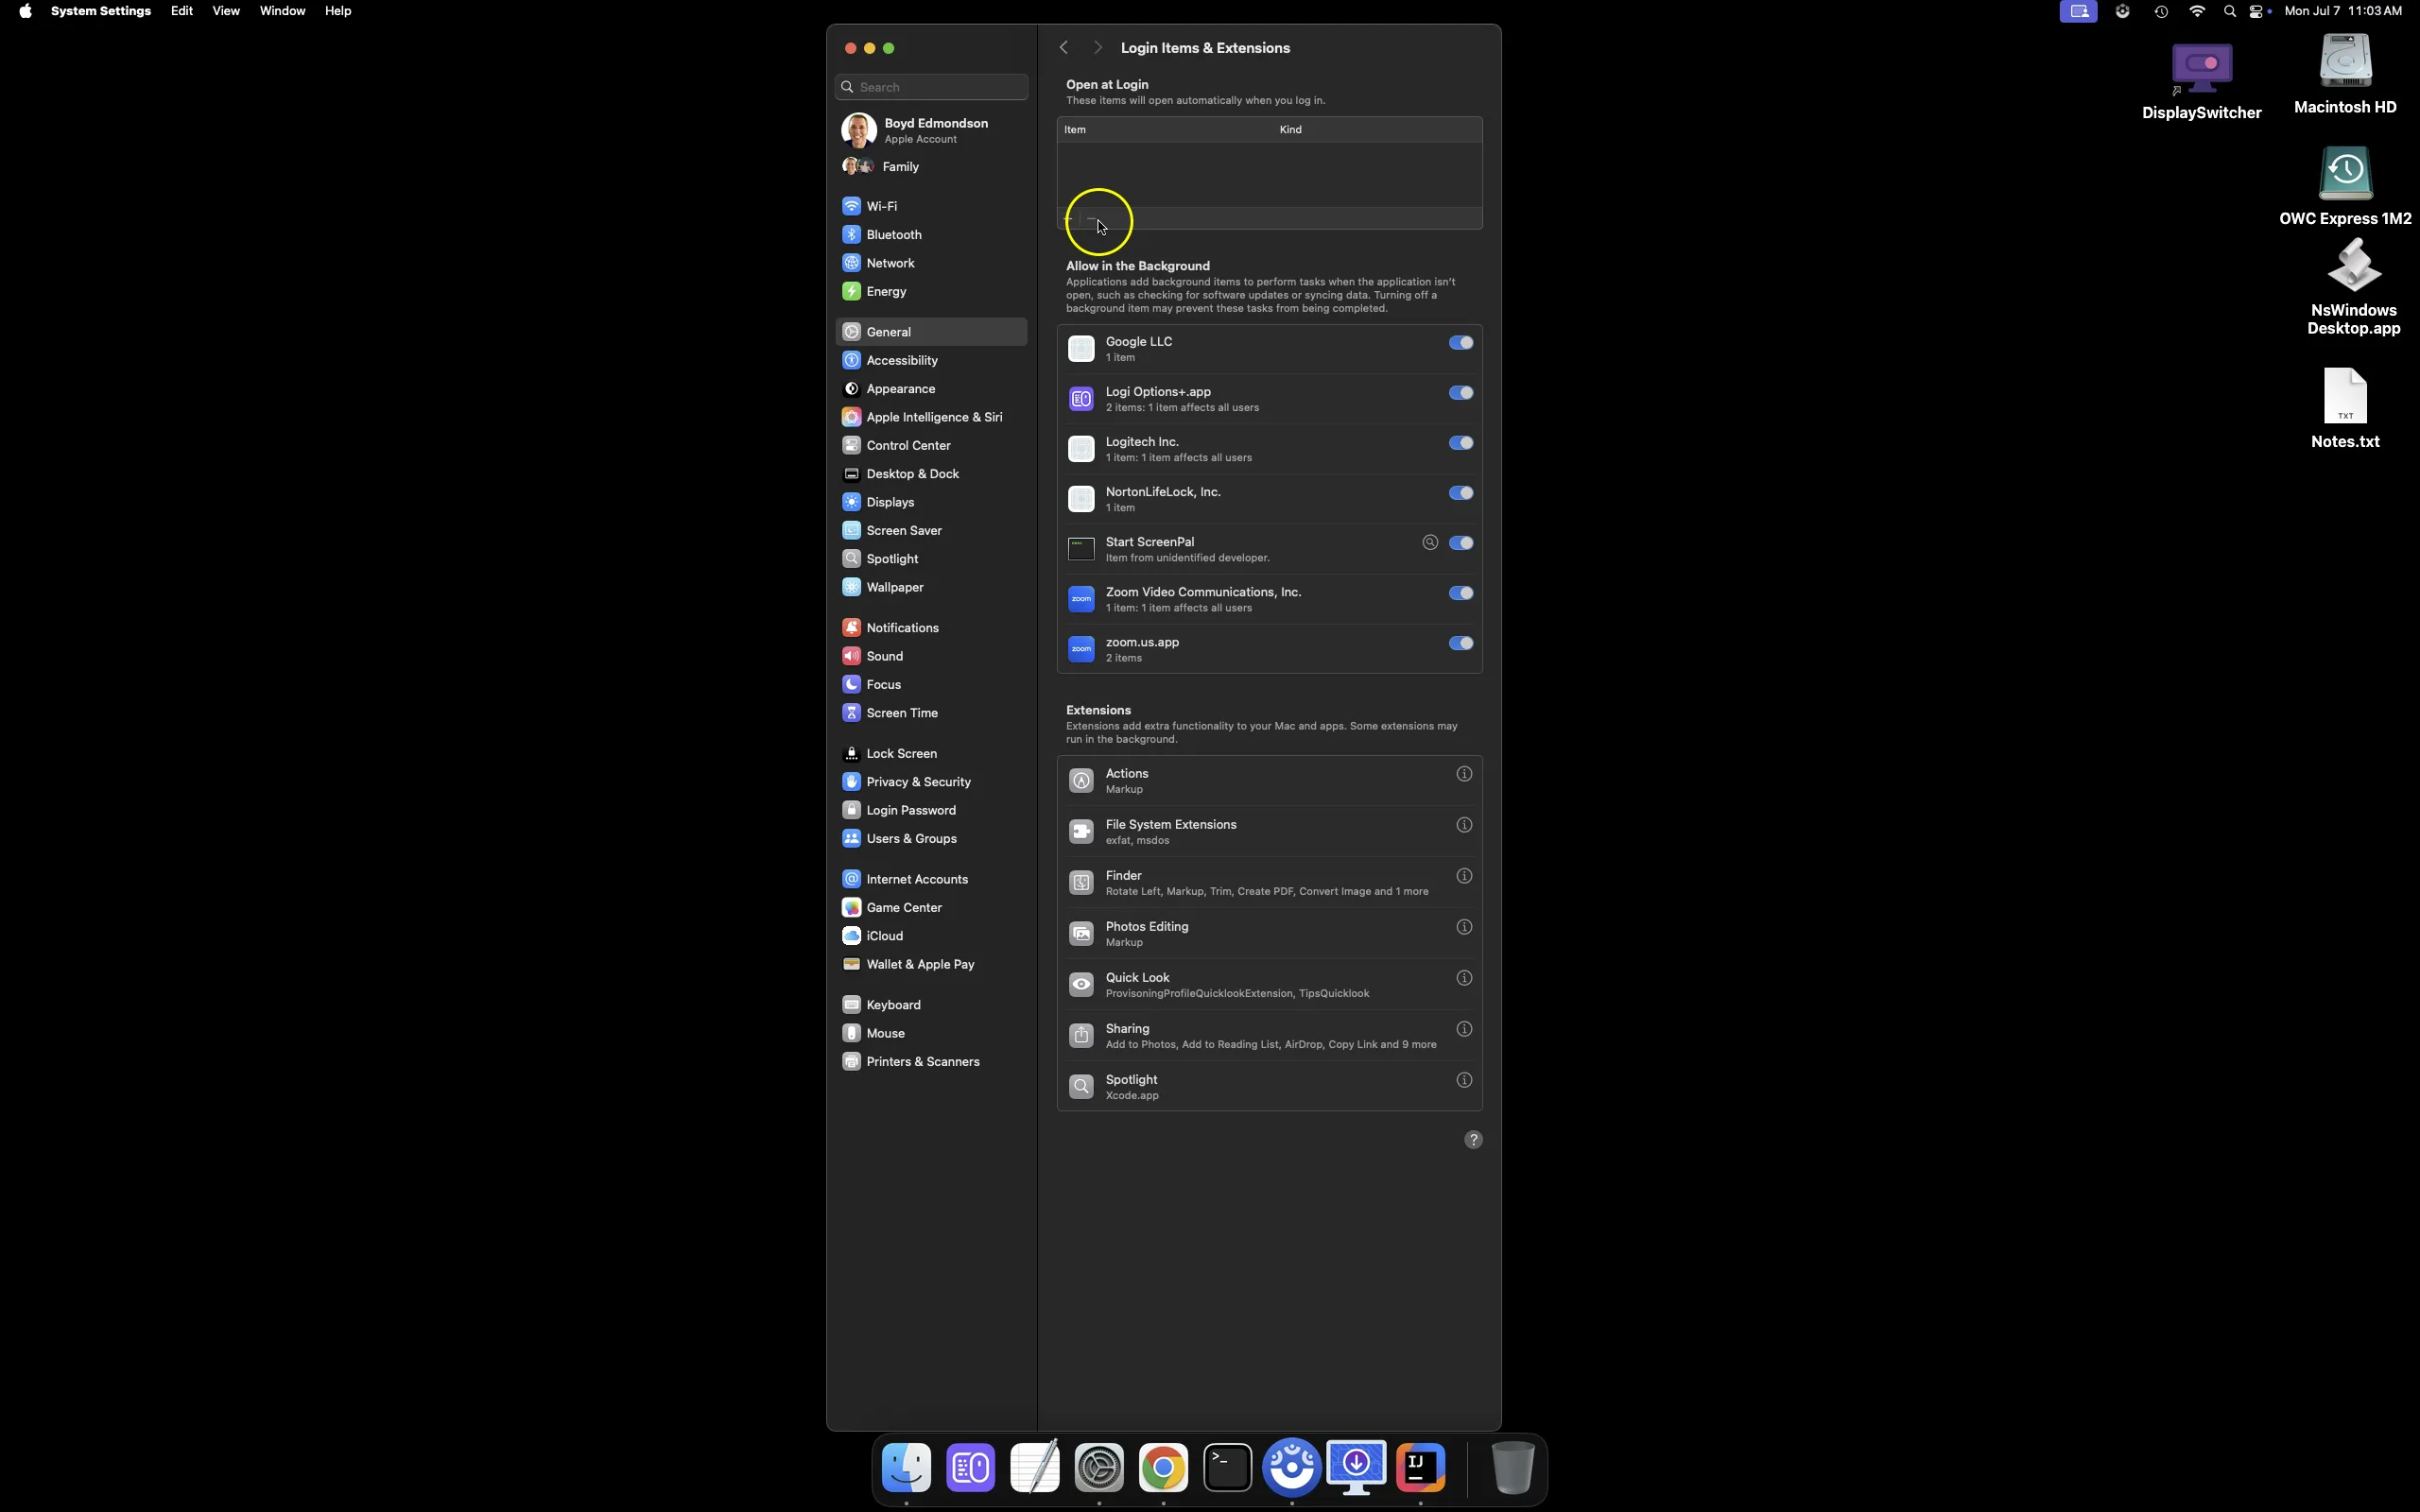
Click the small negative sign symbol - to remove DisplaySwitcher.app from Open at Login.
Windows
Requirements
DisplaySwitcher requires 64-bit Windows 10 or later on x86_64 architecture.
Monitor with DDC/CI Support [What is DDC/CI?]
- DisplaySwitcher only works with external monitors that support DDC/CI over the active connection (HDMI, DisplayPort, USB-C, etc.)
- Internal laptop displays are not supported
- Some monitors require DDC/CI to be enabled manually in their on-screen display (OSD) settings
- Common blockers:
- USB-to-HDMI adapters often block DDC/CI
- Some docking stations may interfere with DDC/CI signaling
- DisplayPort-to-HDMI converters are unreliable for DDC/CI
Uninstall
The installer automatically replaces previous installations, so you don't ever need to uninstall, else you want to stop using DisplaySwitcher.
Read instructions below, or watch this demo video.
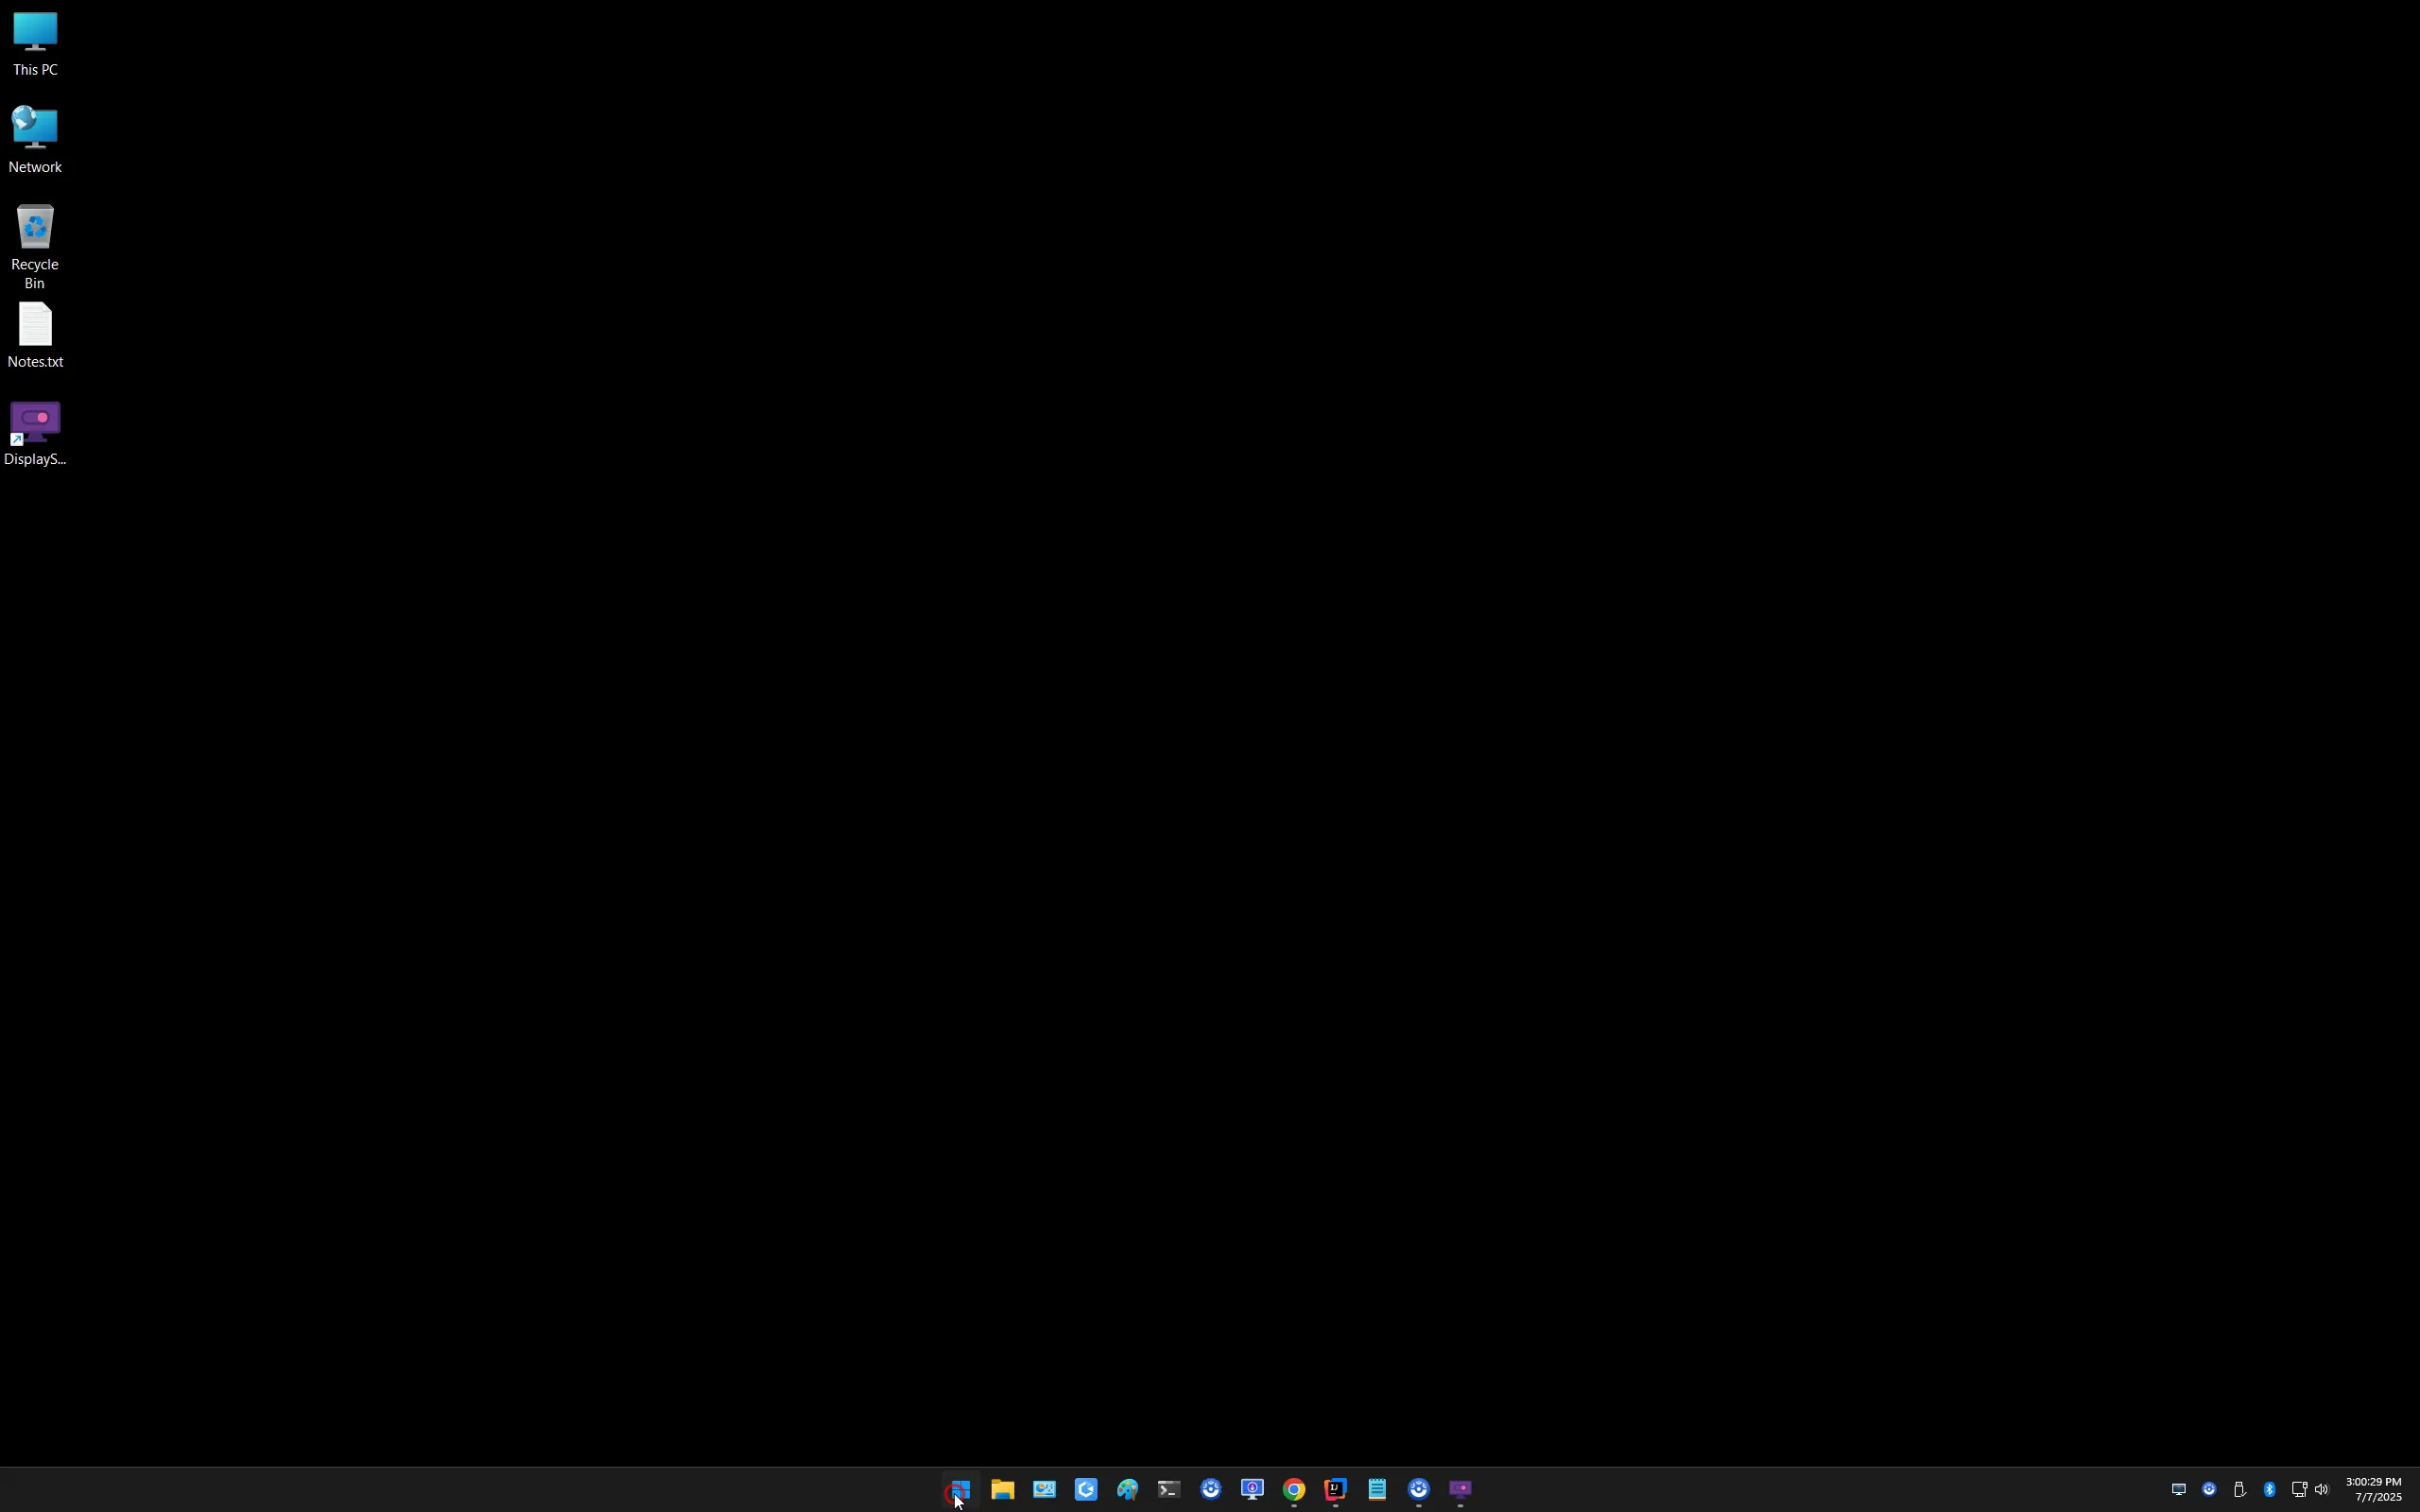
Click Windows Start button.
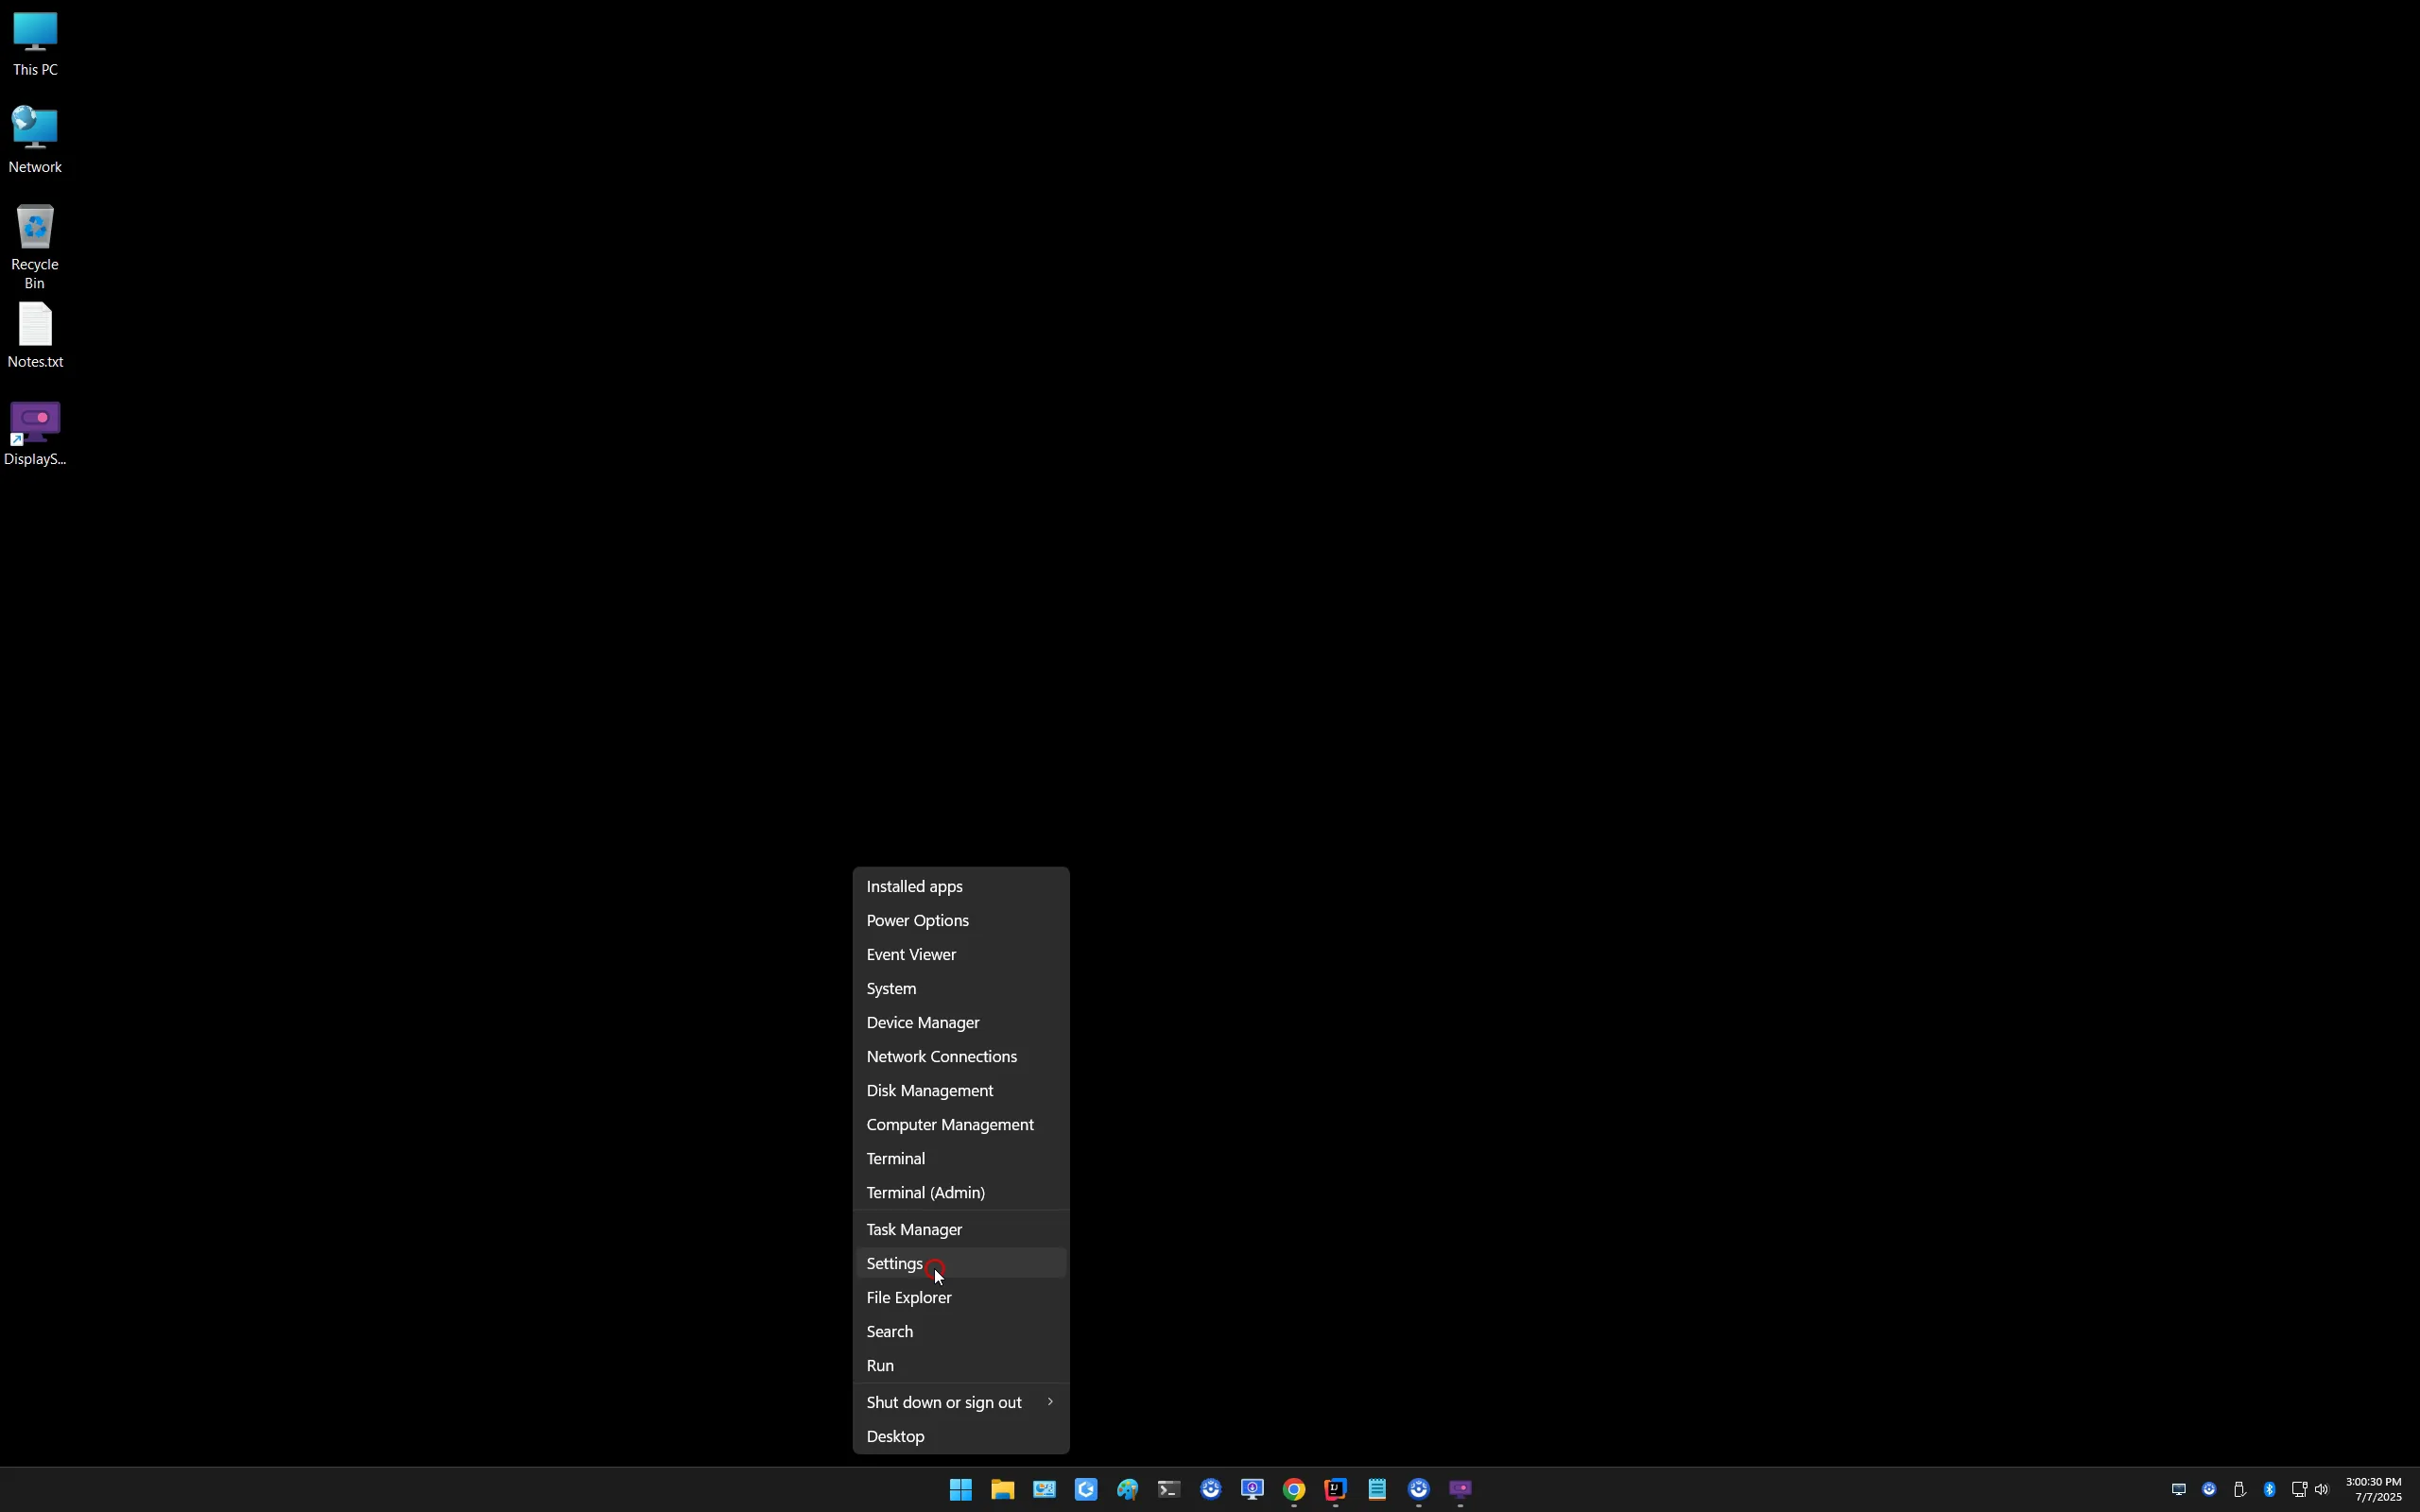
Select Settings from the menu.
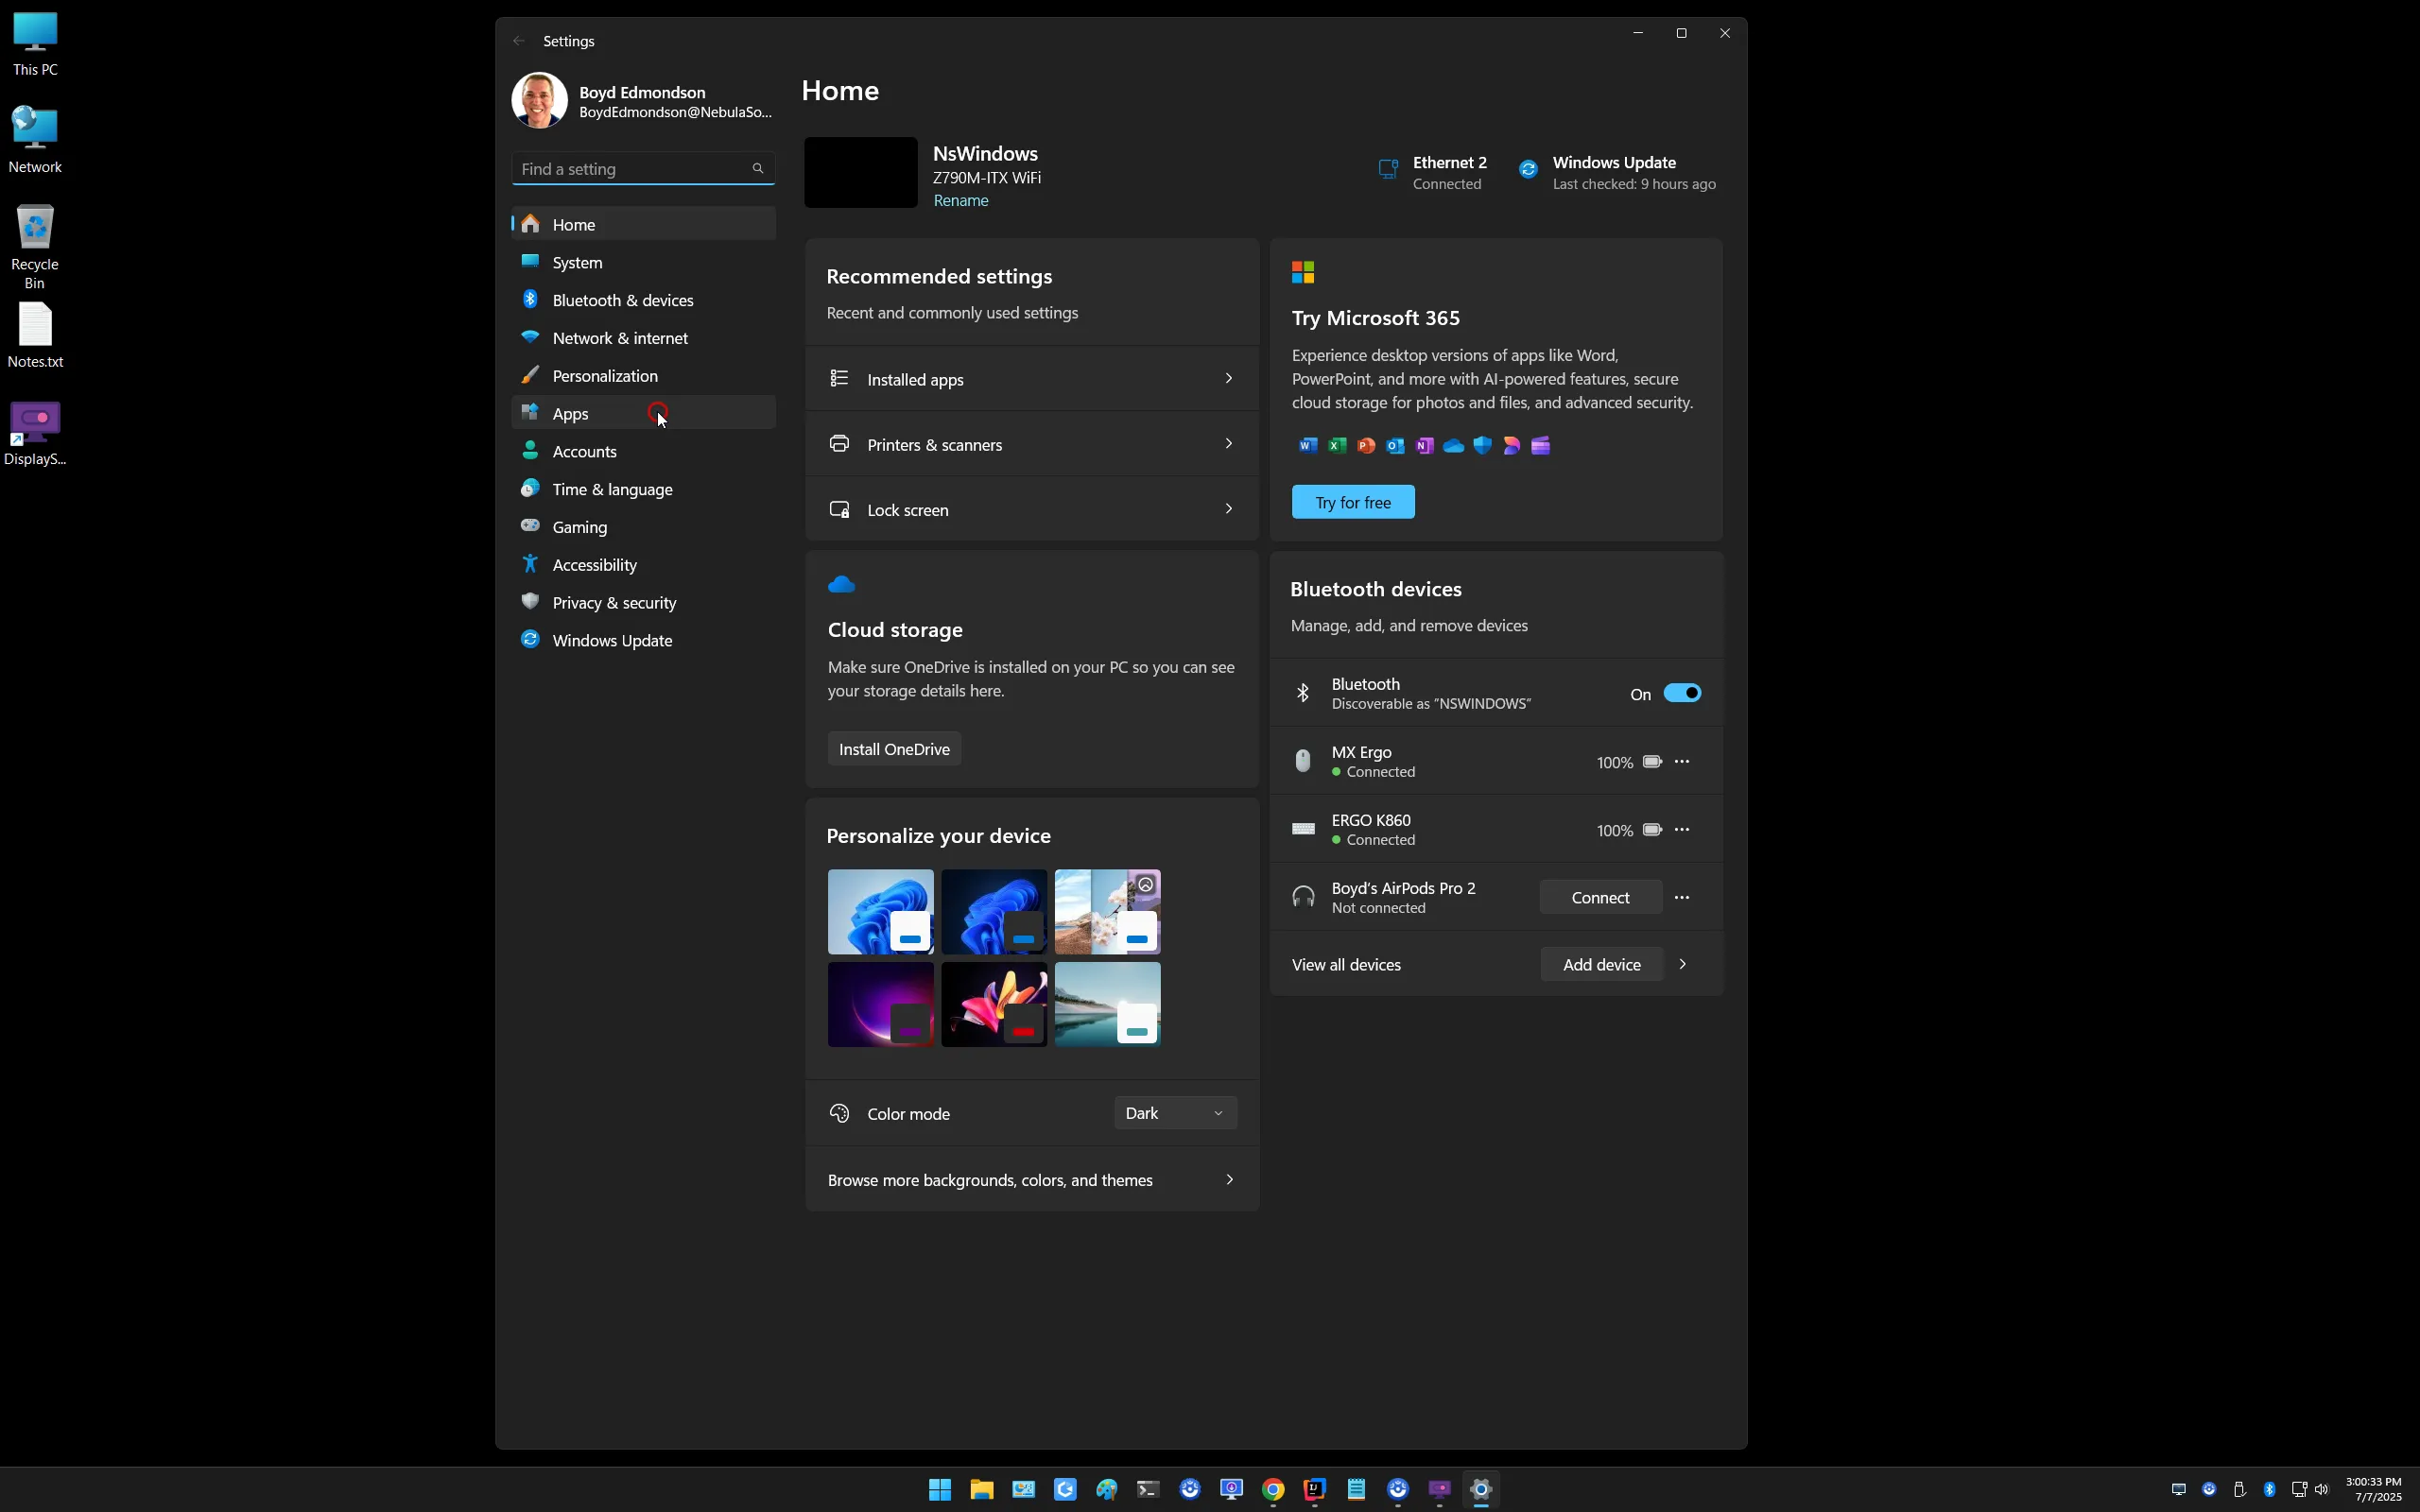
Select Apps.
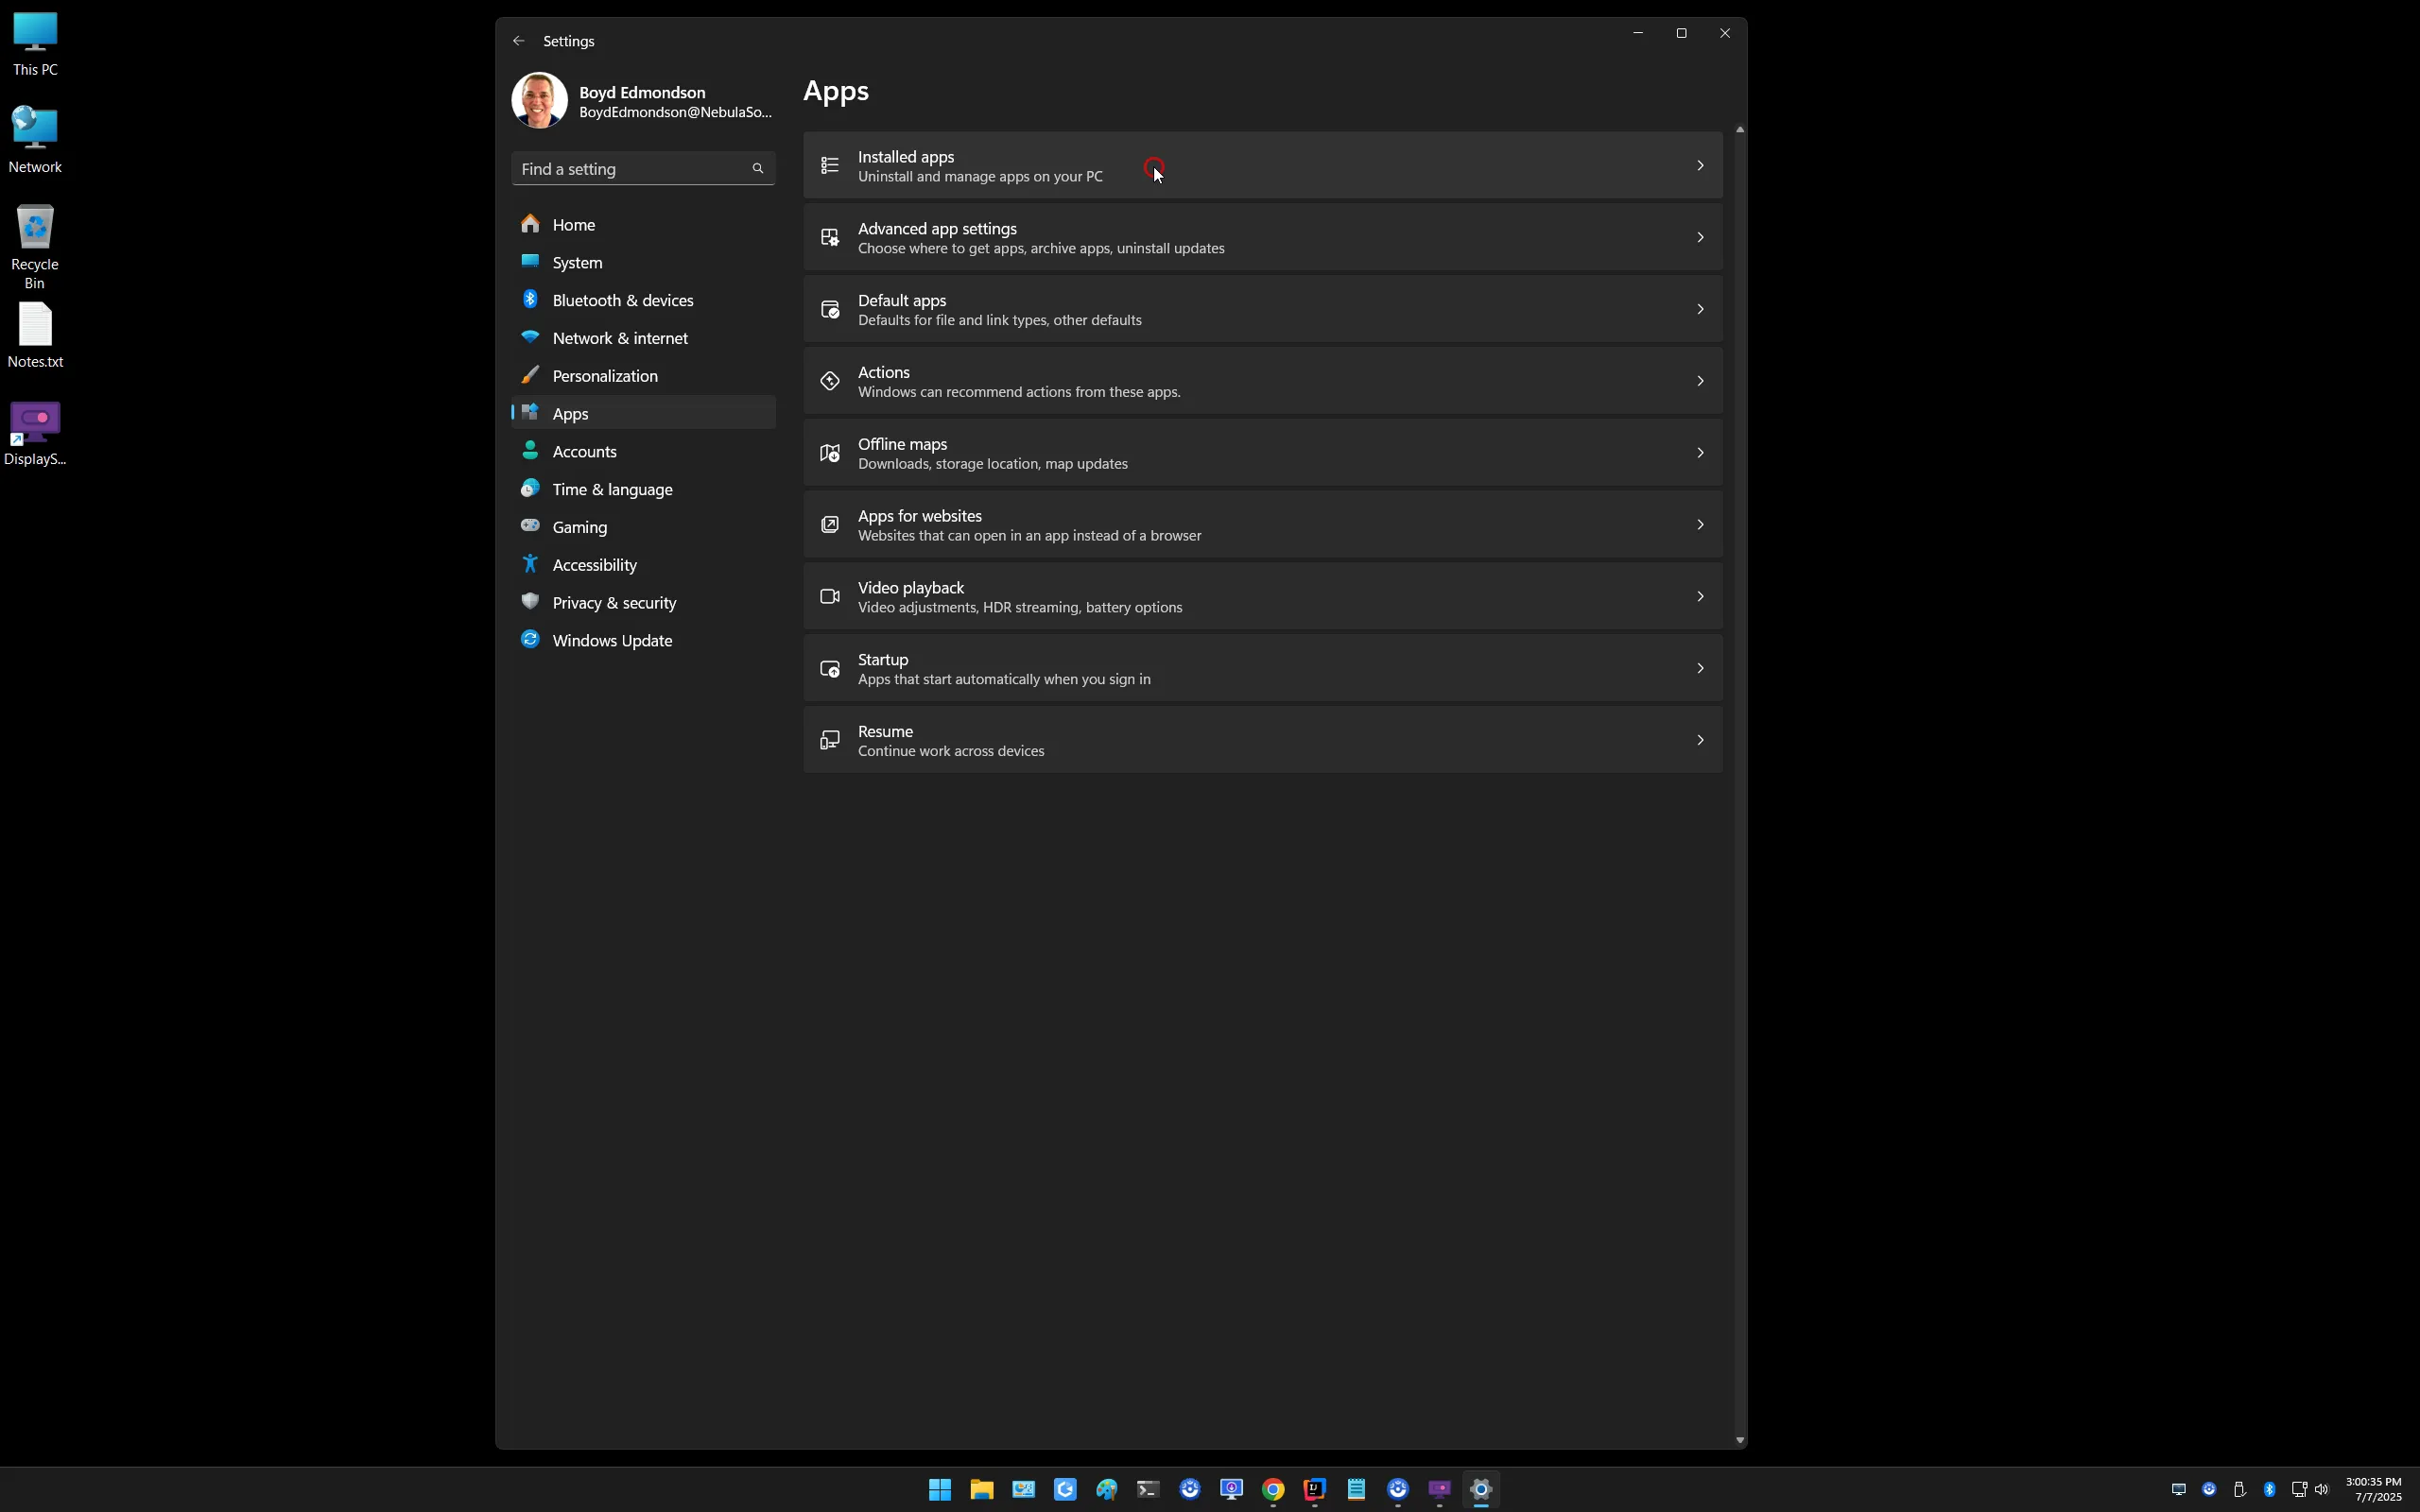
Select Installed Apps.
Click the ... menu to the right of the DisplaySwitcher entry.
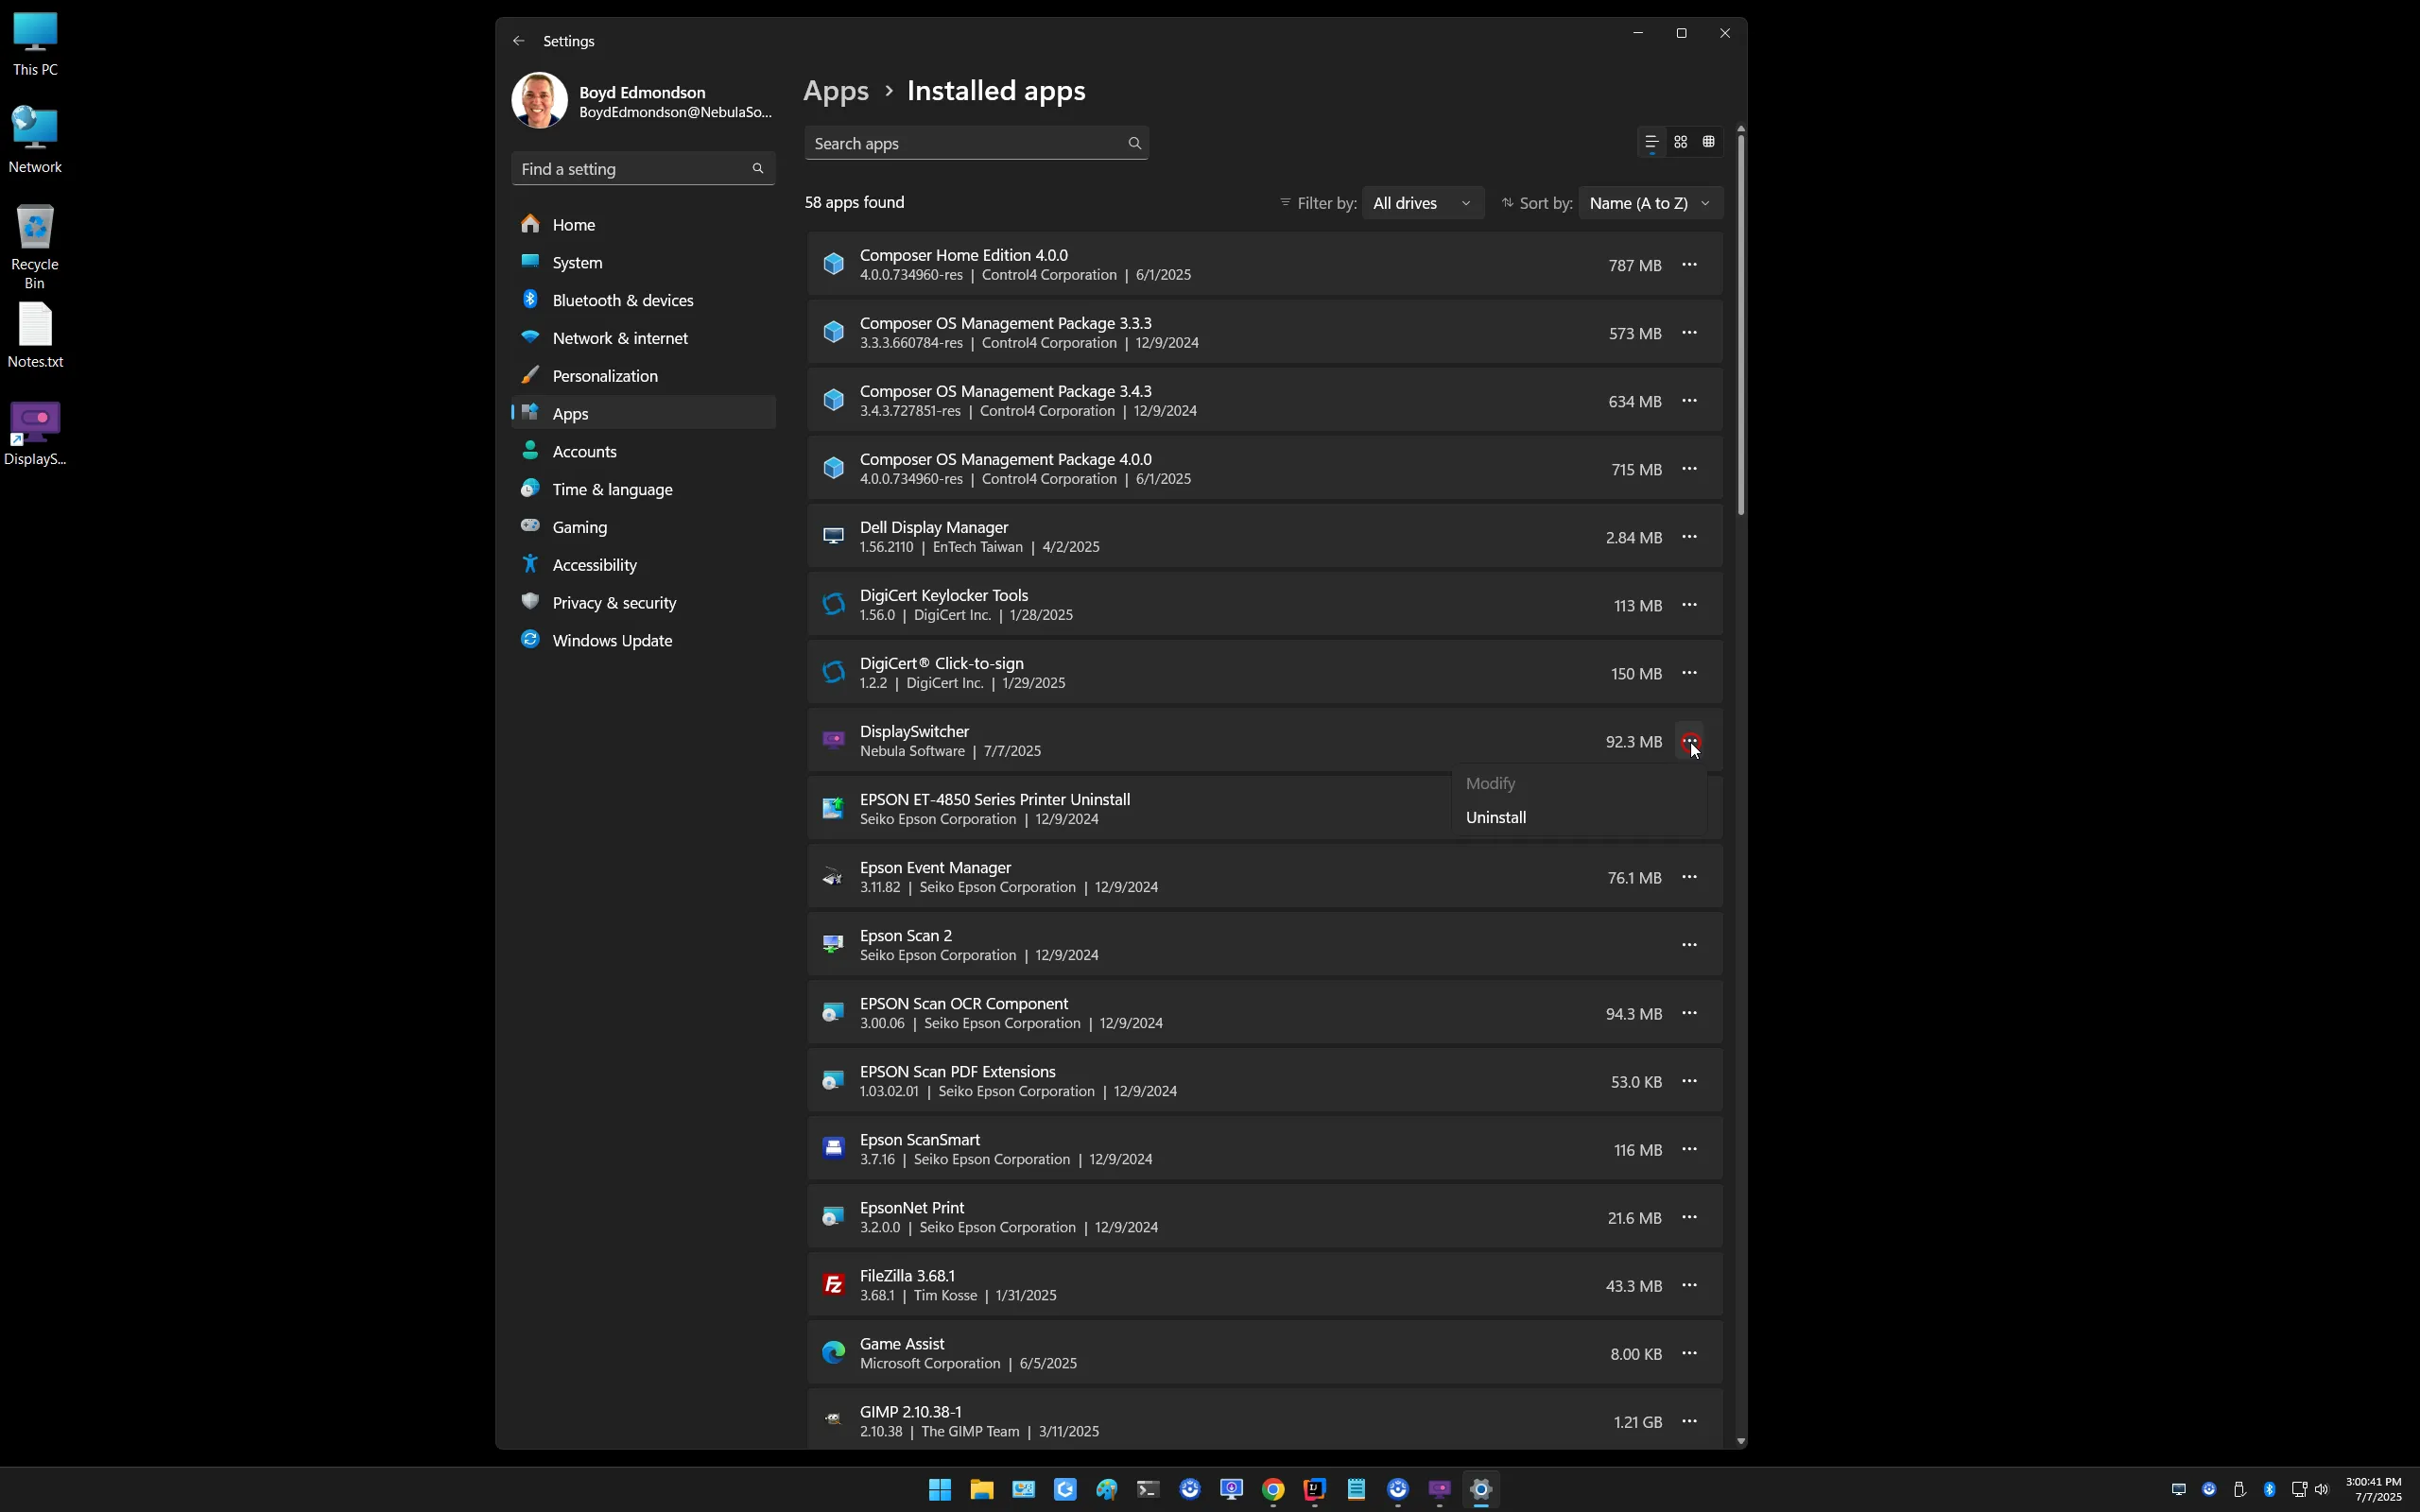
Choose the Uninstall menu item.
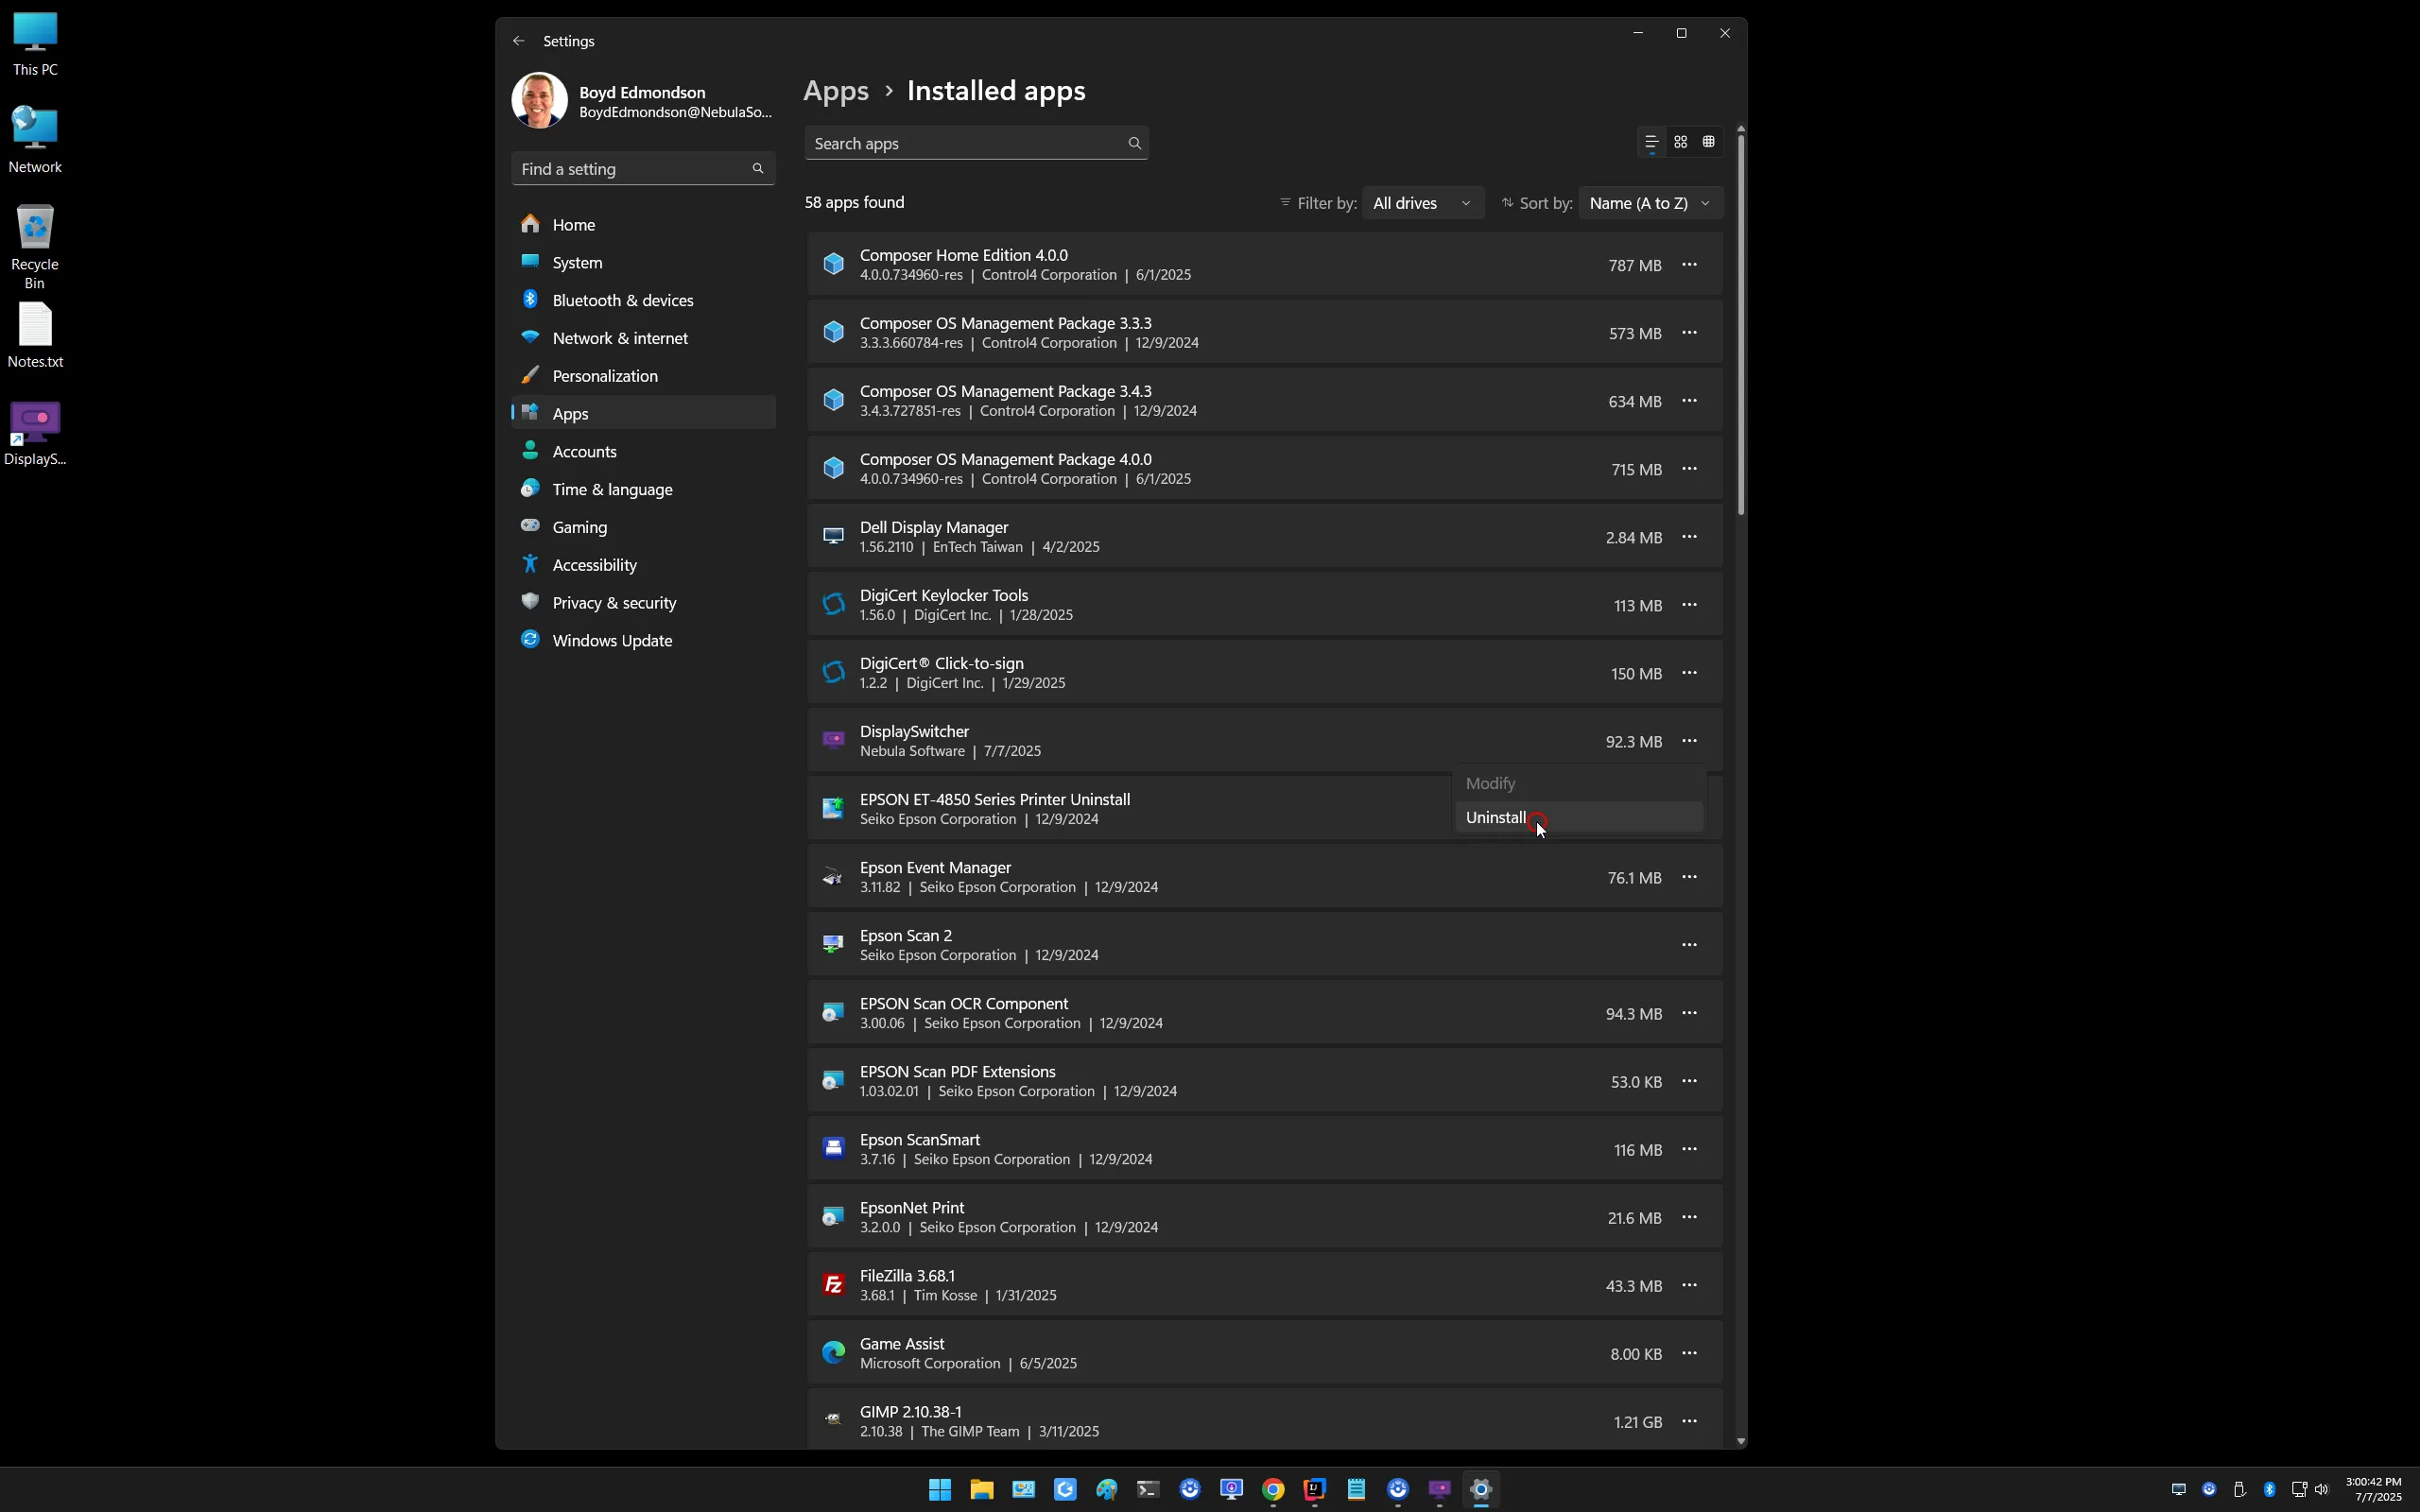
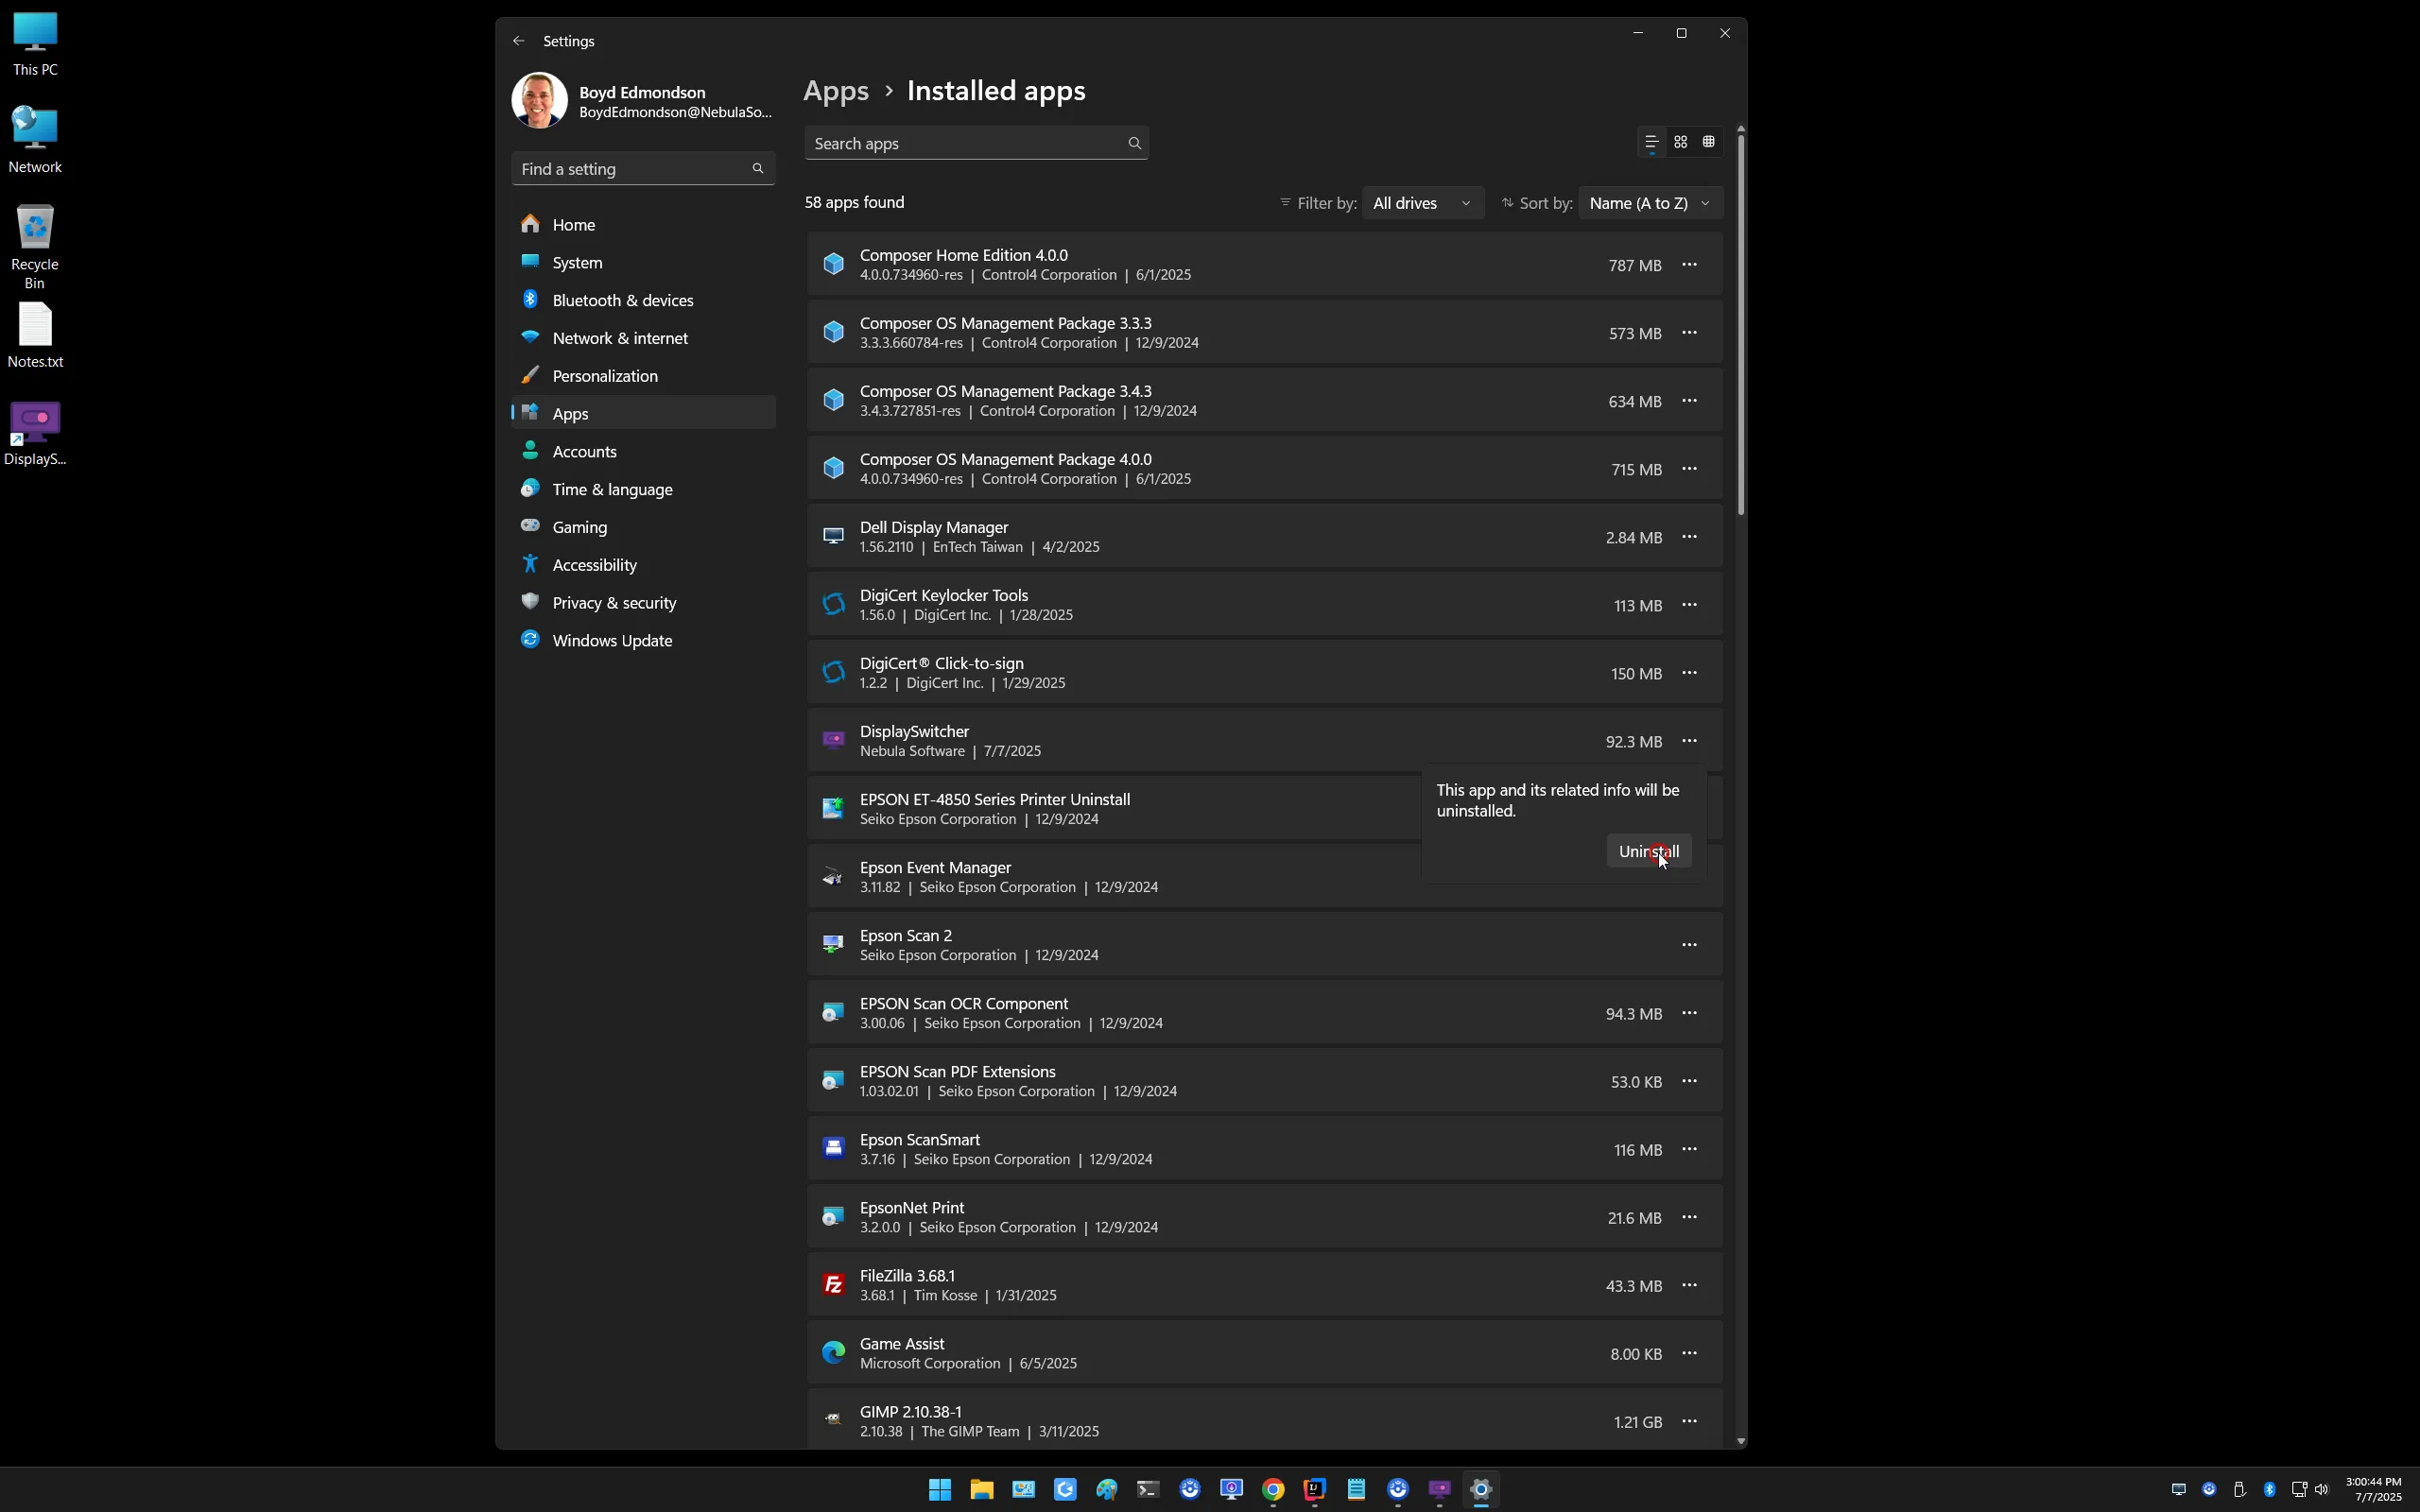
Click the Uninstall button.
Install
Use the installer Install_DisplaySwitcher.exe to install DisplaySwitcher.
Read instructions below, or watch this demo video.
Double click the installer .exe file.
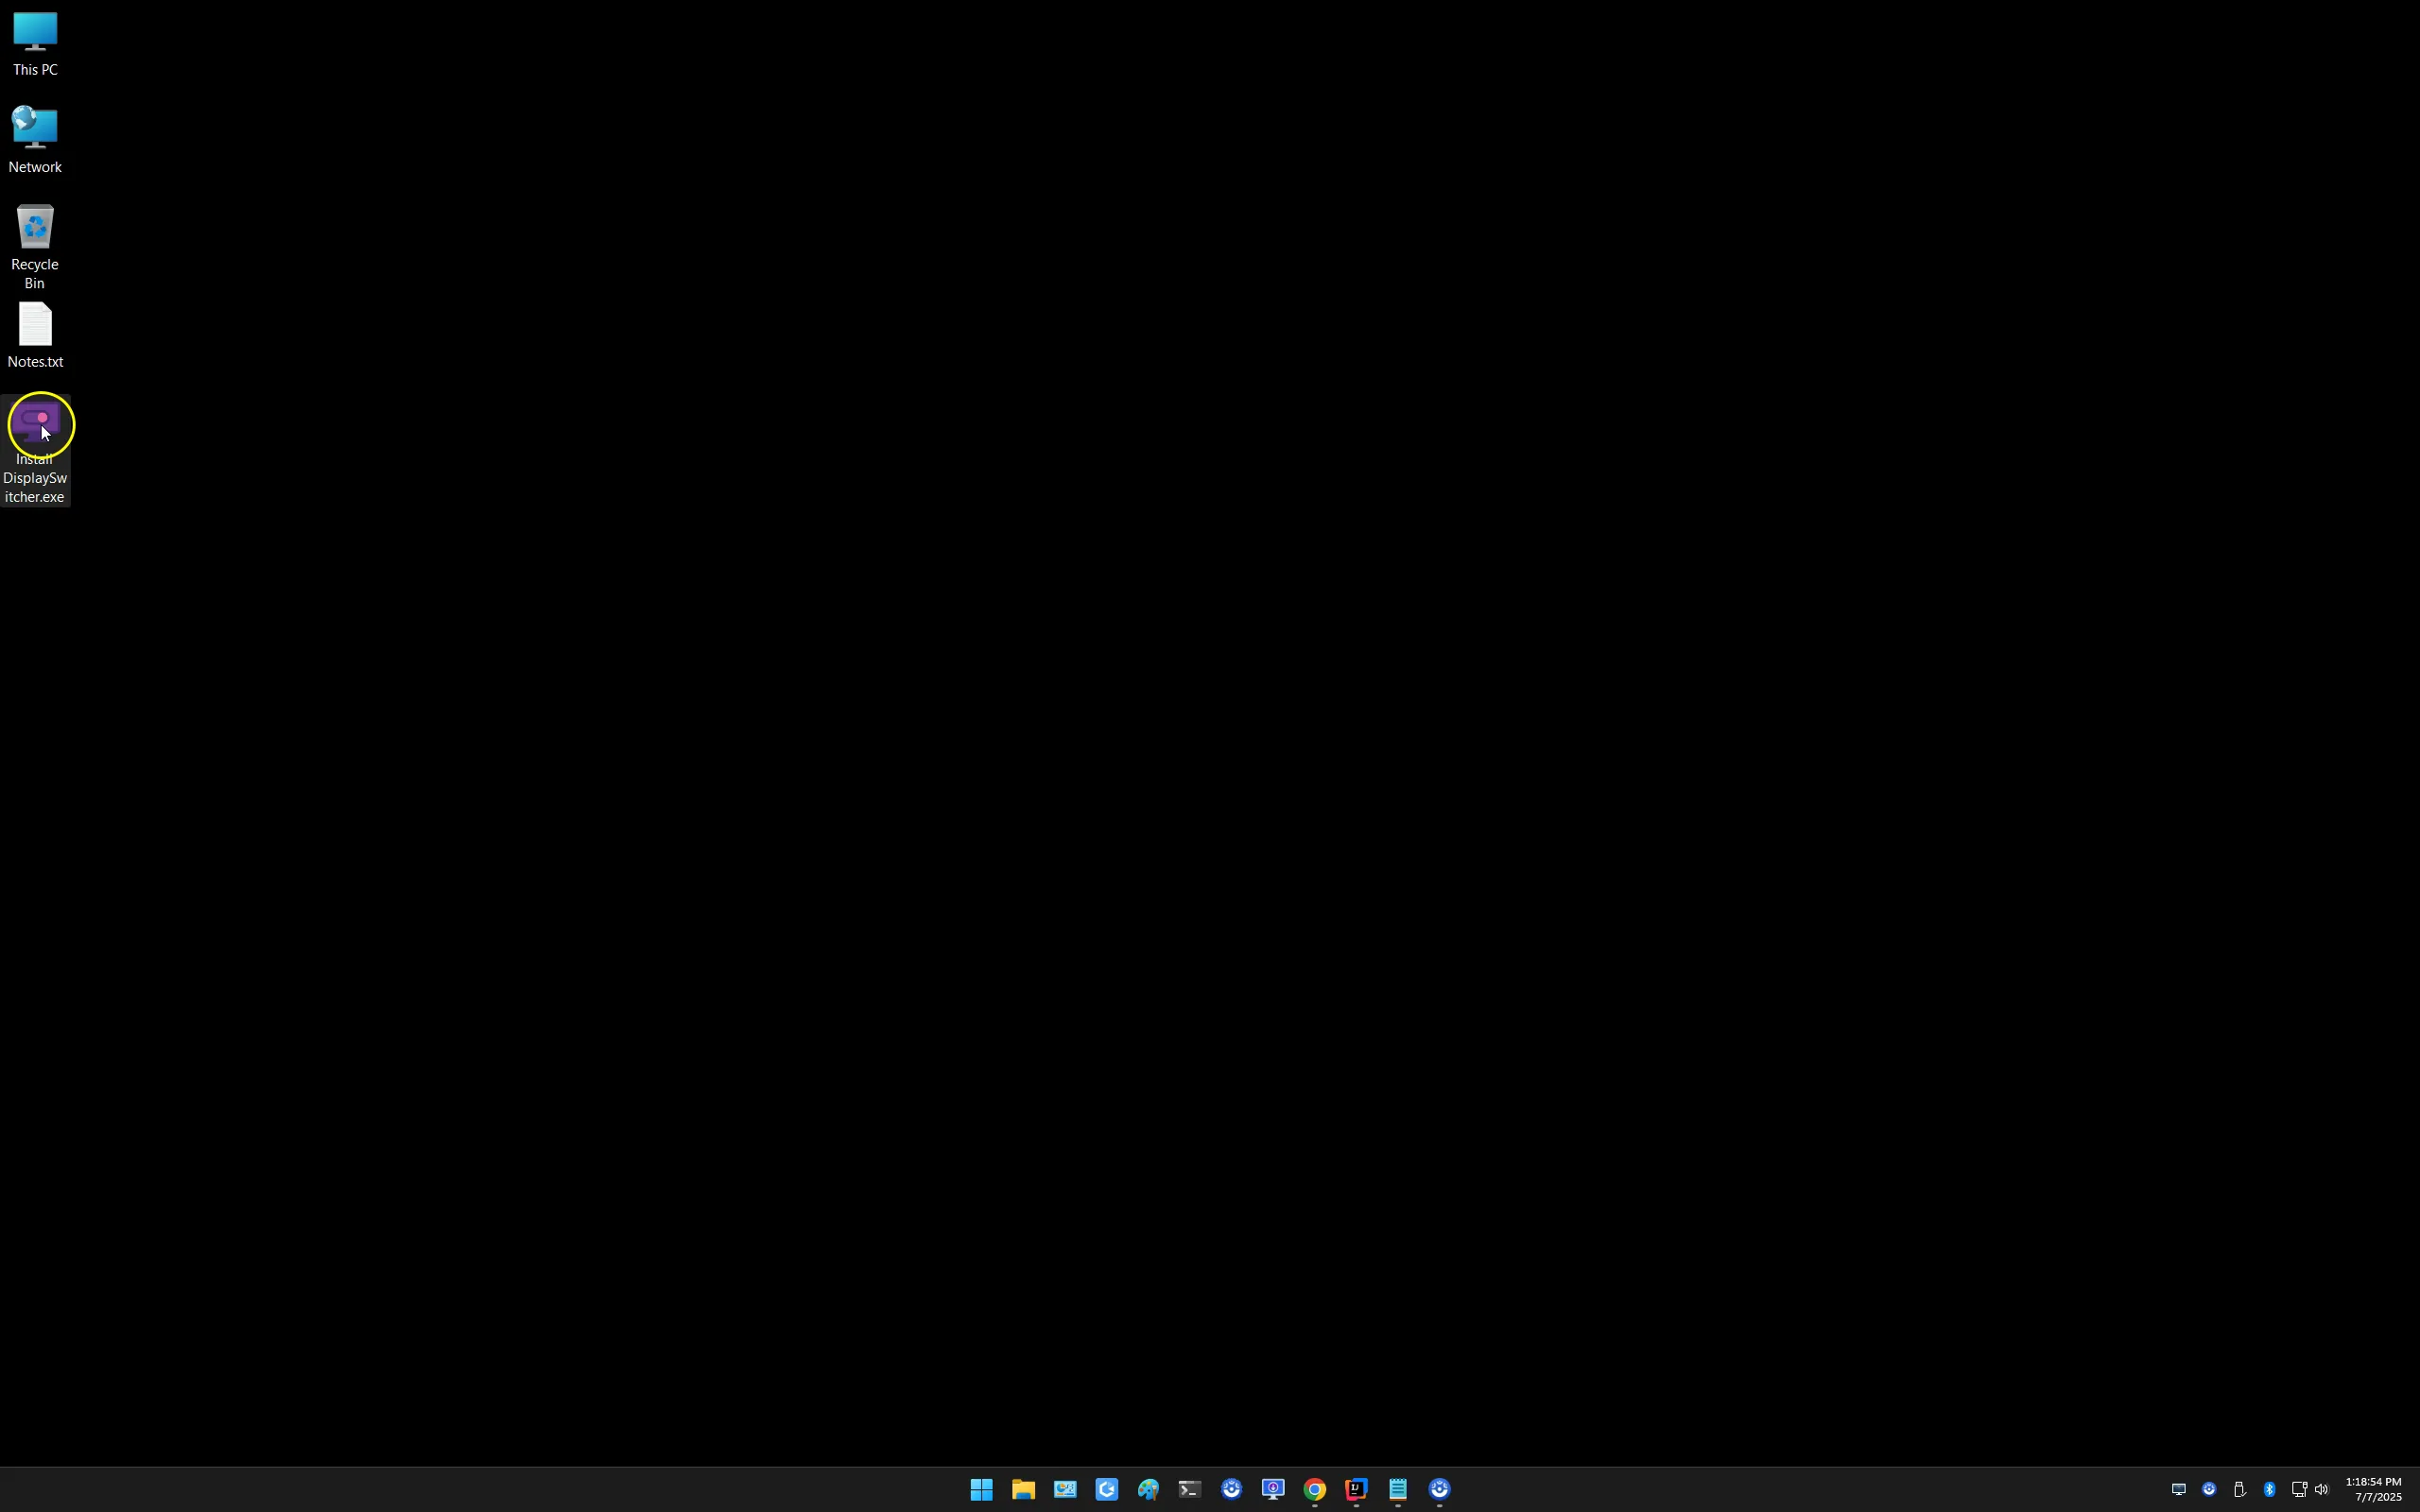
When the installer application finishes, you may then delete Install_DisplaySwitcher.exe.
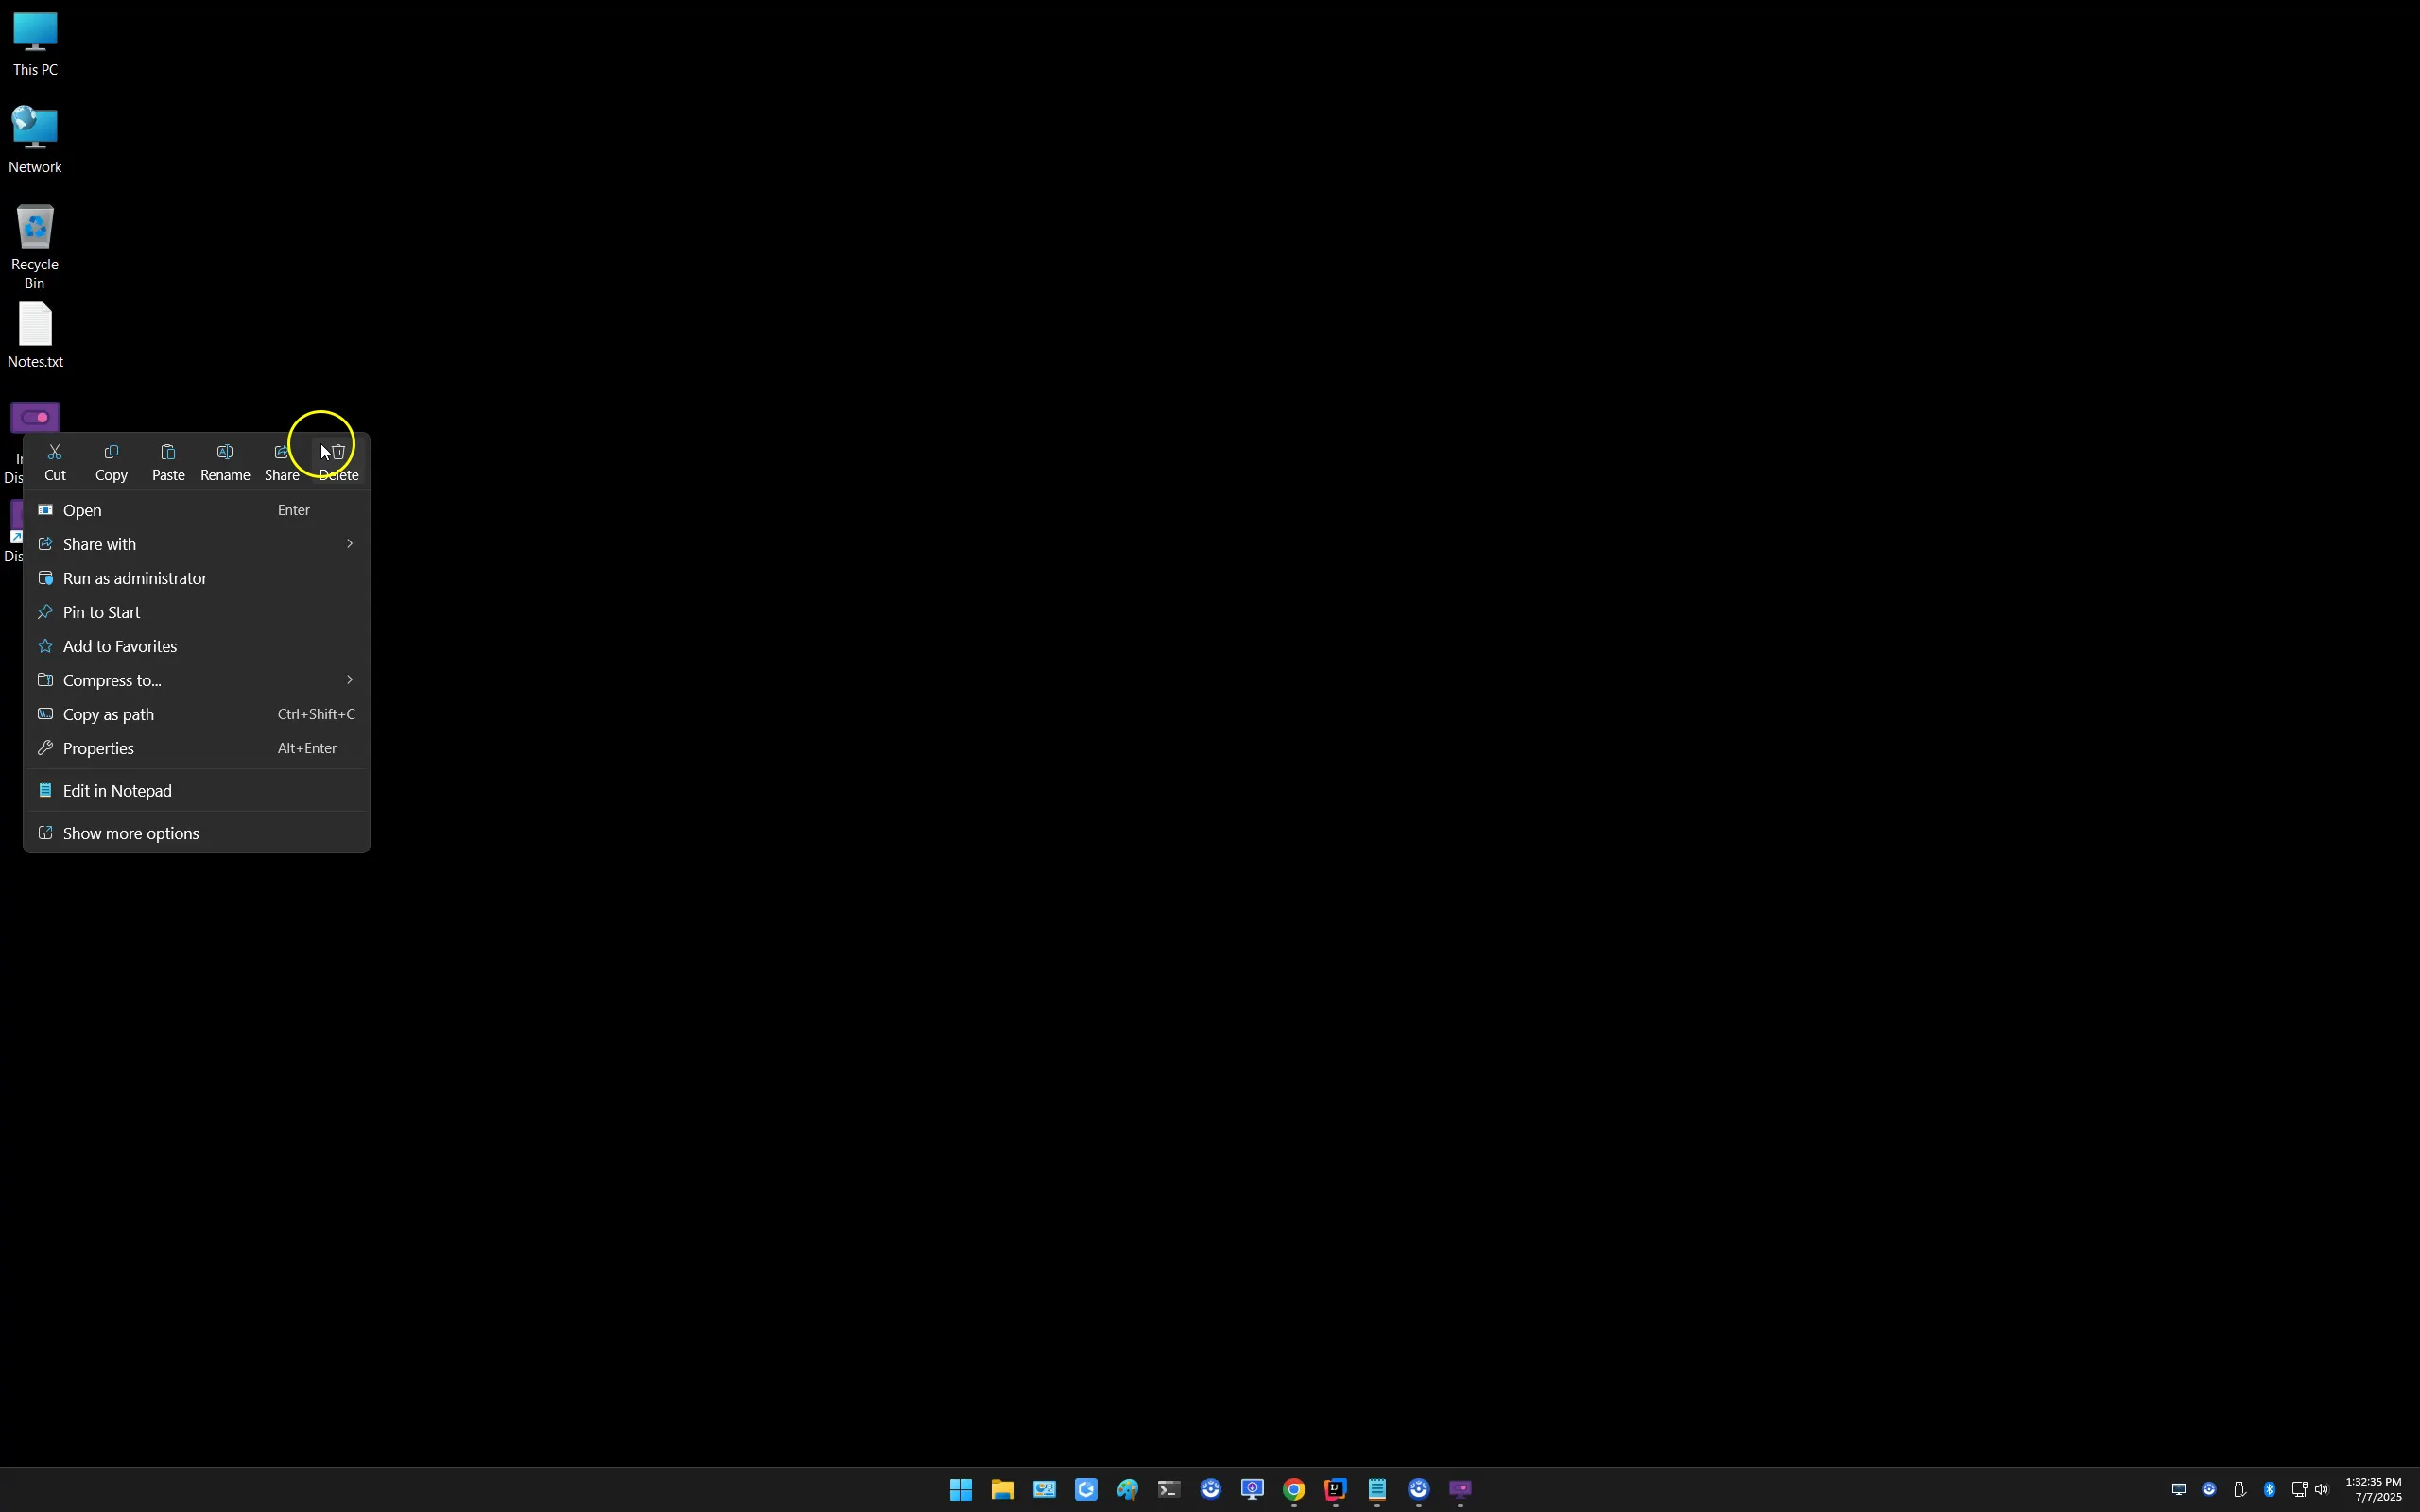
How to Pin to Taskbar
Windows has an Application Icon area called the "Taskbar". You may pin DisplaySwitcher to the Taskbar to make it easier to launch DisplaySwitcher.
Read instructions below, or watch this demo video.
Run DisplaySwitcher.
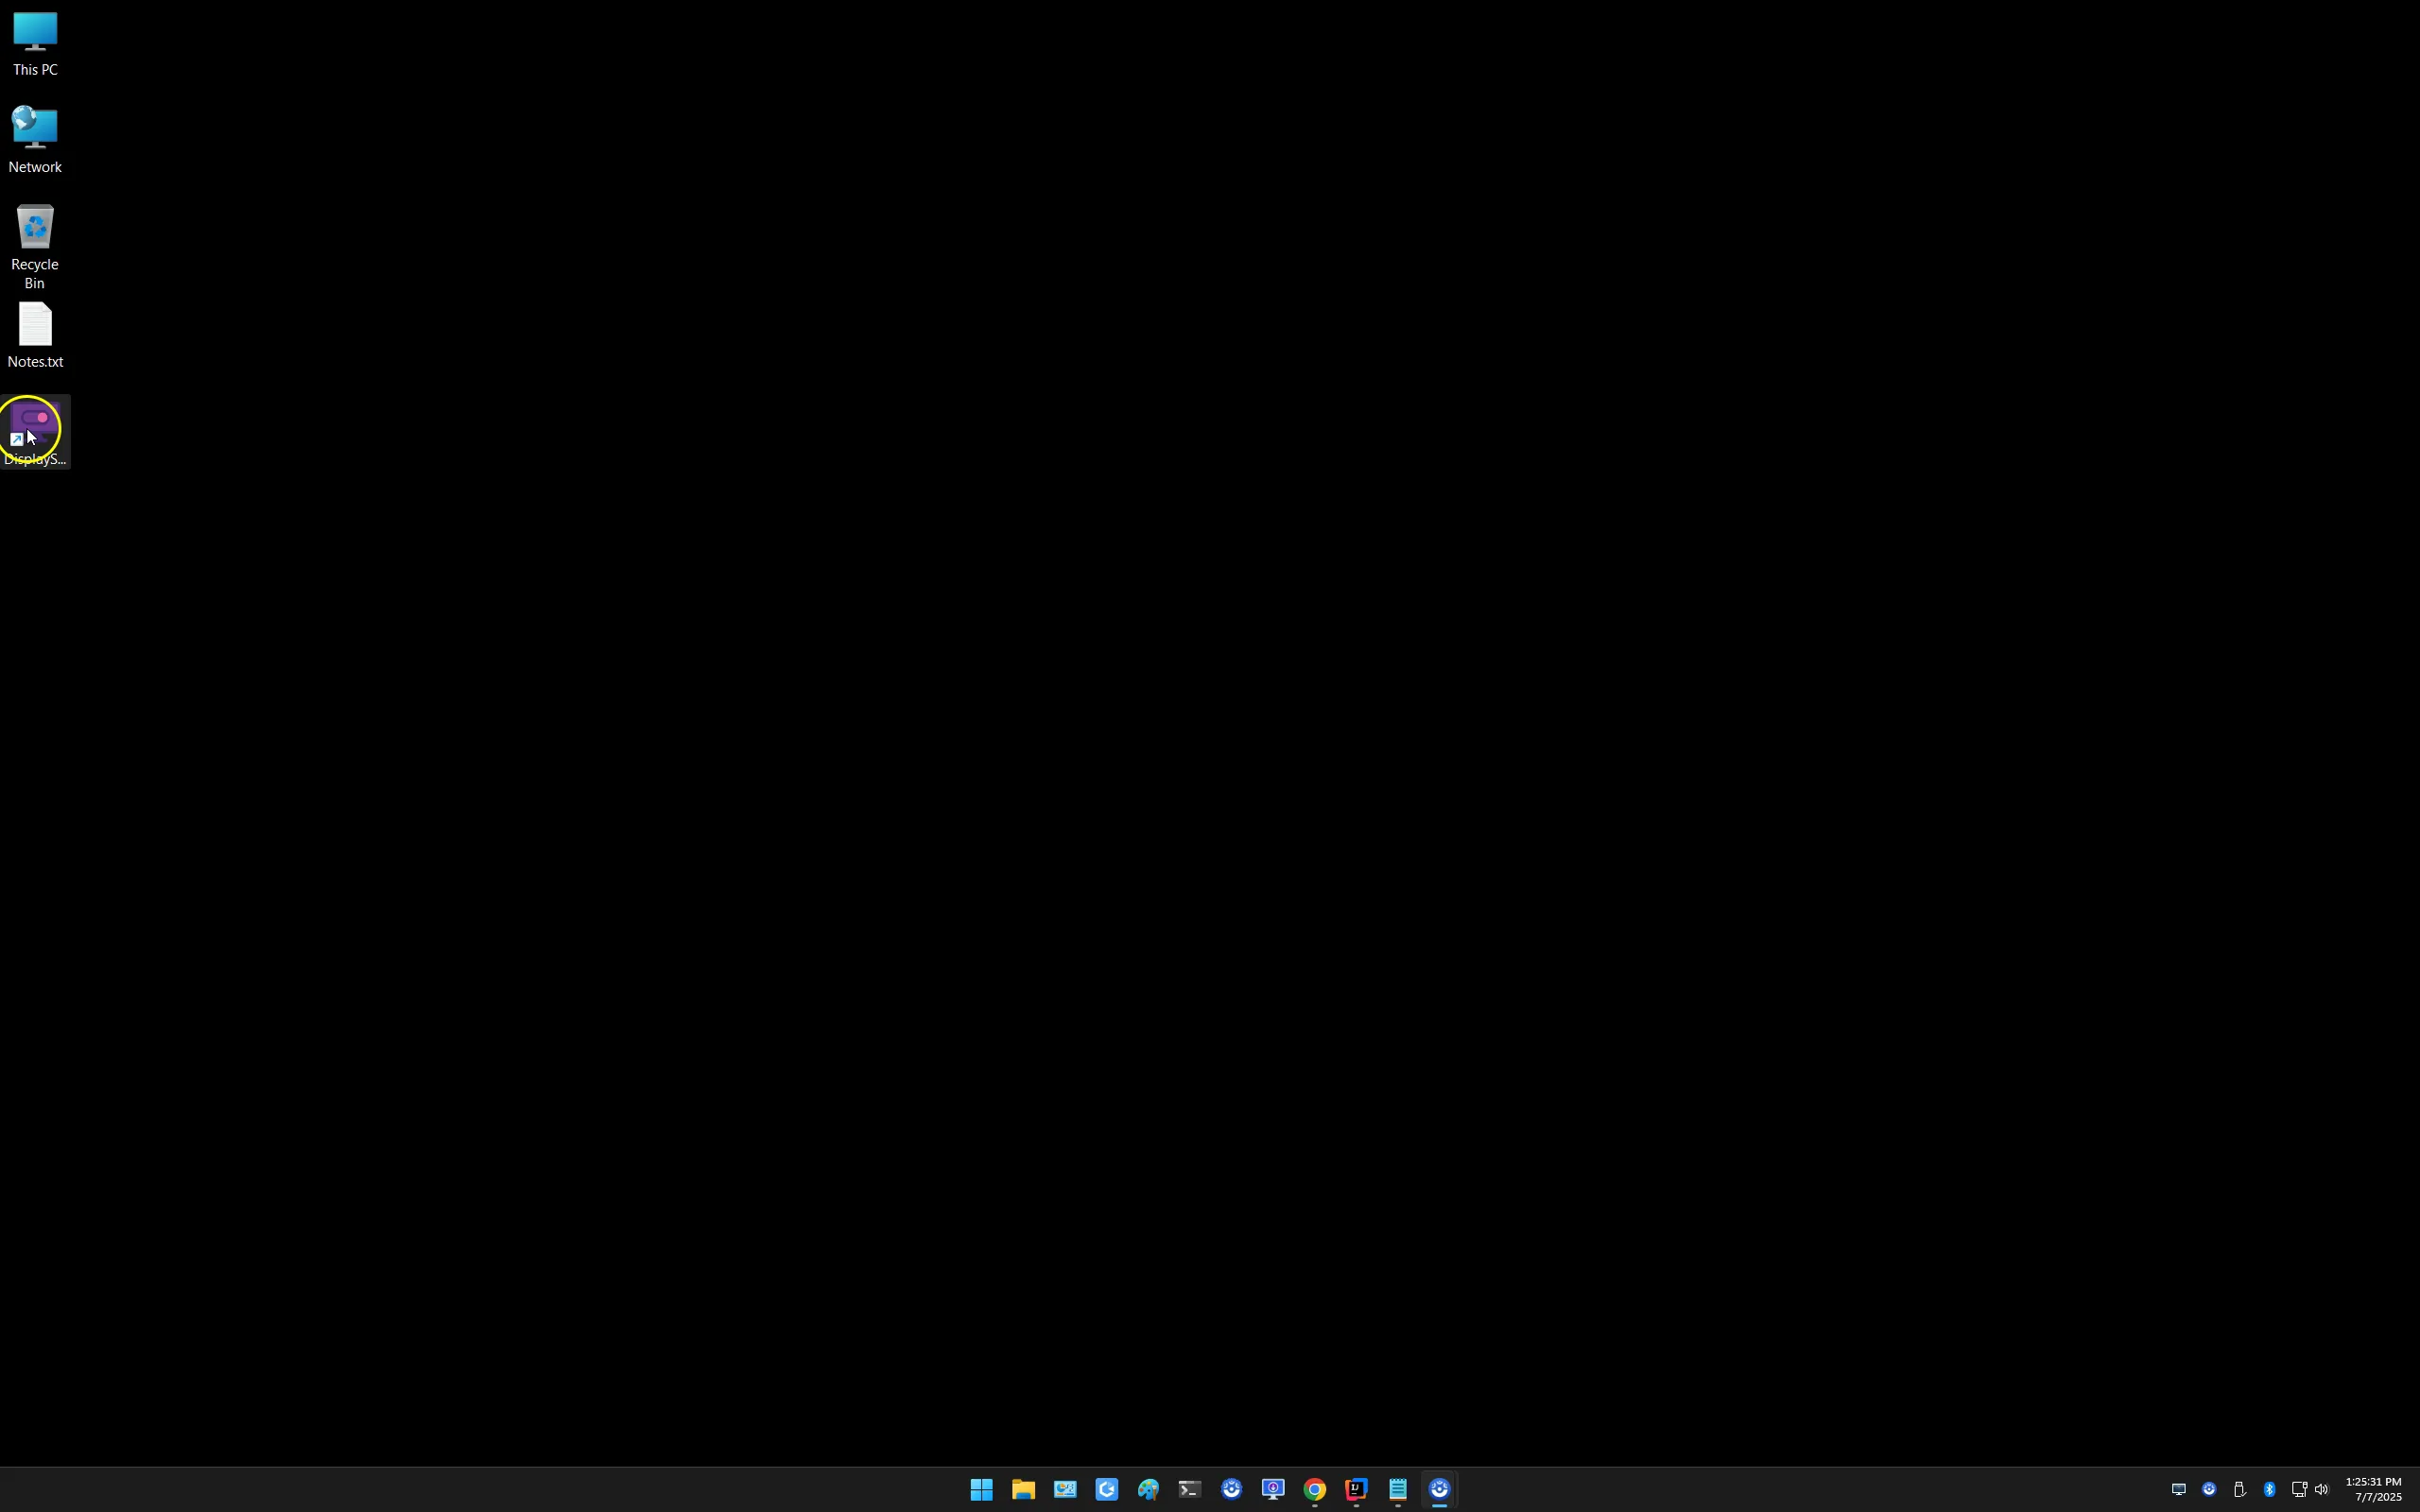
Right click DisplaySwitcher application icon on the Windows Taskbar and choose Pin to taskbar from the menu.
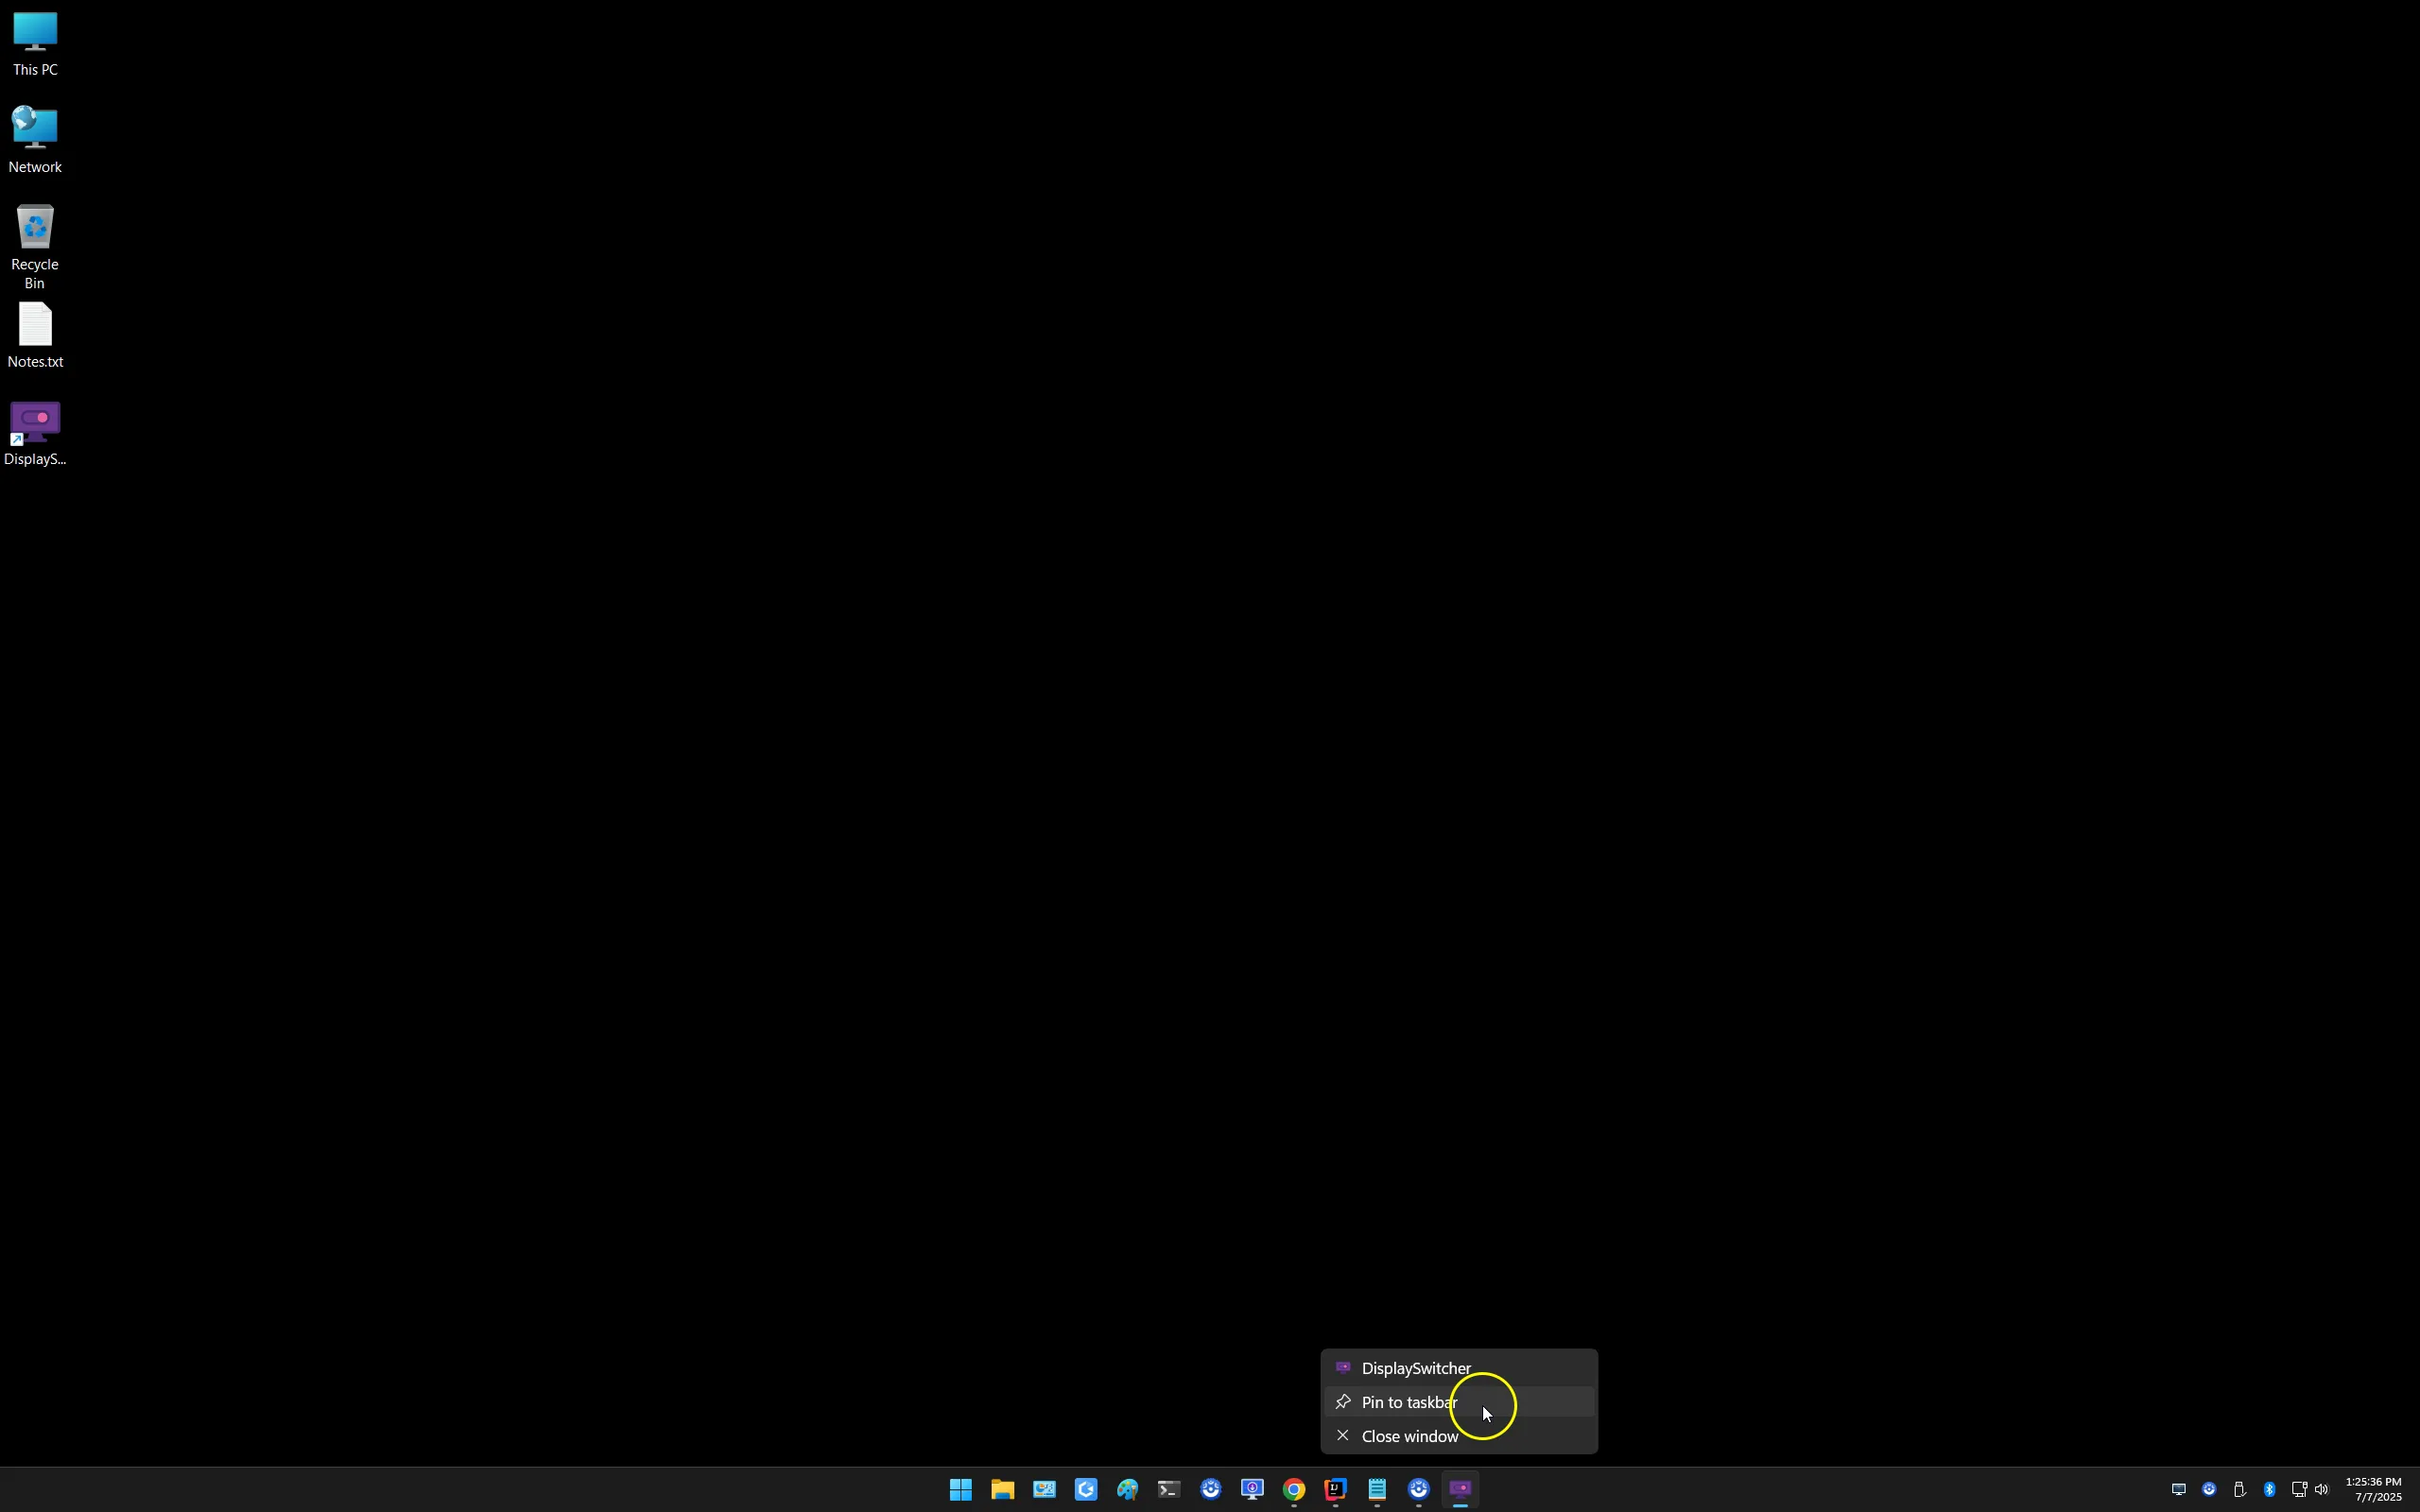
If you want to remove DisplaySwitcher from the Taskbar, right click and choose Unpin from taskbar from the menu.
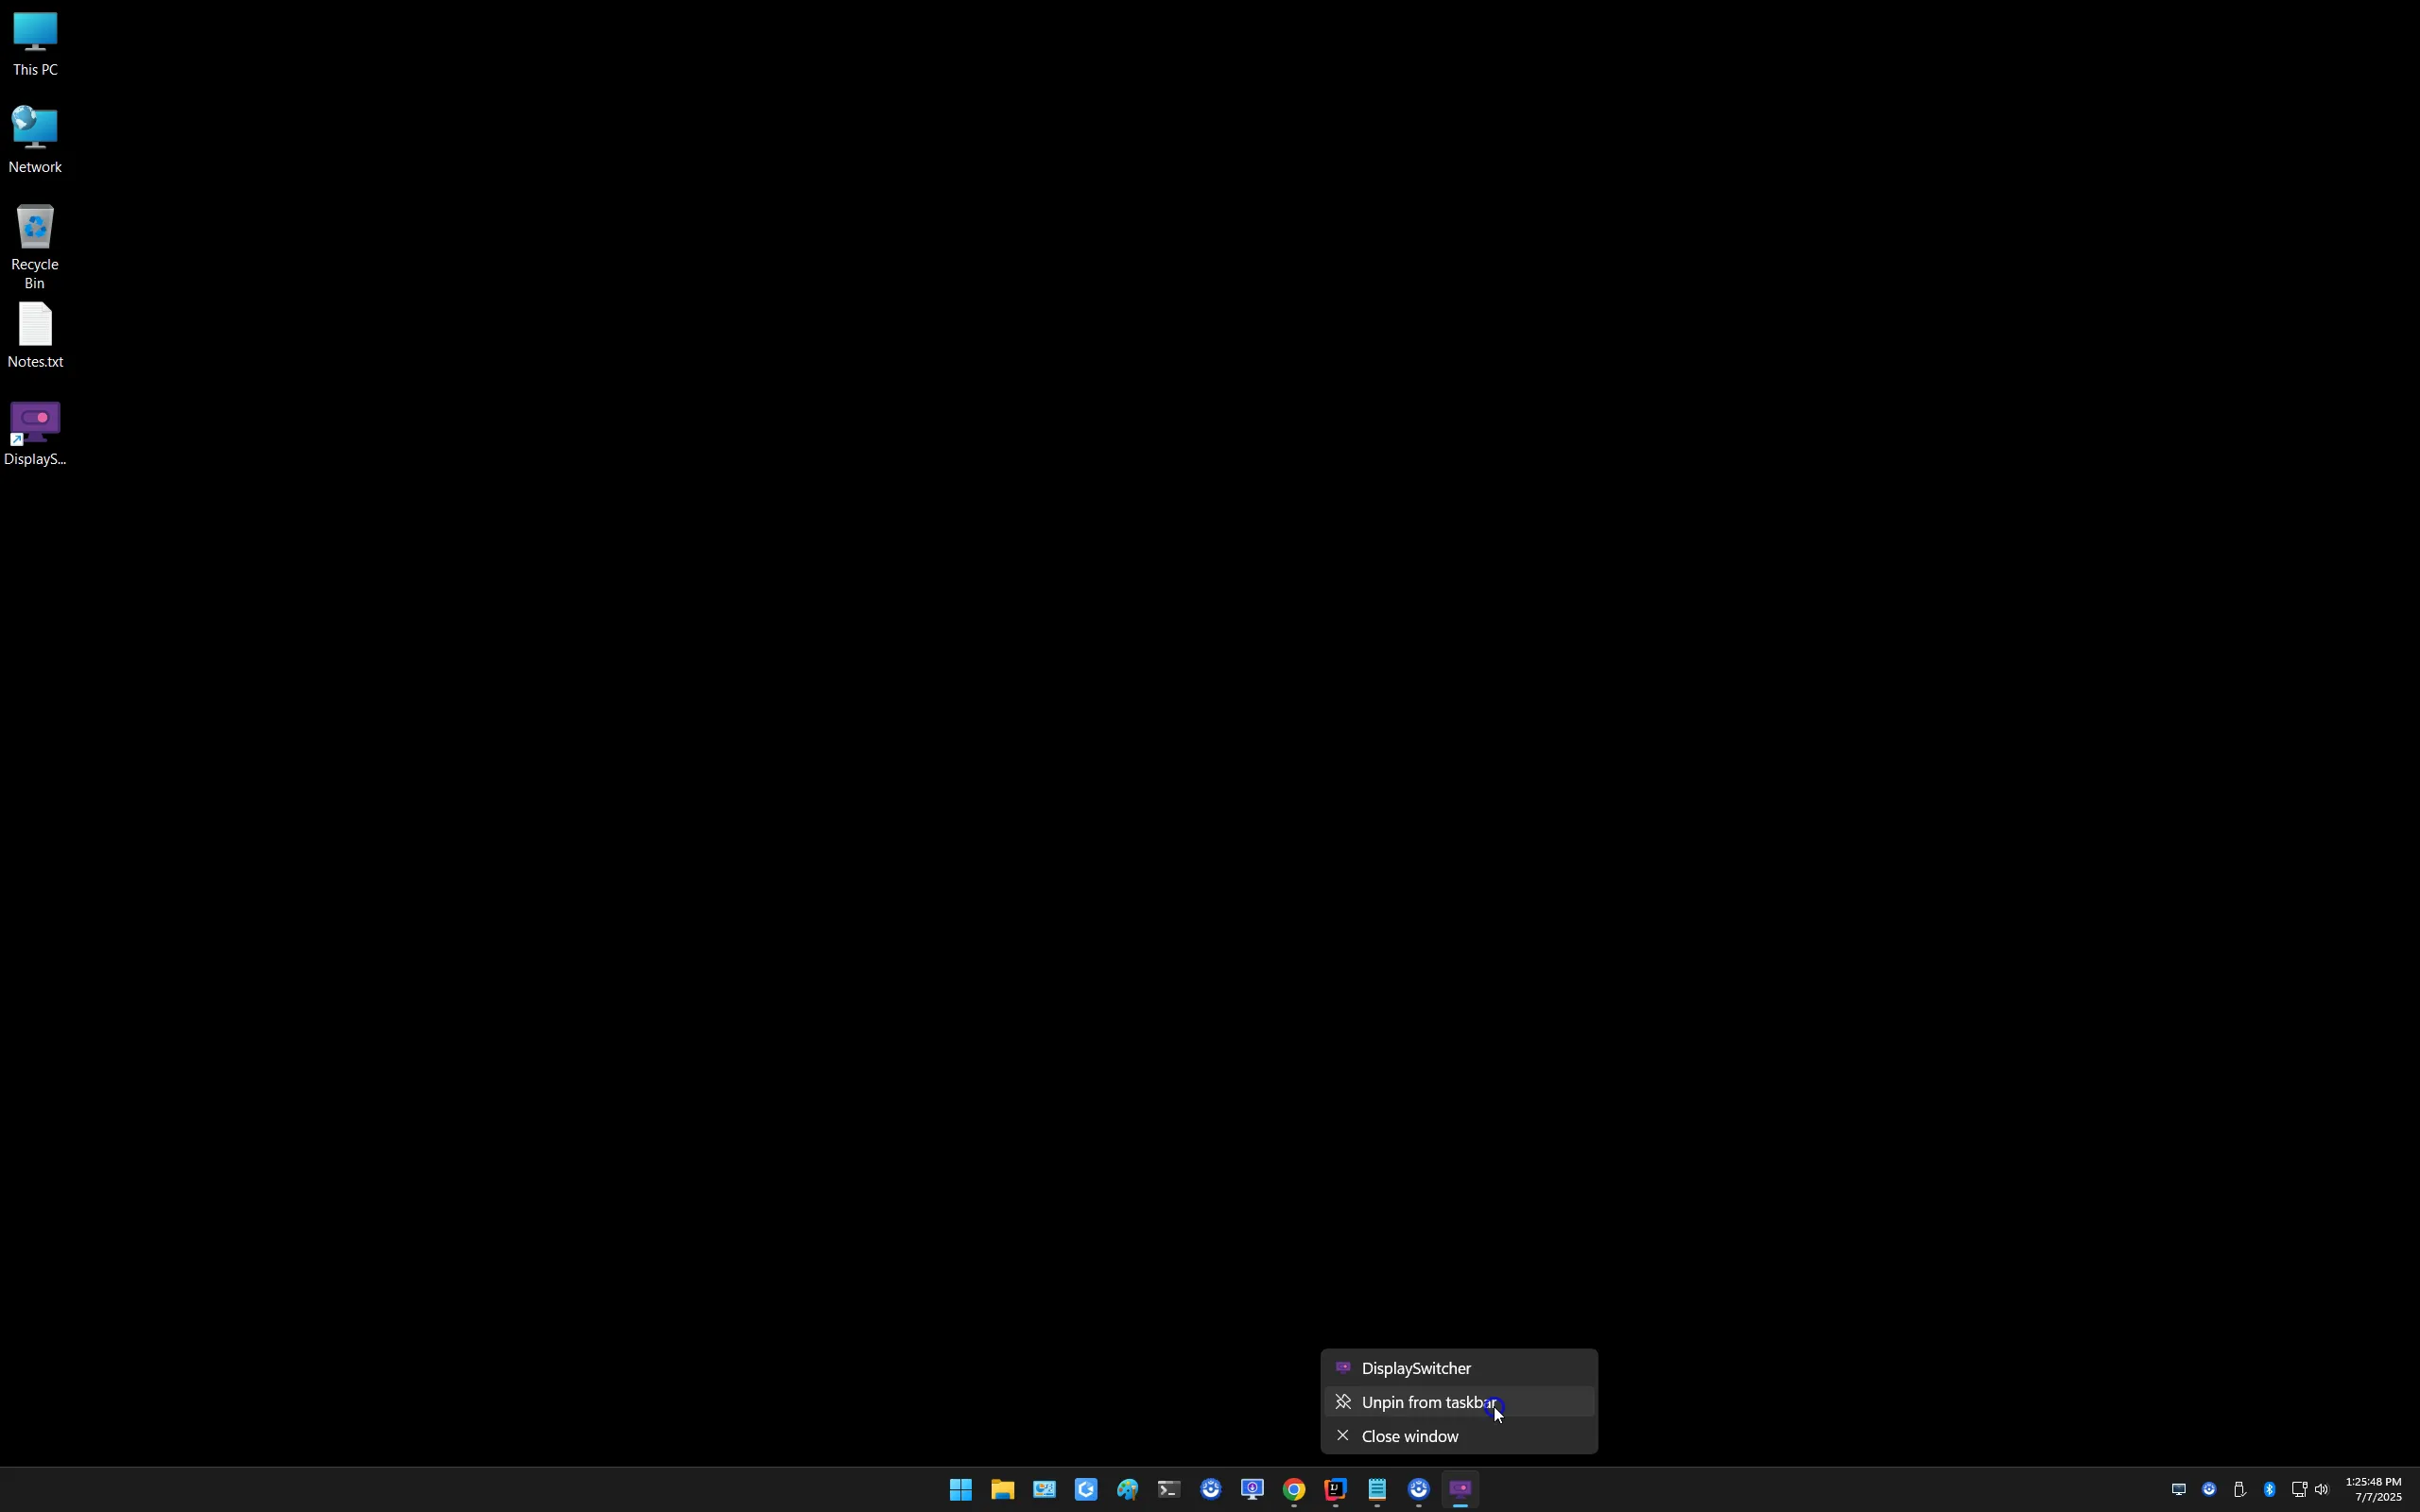
Enable/Disable Run at Logon
After running the installer, DisplaySwitcher is automatically set to run when you logon to Windows. You may disable that in Windows Settings.
Note that if you uninstall and reinstall, the last state you made to enable/disable of run at logon is preserved by Windows OS.
Read instructions below, or watch this demo video.
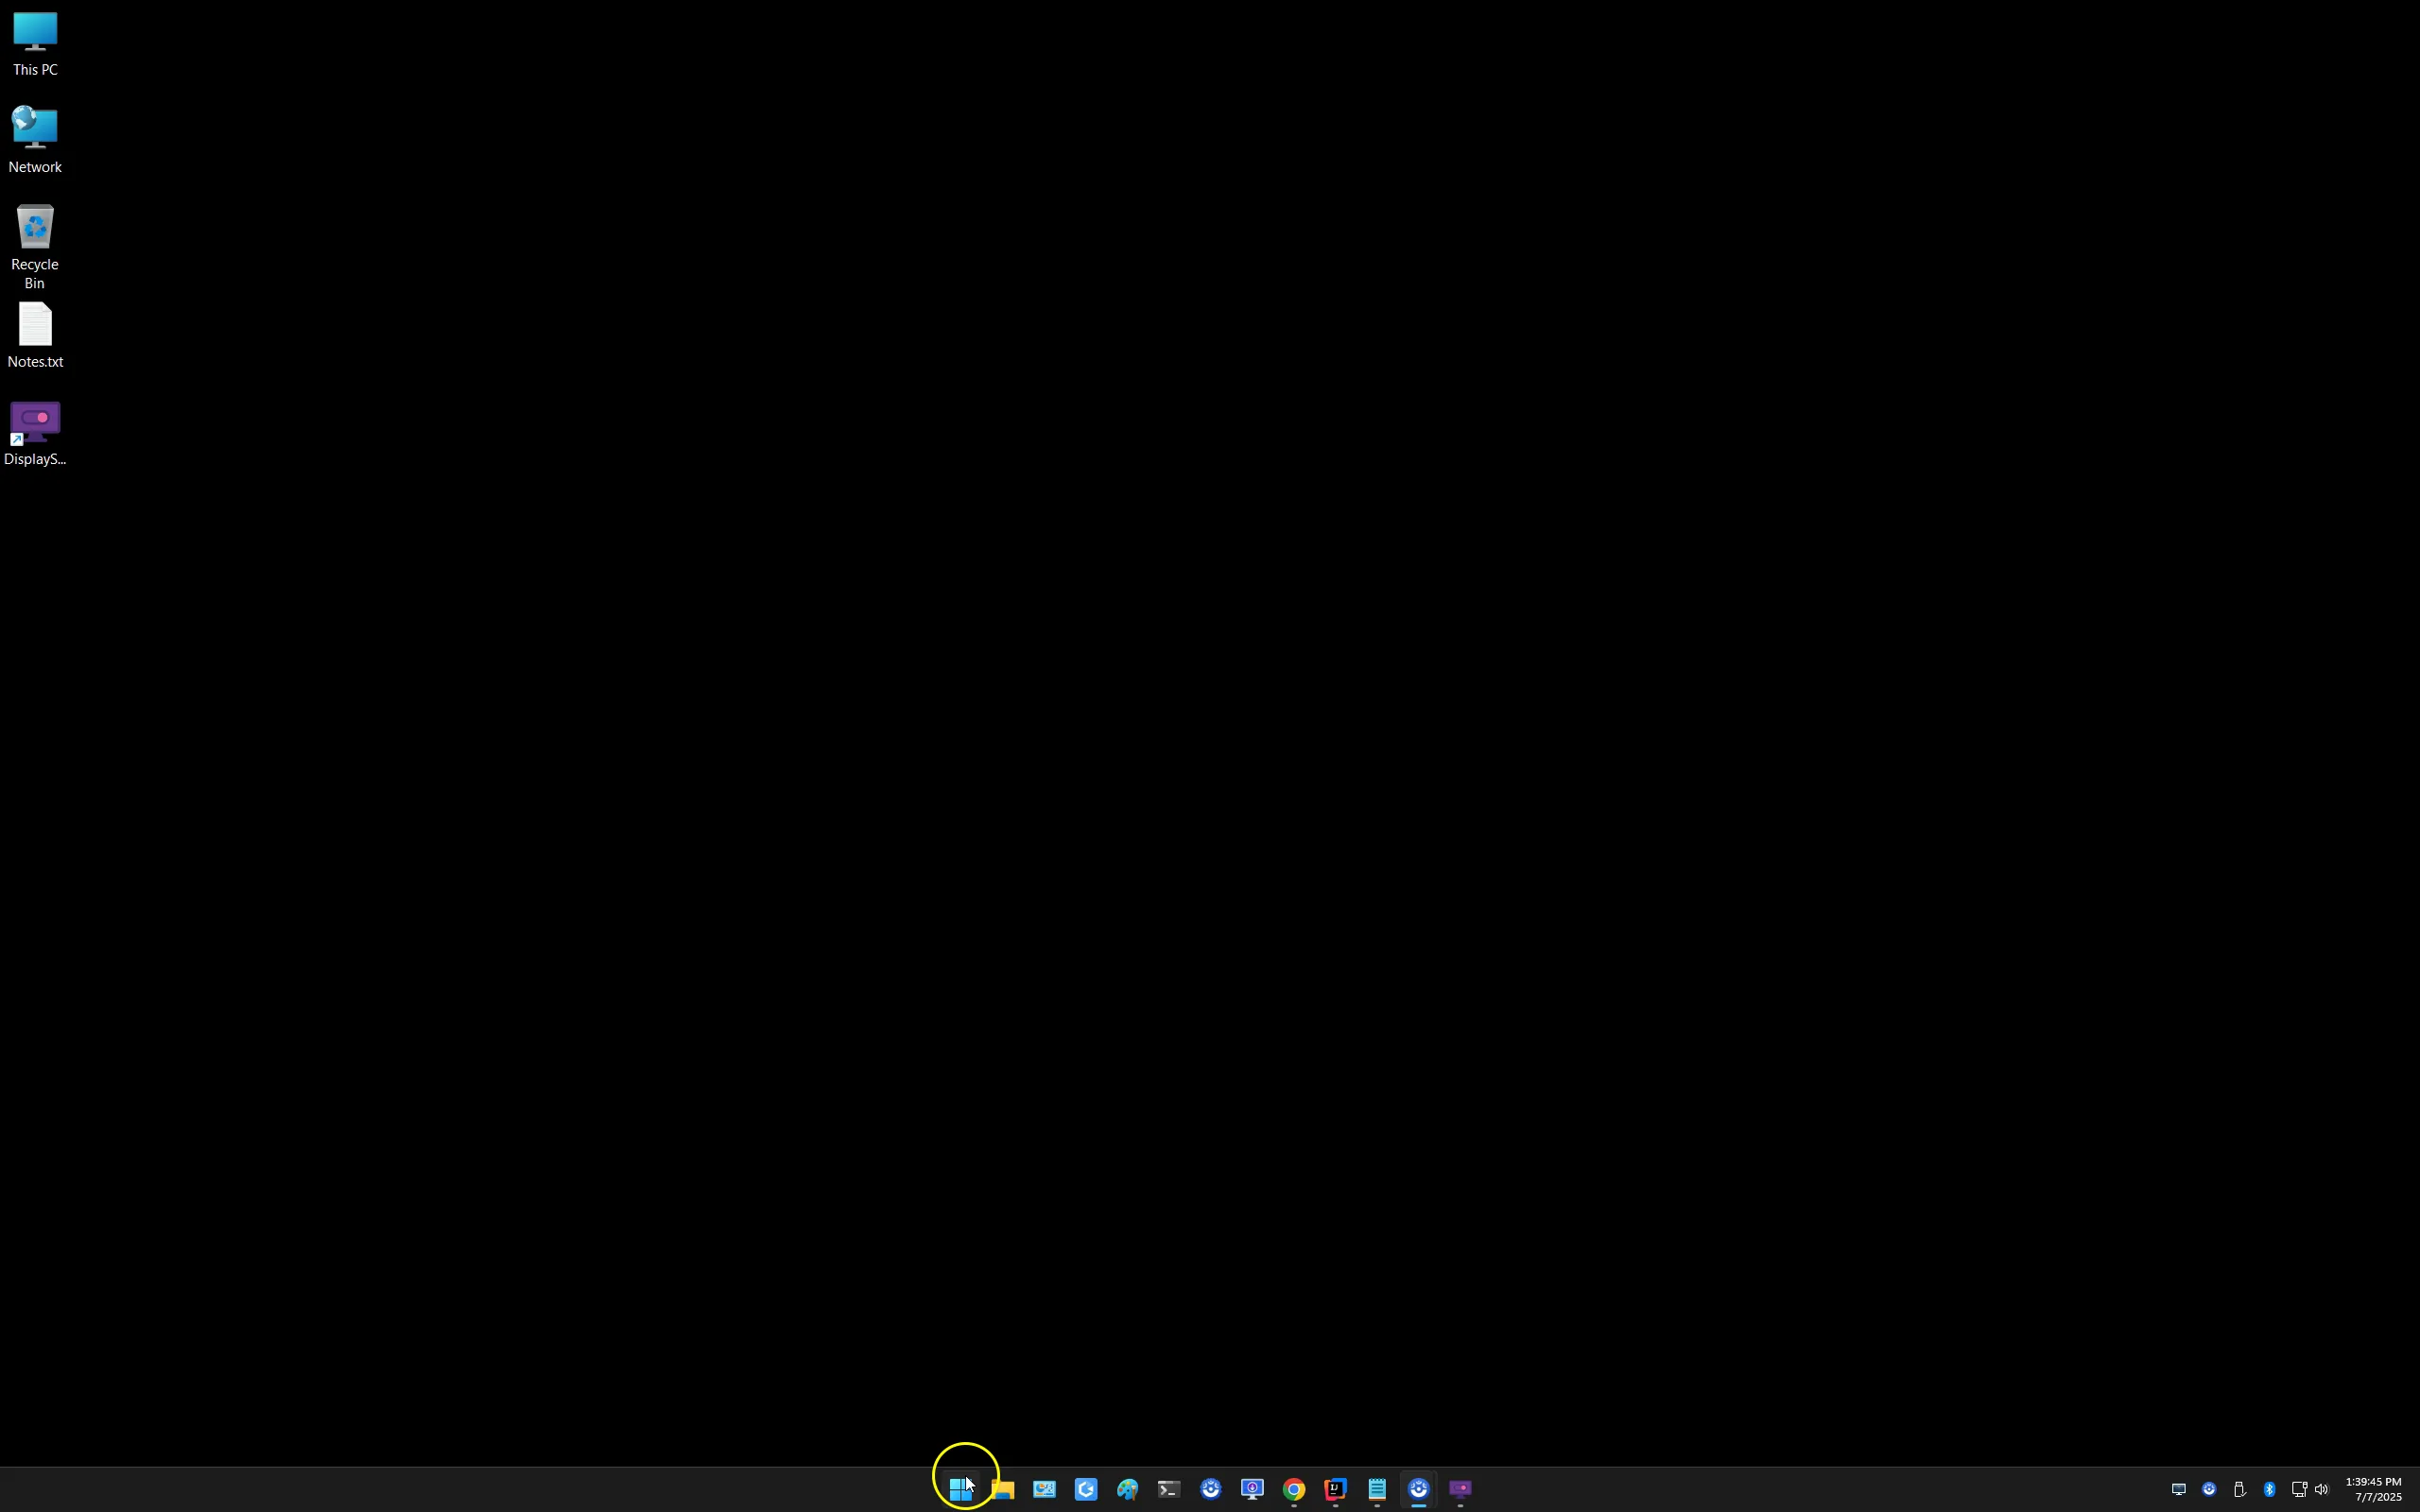
Click the Windows Start button.
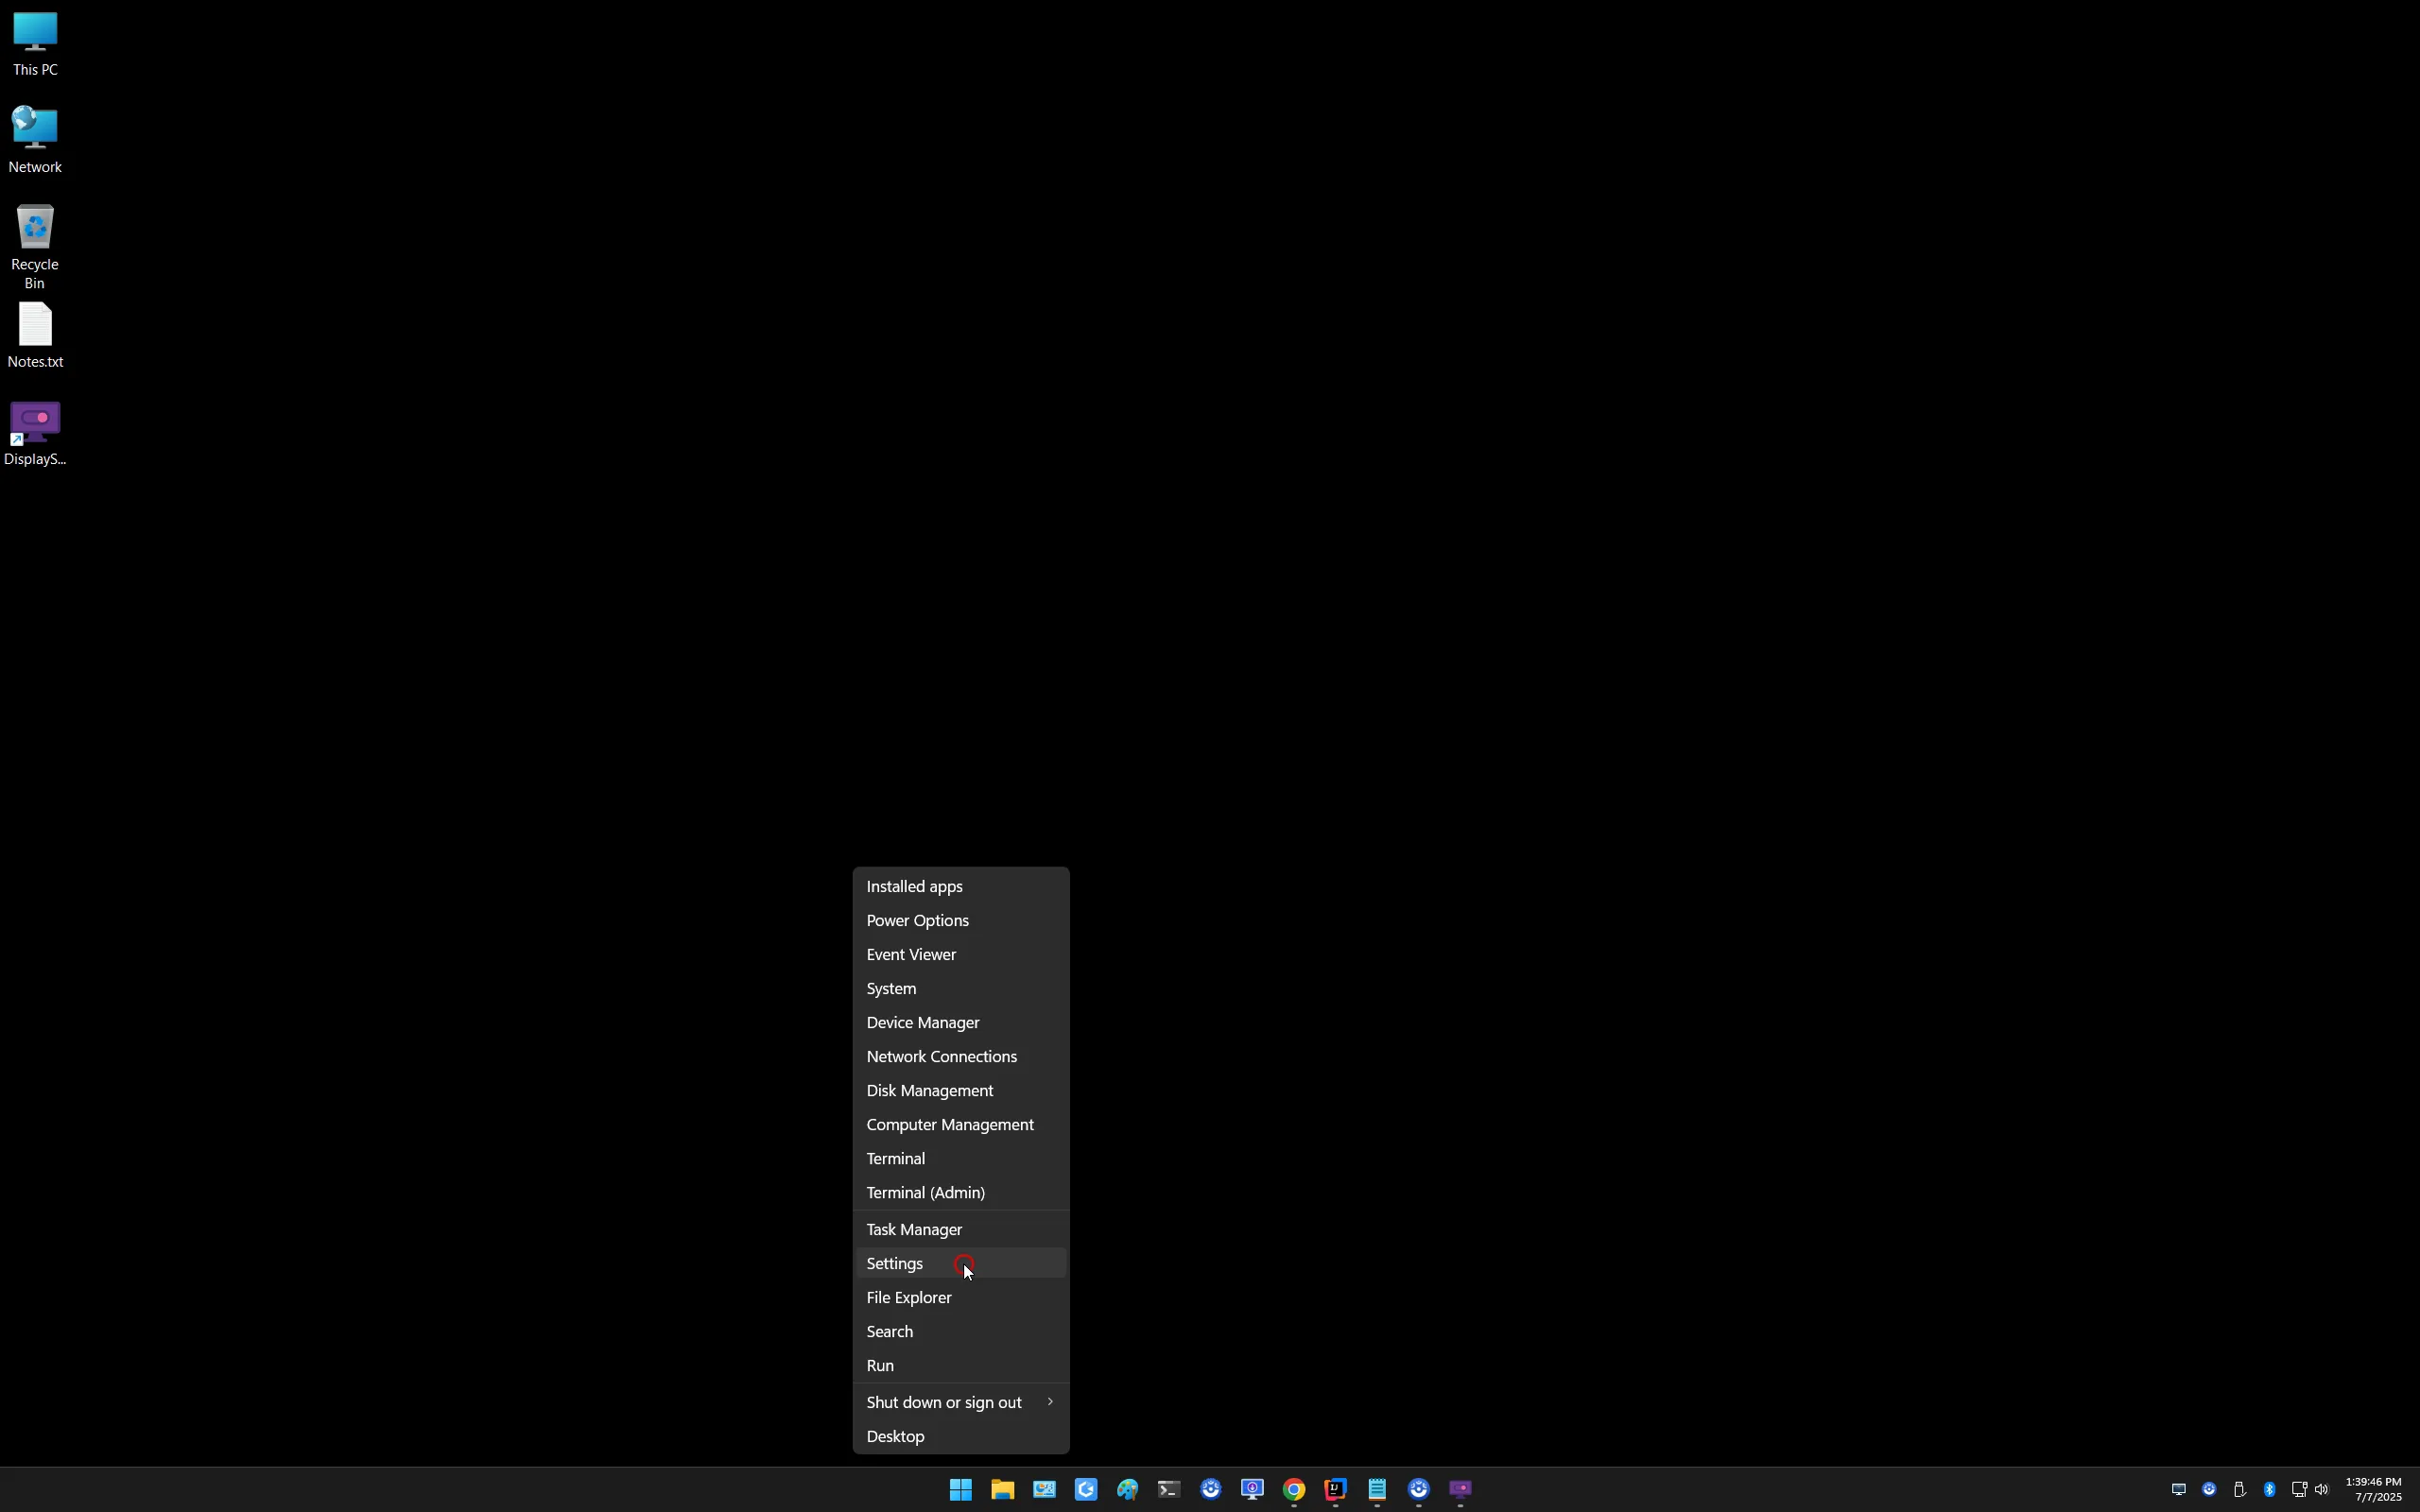
Choose Settings from the menu.
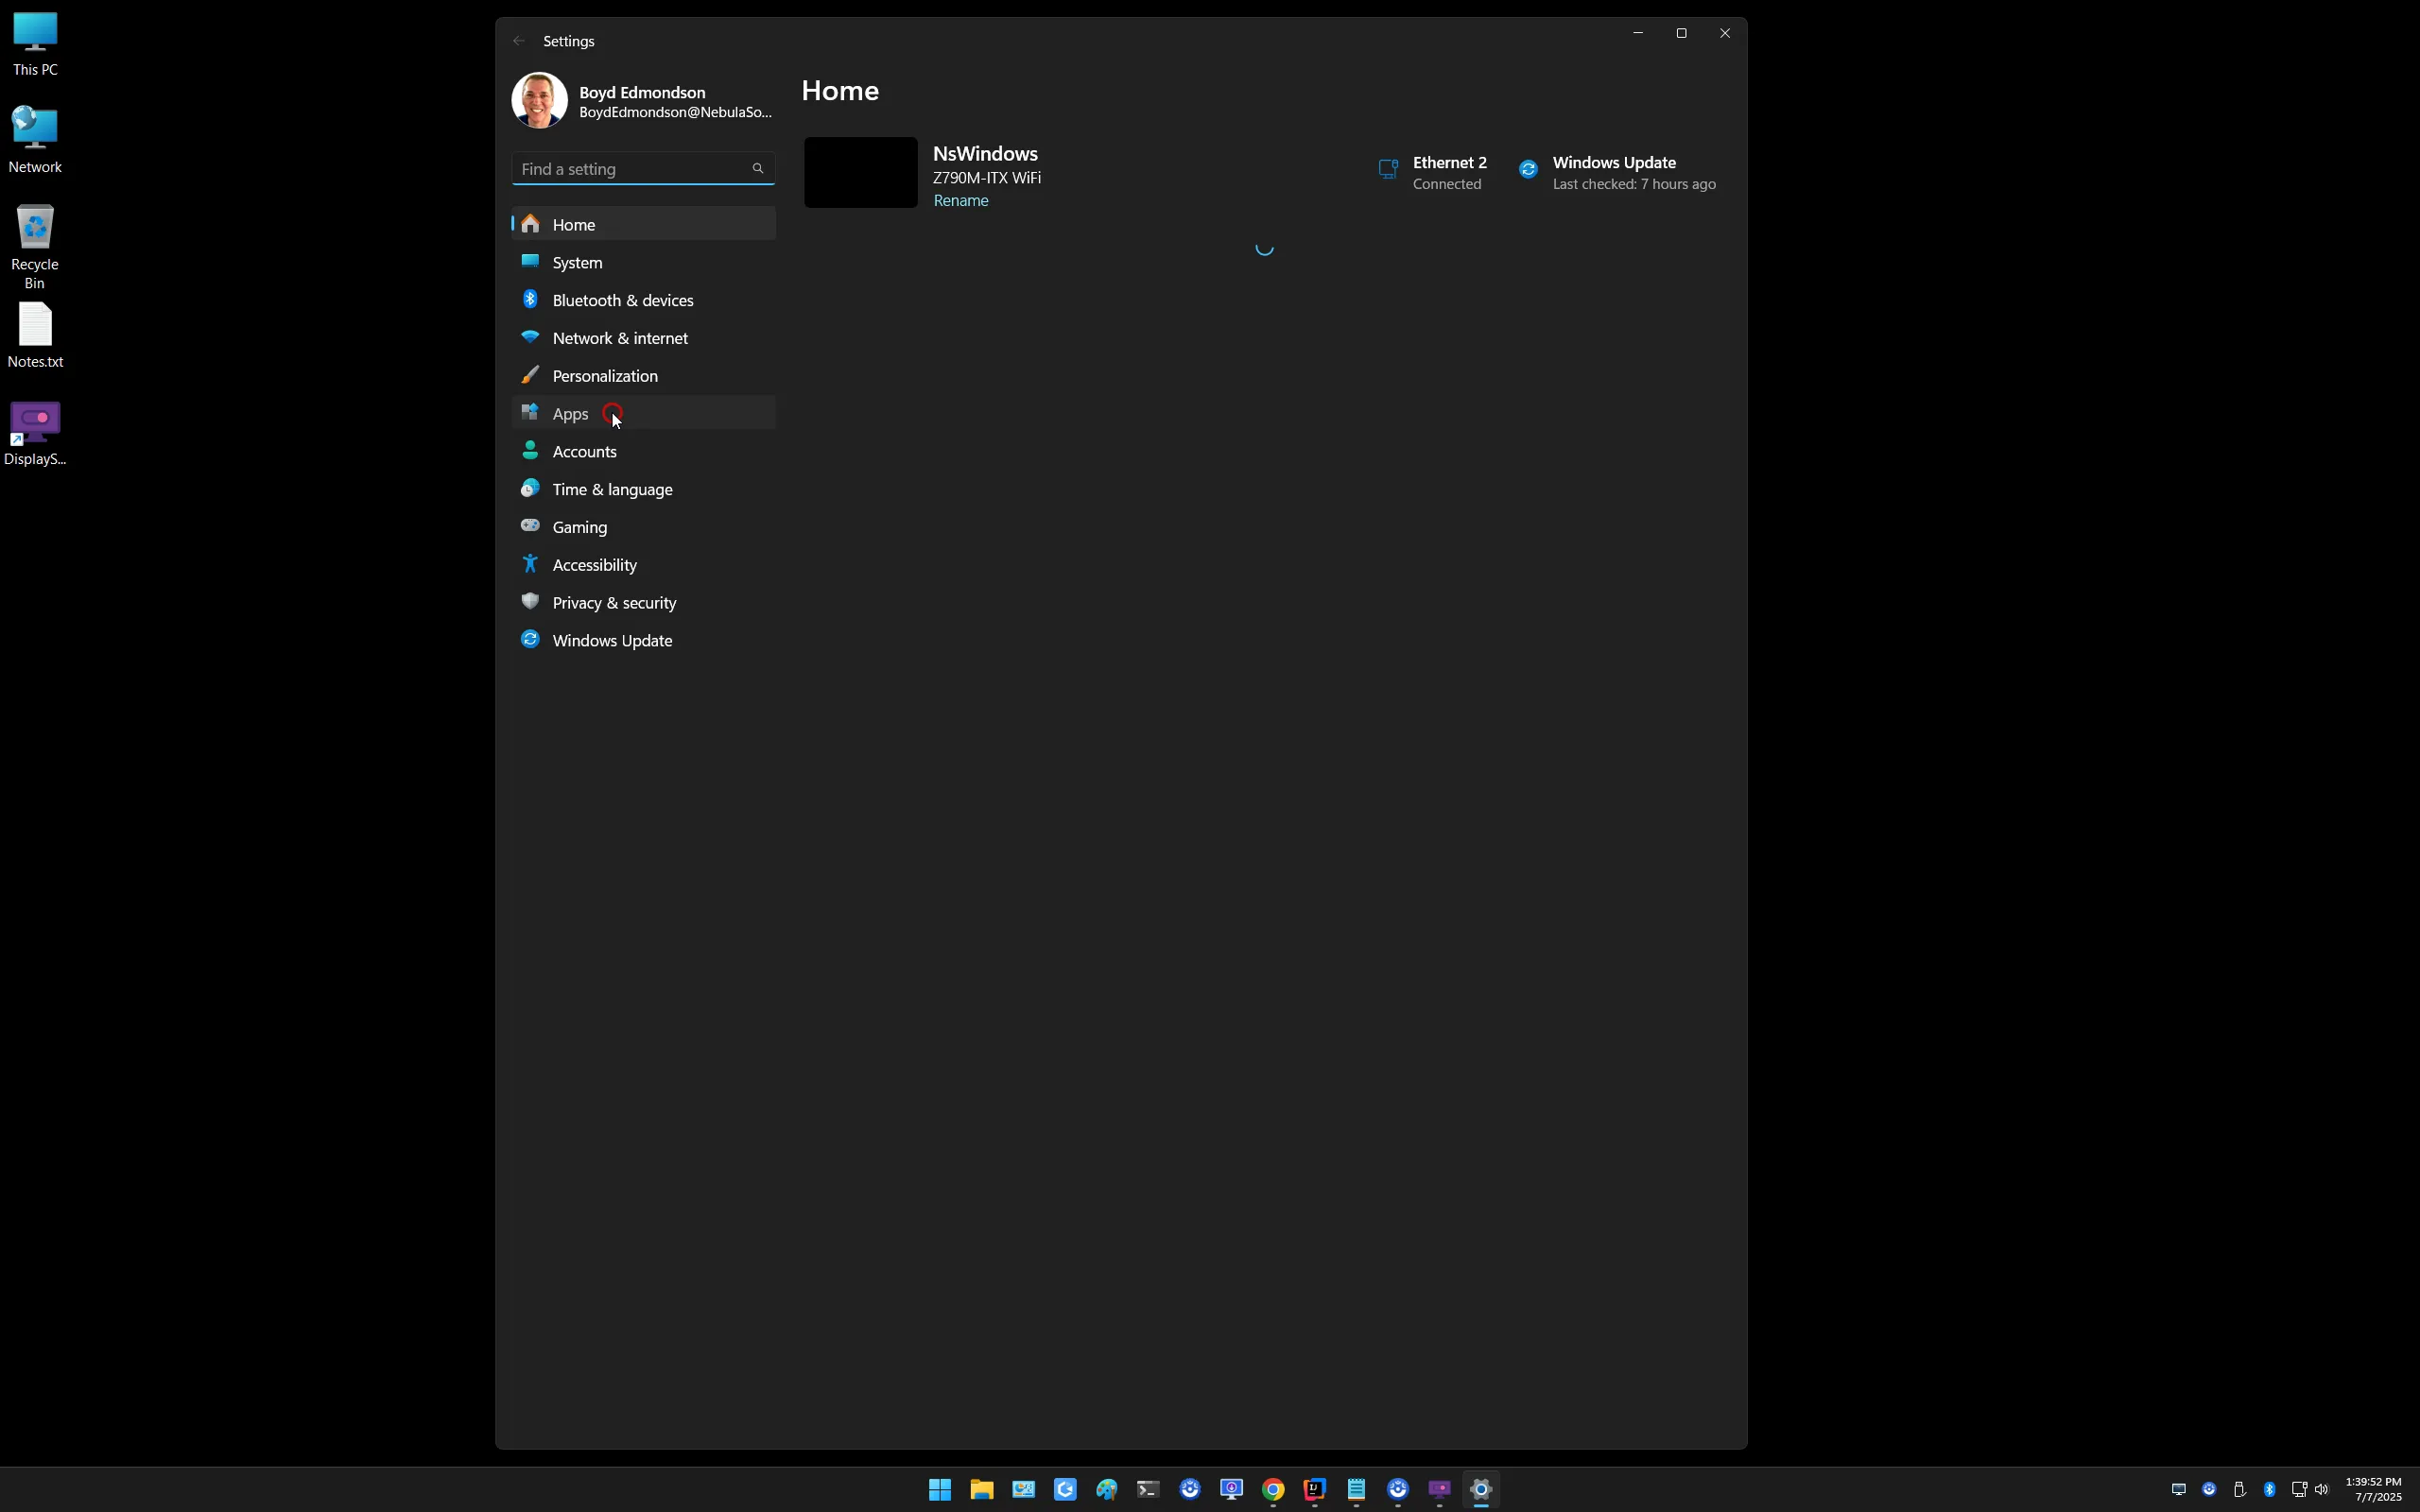
Choose Apps.
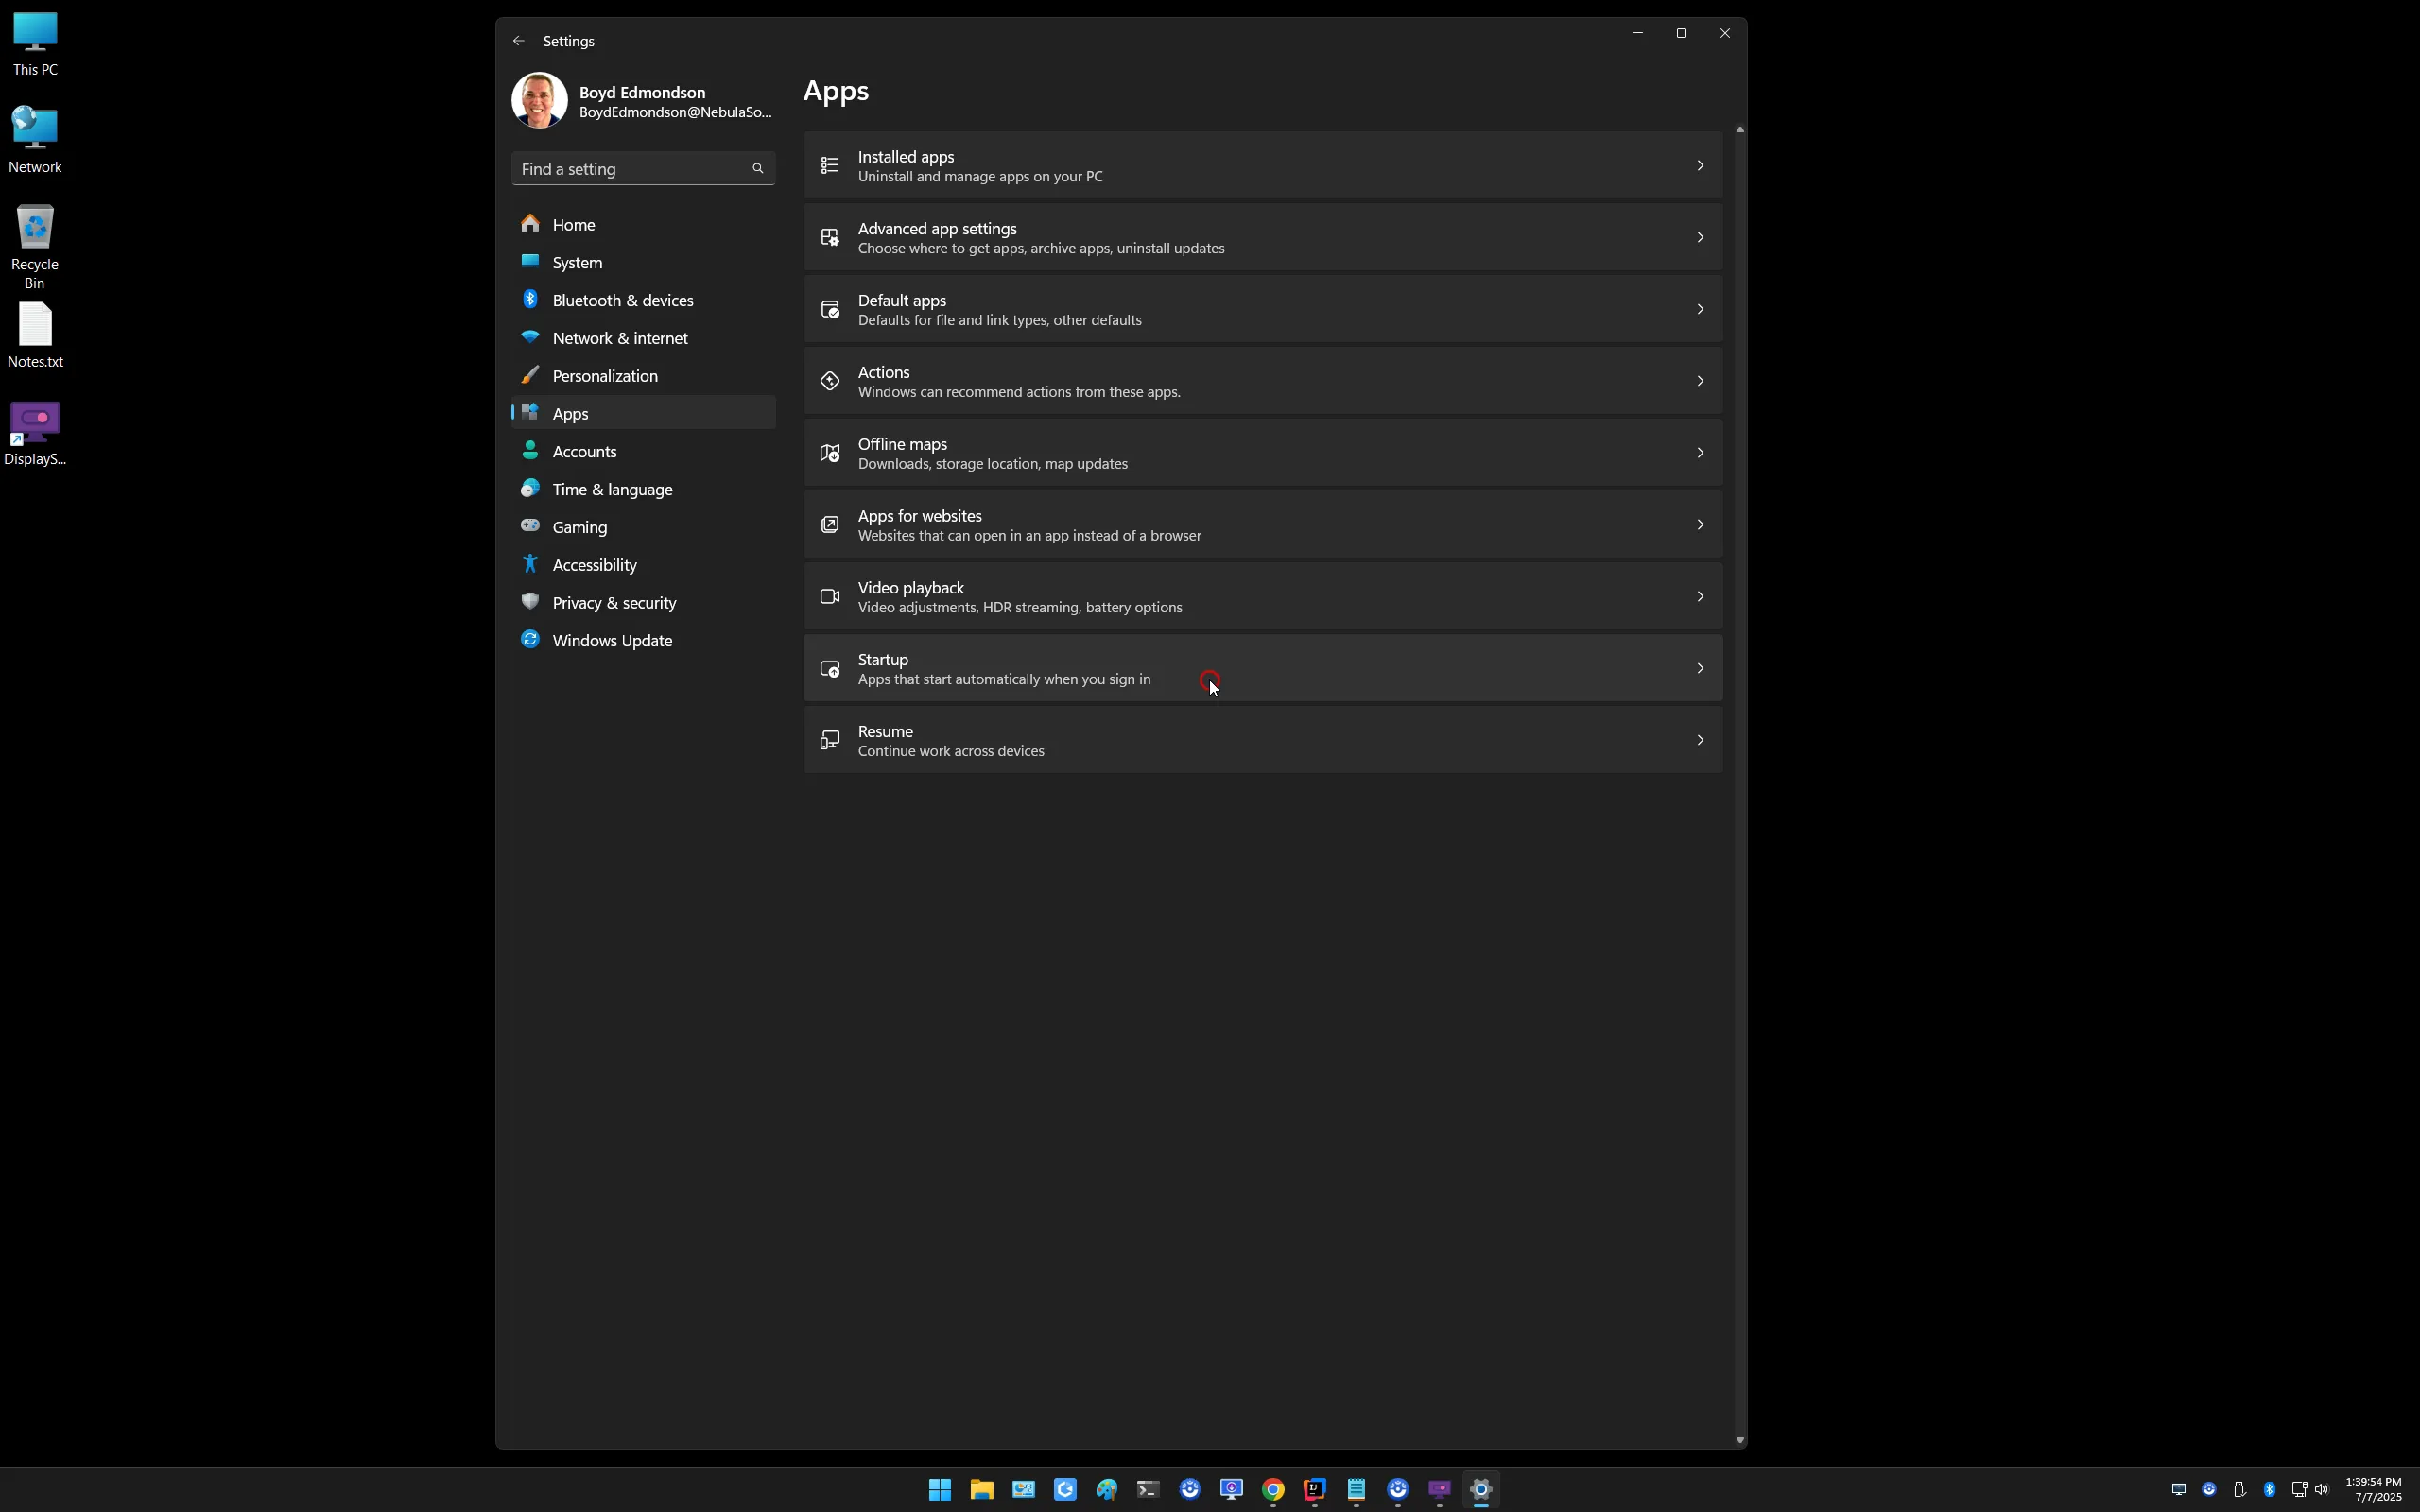
Choose Startup.
Find DisplaySwitcher.exe and click the slider to on.
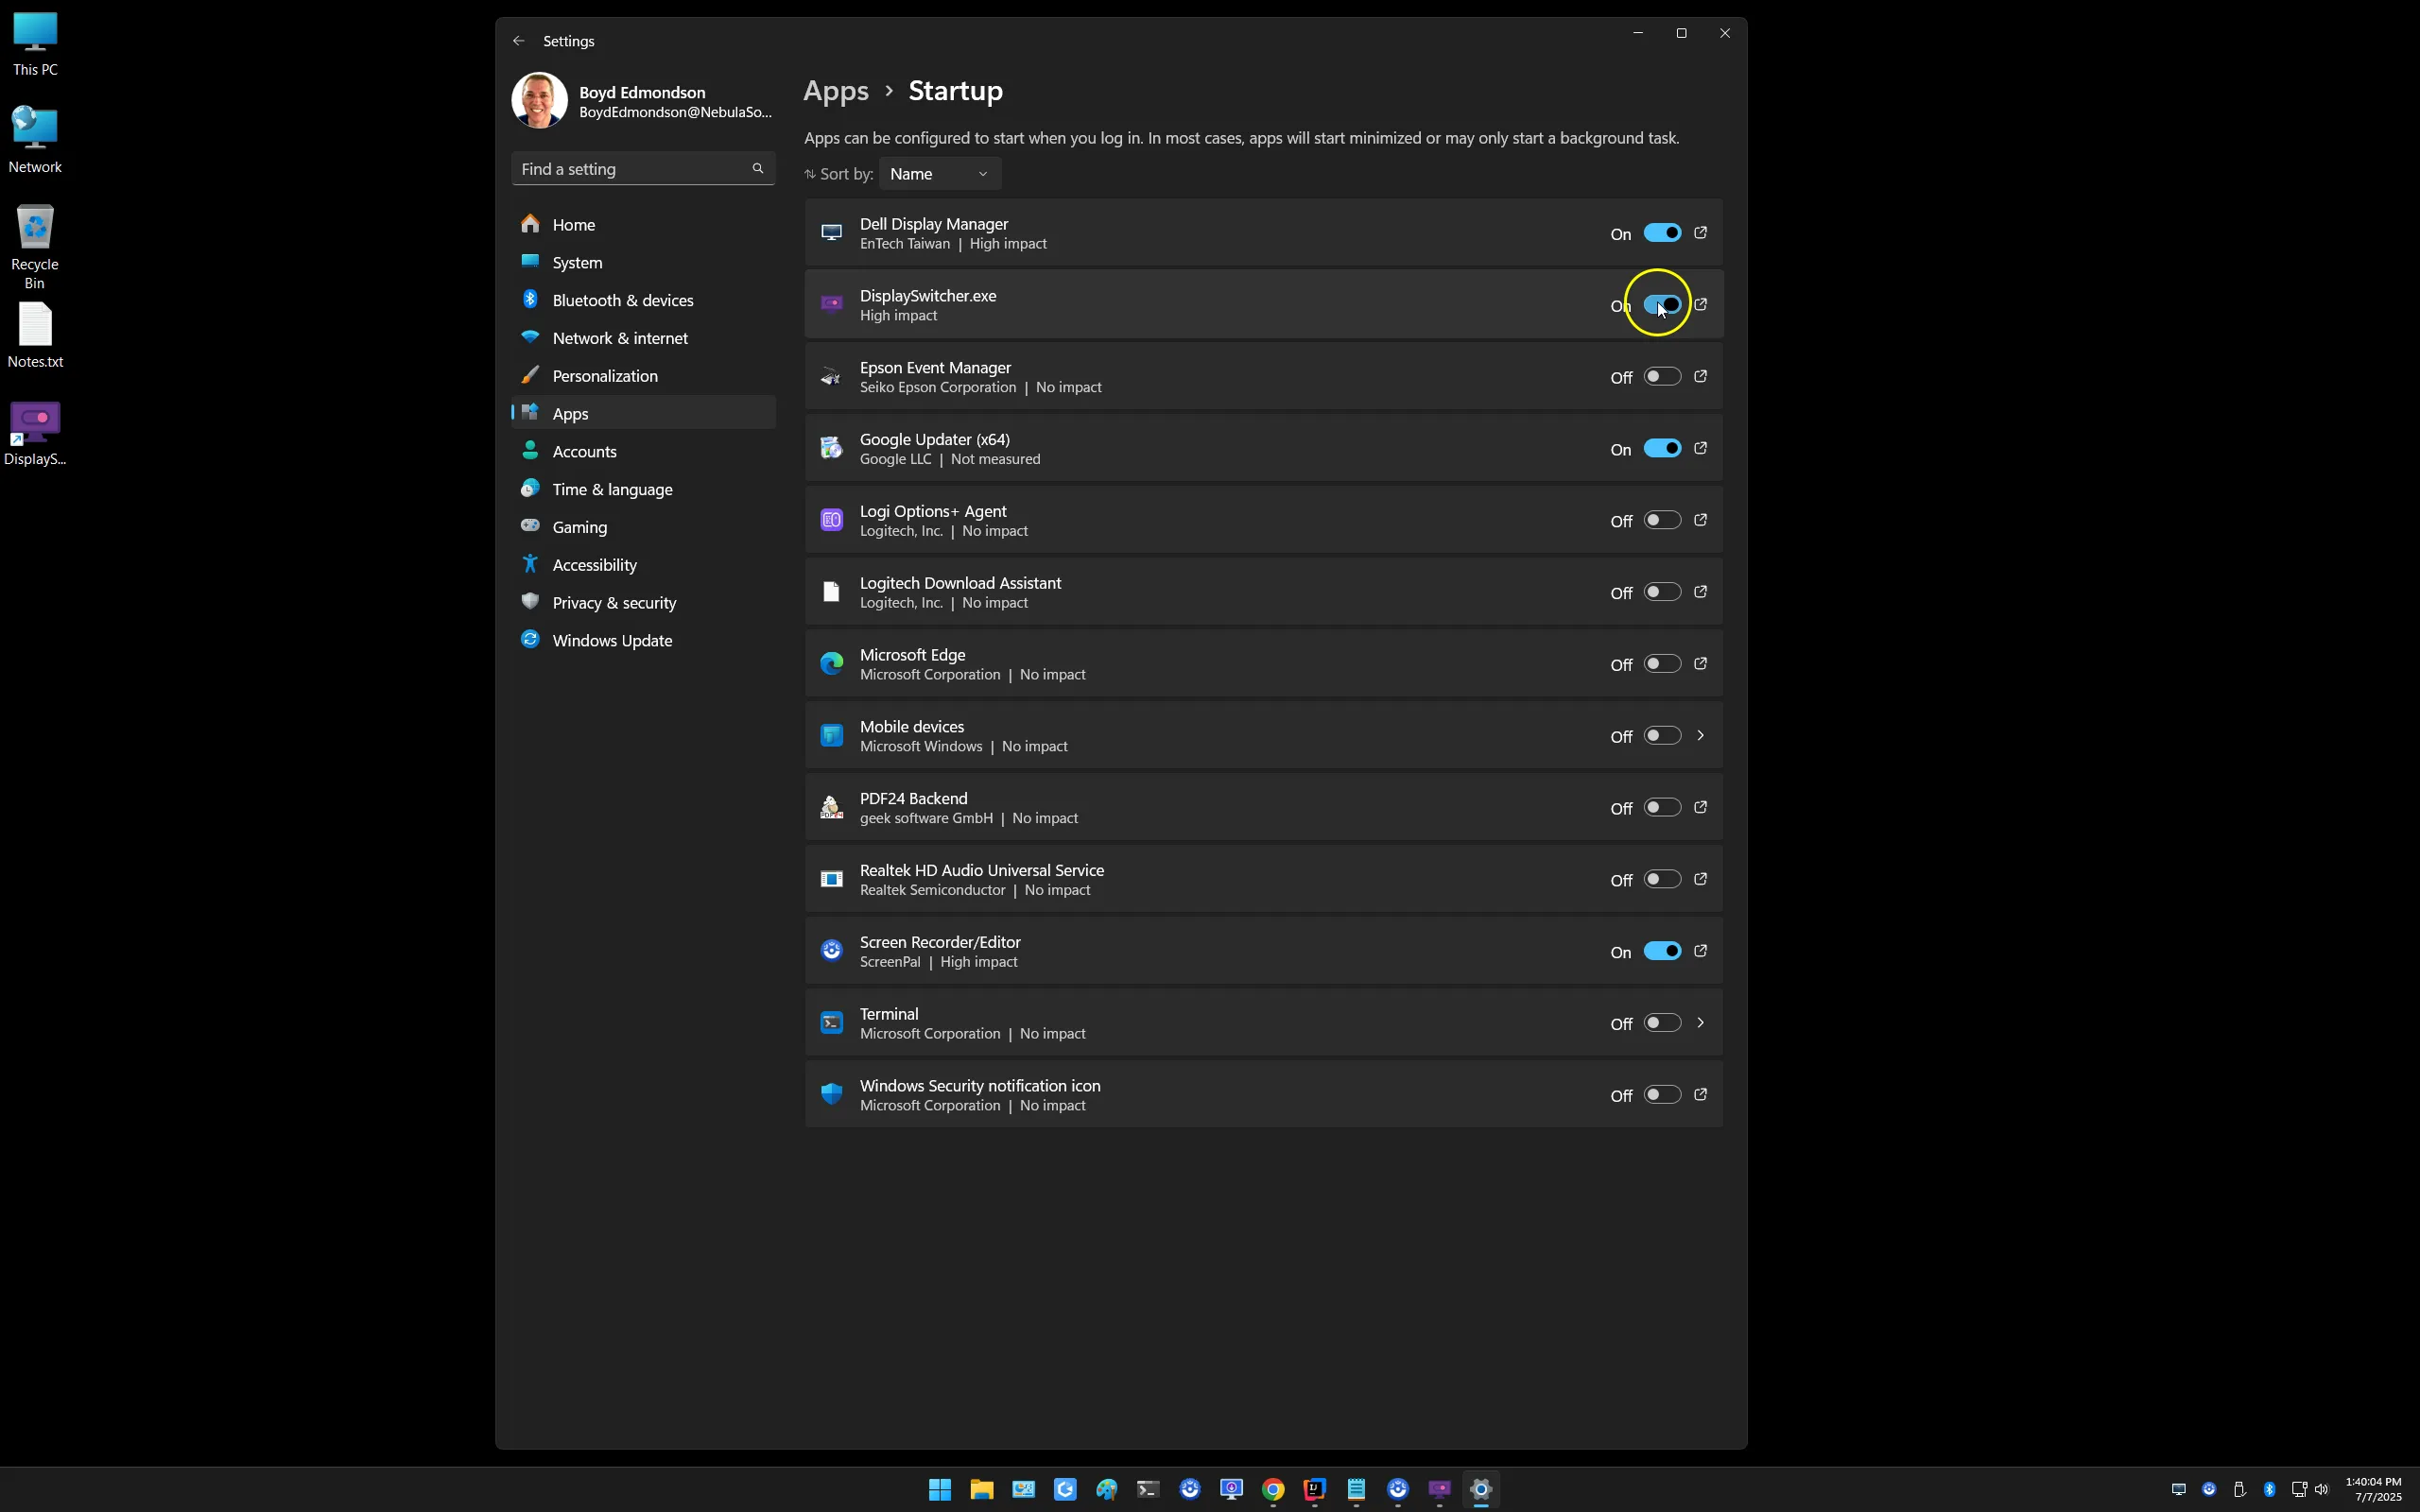
If you want to stop DisplaySwitcher from running at logon, then click that slider to off.